SafeGuest and OwnerRez Integration for Vacation Rental Hosts
22 September 2026
Connect SafeGuest with OwnerRez to reduce risk before check-in. Automate guest verification, security deposit handling, and chargeback coverage while giving hosts the insights they need to make confident booking decisions — all without adding extra work to their reservation process.
Expanding guest protection options with OwnerRez and SafeGuest
OwnerRez provides vacation rental managers with the tools they need to streamline operations, from channel management and payments to communication, accounting, and guest checkout. Through its partnership with SafeGuest, OwnerRez users can also access additional tools for guest verification, reservation risk assessment, and property protection within their existing workflow.
Together, OwnerRez and SafeGuest help property managers take a more proactive approach to guest-related risk while creating a streamlined experience for both hosts and guests.
About OwnerRez
Built by property managers, for property managers, OwnerRez is an independent vacation rental platform offering channel management, CRM, property management, accounting, messaging, payments, websites, and more.
As a #PeopleFirst company, OwnerRez listens closely to its customers and continually evolves its platform around their needs. Many members of the OwnerRez team also use the platform to manage their own vacation rentals, giving them firsthand insight into the challenges property managers face.
Through the OwnerRez and SafeGuest partnership, property managers can incorporate guest verification and reservation risk insights into their existing operations, giving them additional visibility before a guest arrives and more flexibility in how they approach property protection.
To learn more about OwnerRez, visit their website.
Free for hosts
Open the interactive OwnerRez walkthrough
Connect your OwnerRez account to SafeGuest
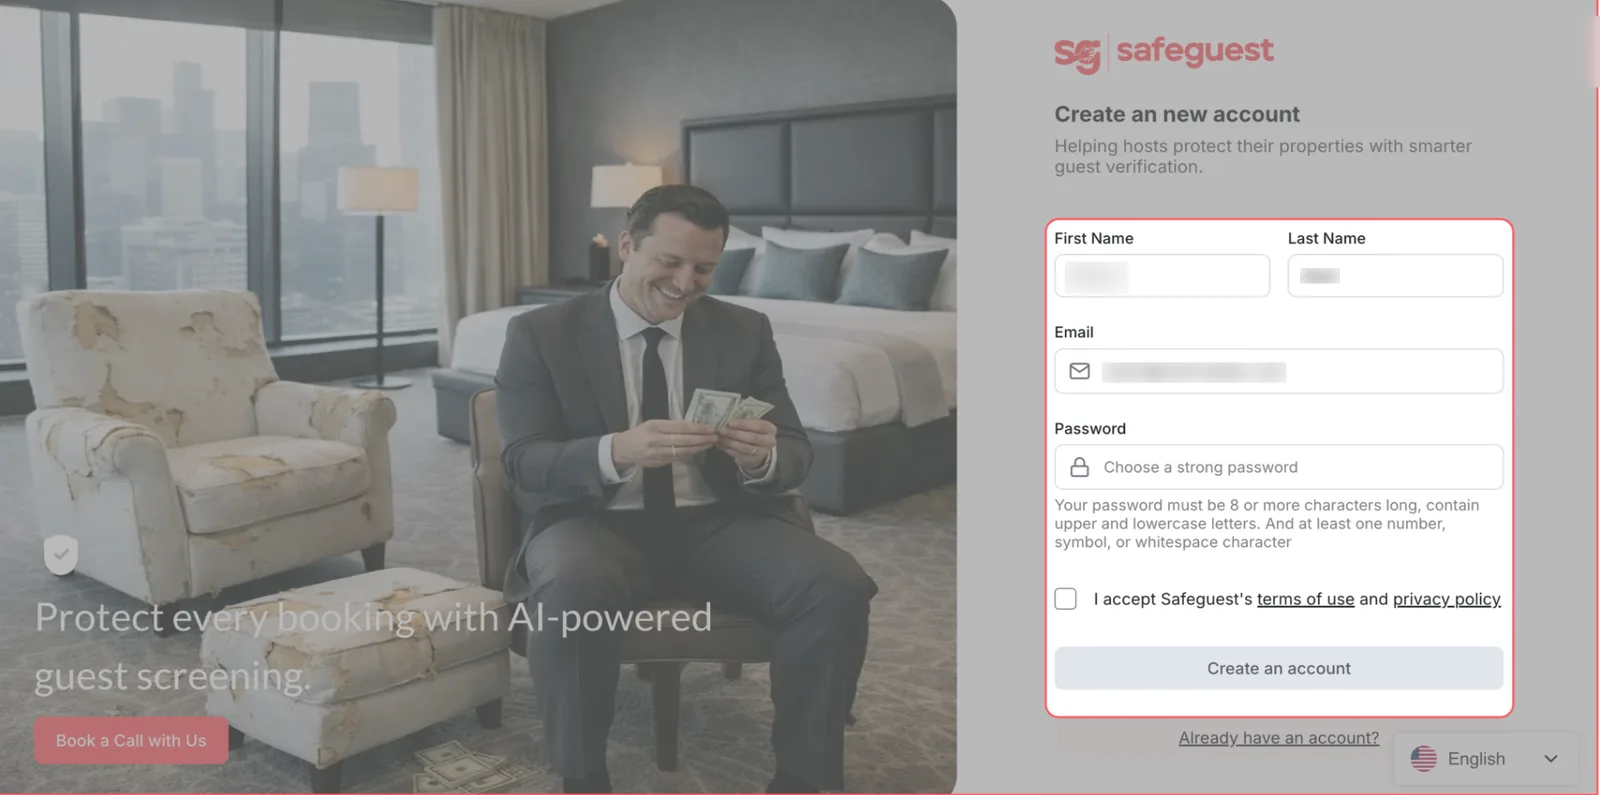
Step 1: Create your SafeGuest account
- Go to app.safeguest.ai.
- Fill in the required information on the sign-up form.
- Accept the terms: “I accept SafeGuest’s terms of use and privacy policy”.
- Select Create an account.
Step 2: Verify your email address
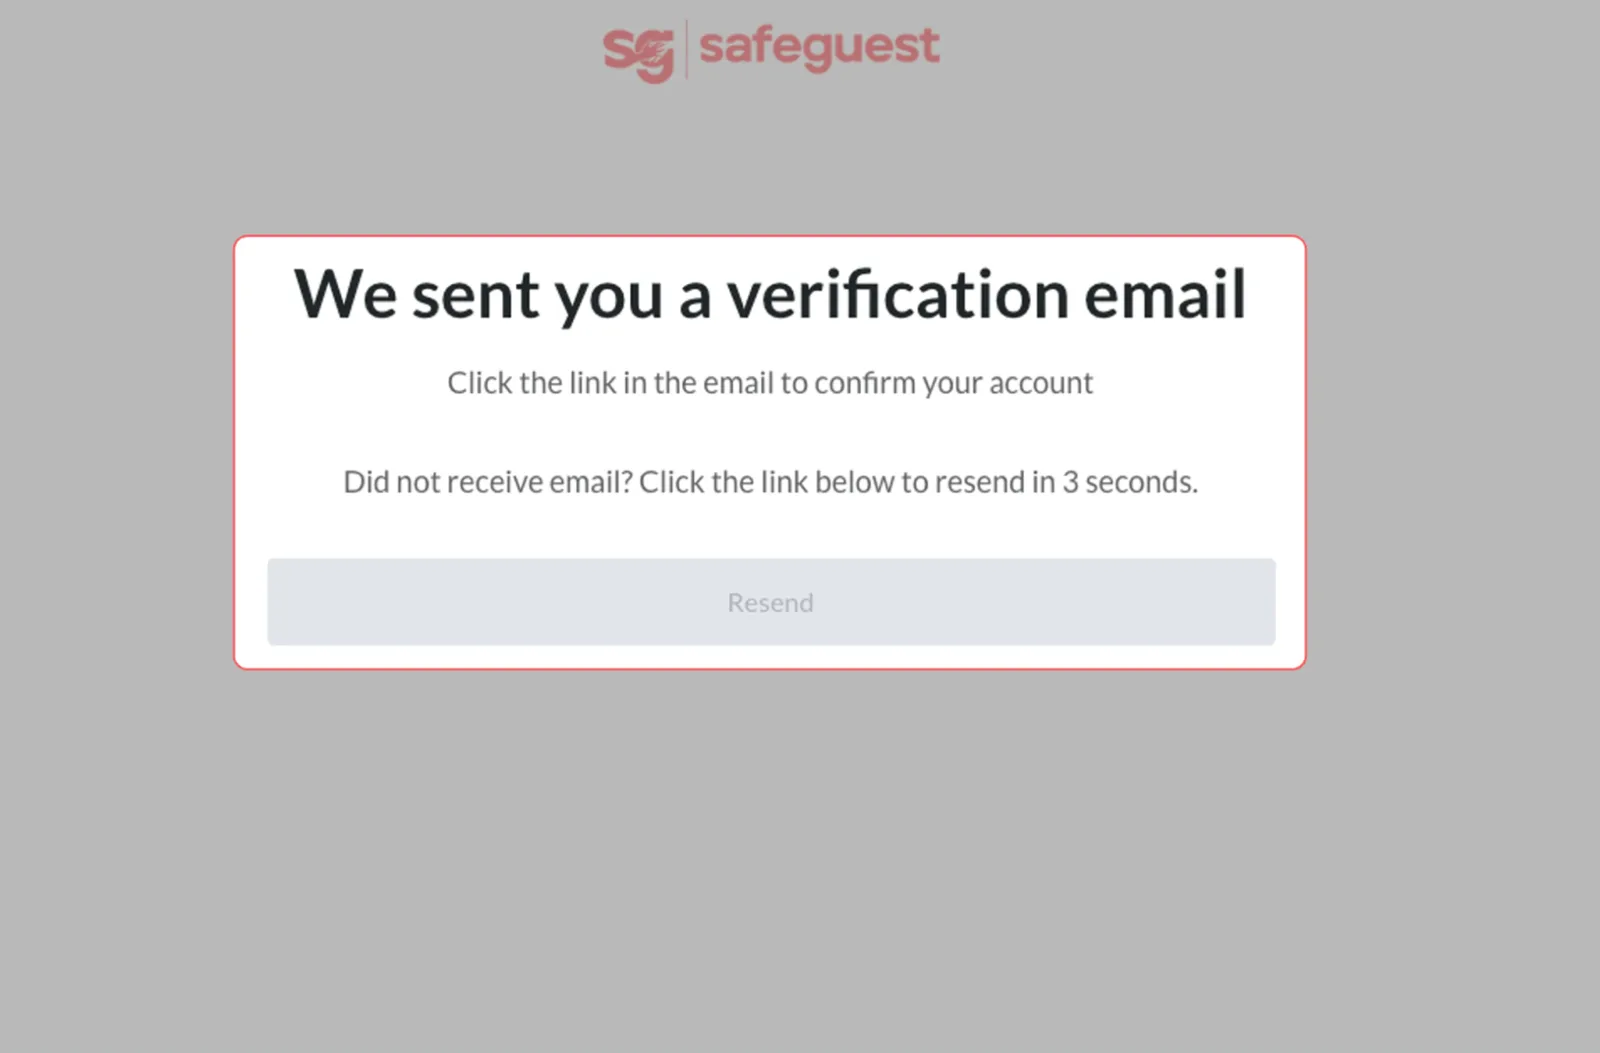
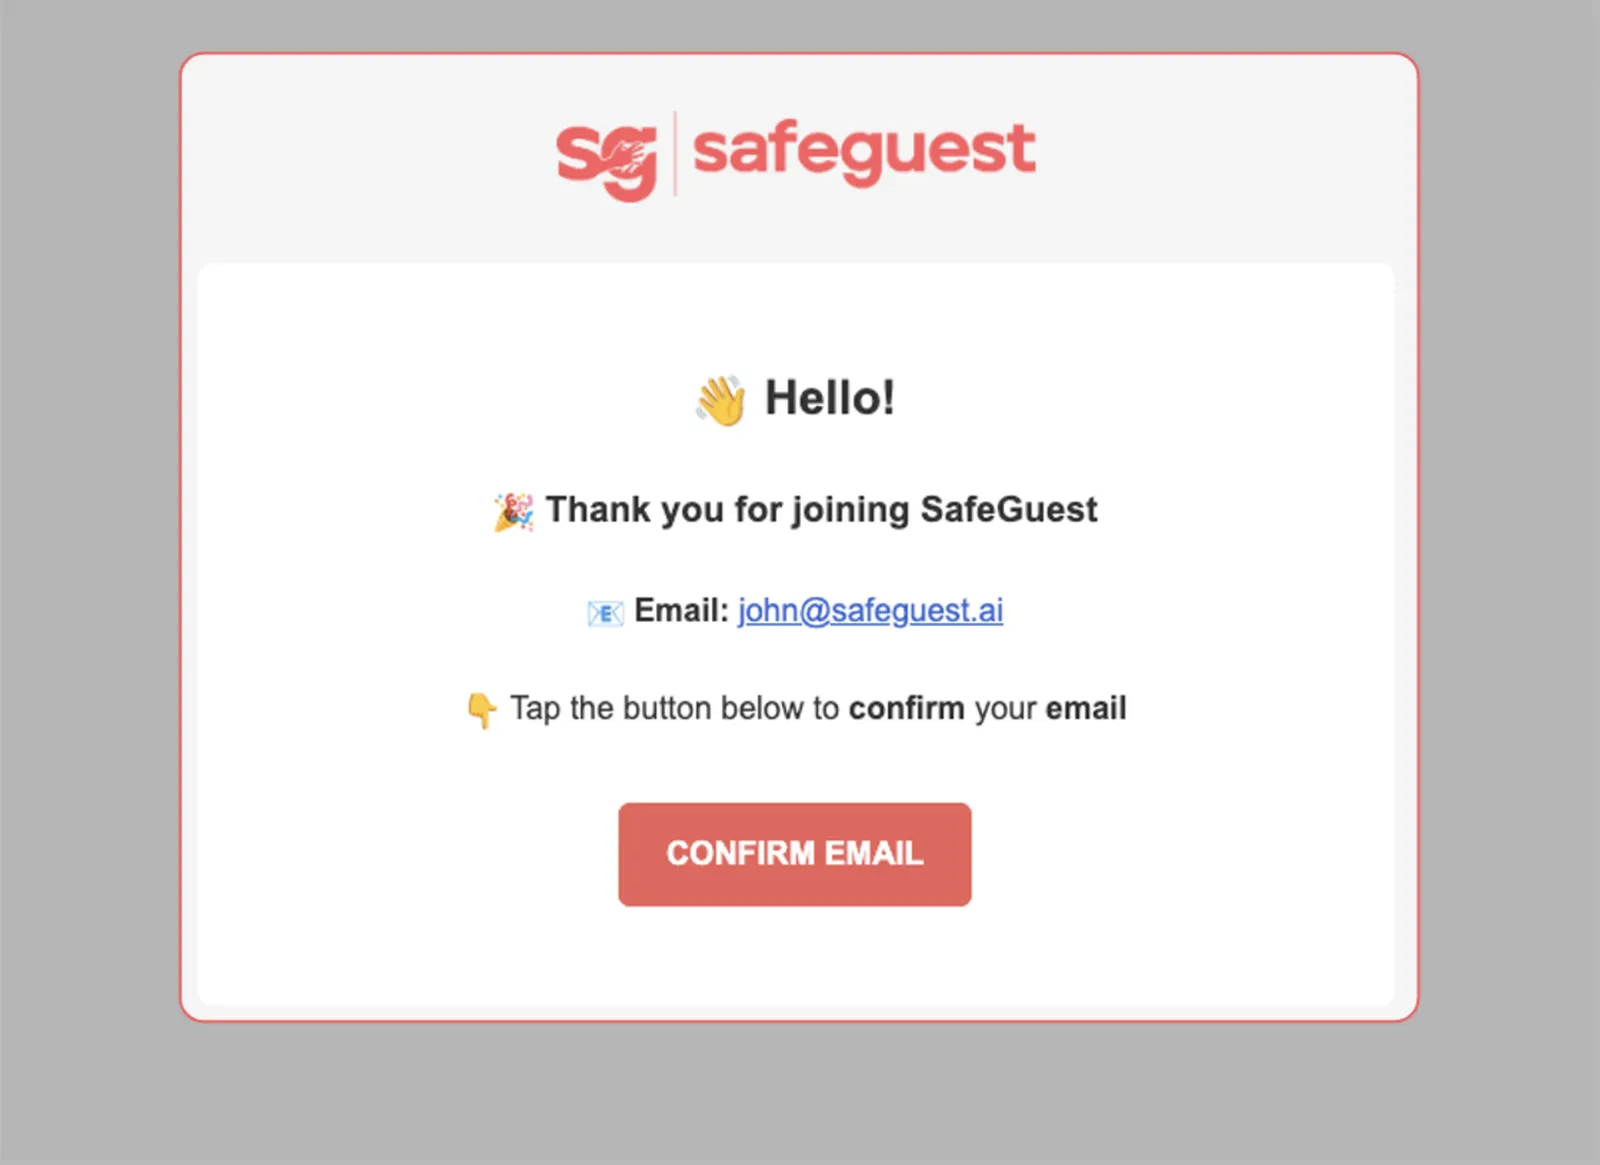
- Check your inbox for the verification email sent by SafeGuest.
- Open the email and select Confirm Email to complete registration.
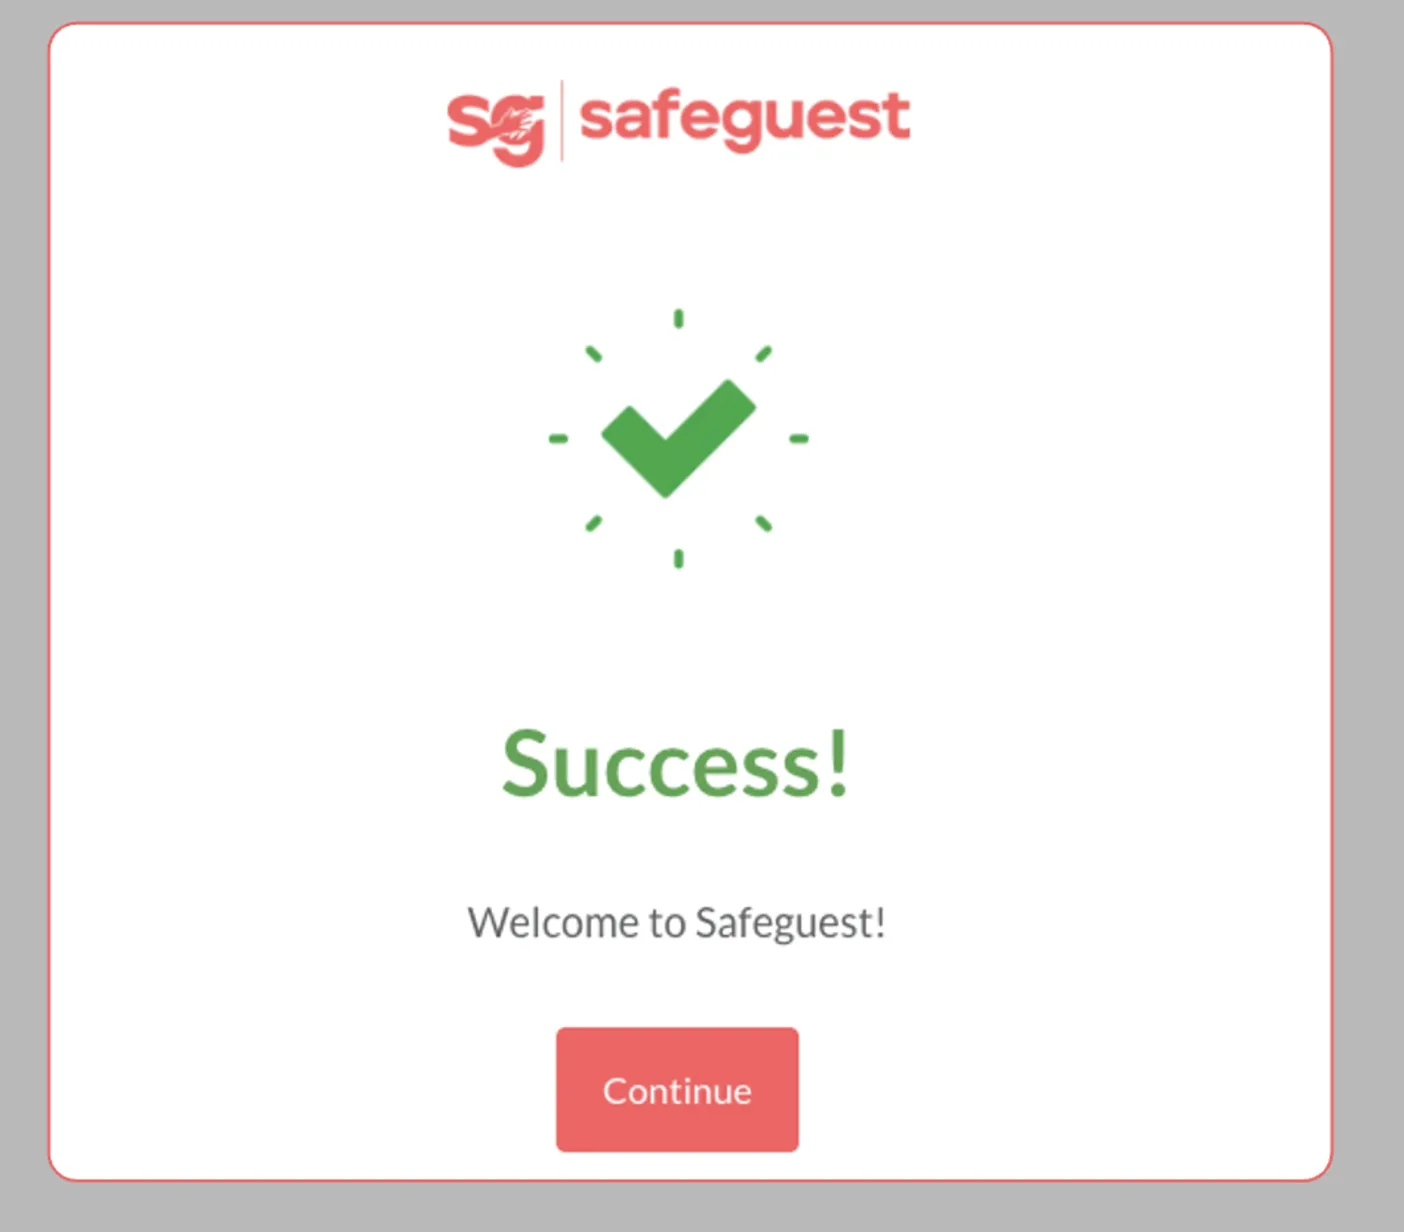
- You are redirected to a success page confirming your email has been verified — select Continue to proceed.
Step 3: Select OwnerRez during onboarding
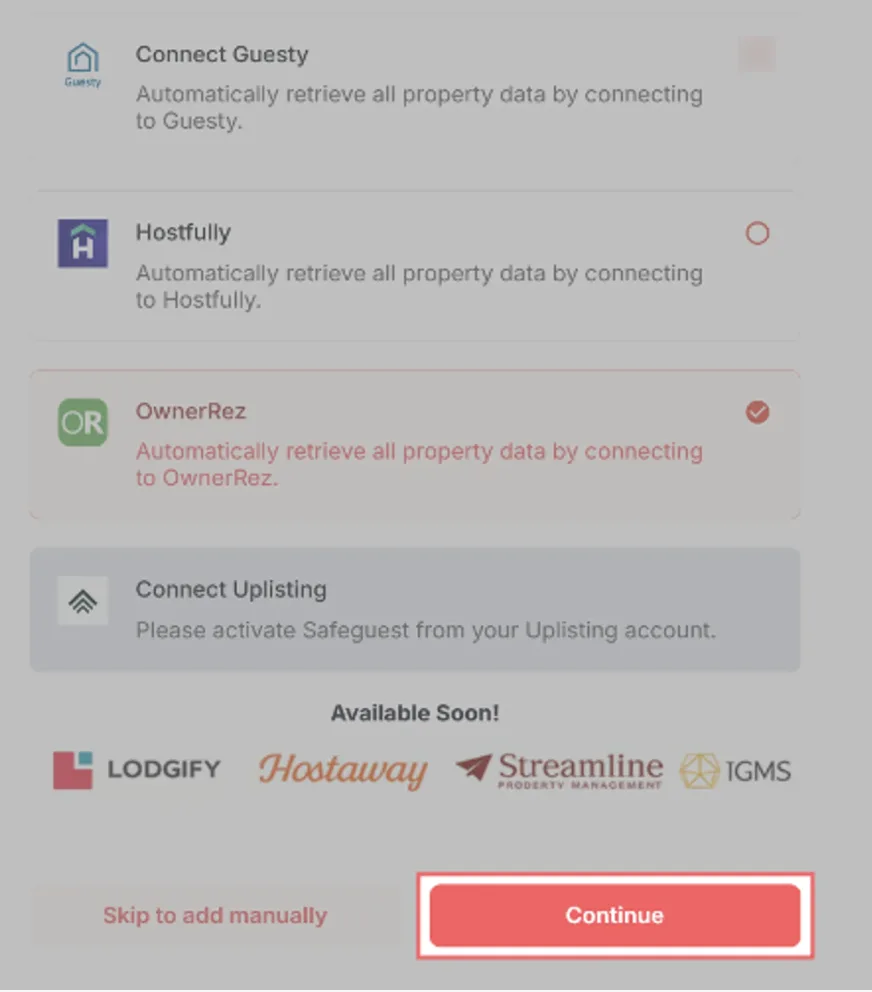
- After selecting Continue, you land on the SafeGuest onboarding screen.
- Select OwnerRez from the list of available integrations.
- Select Continue to move forward with the setup.
Step 4: Log in and authorize OwnerRez
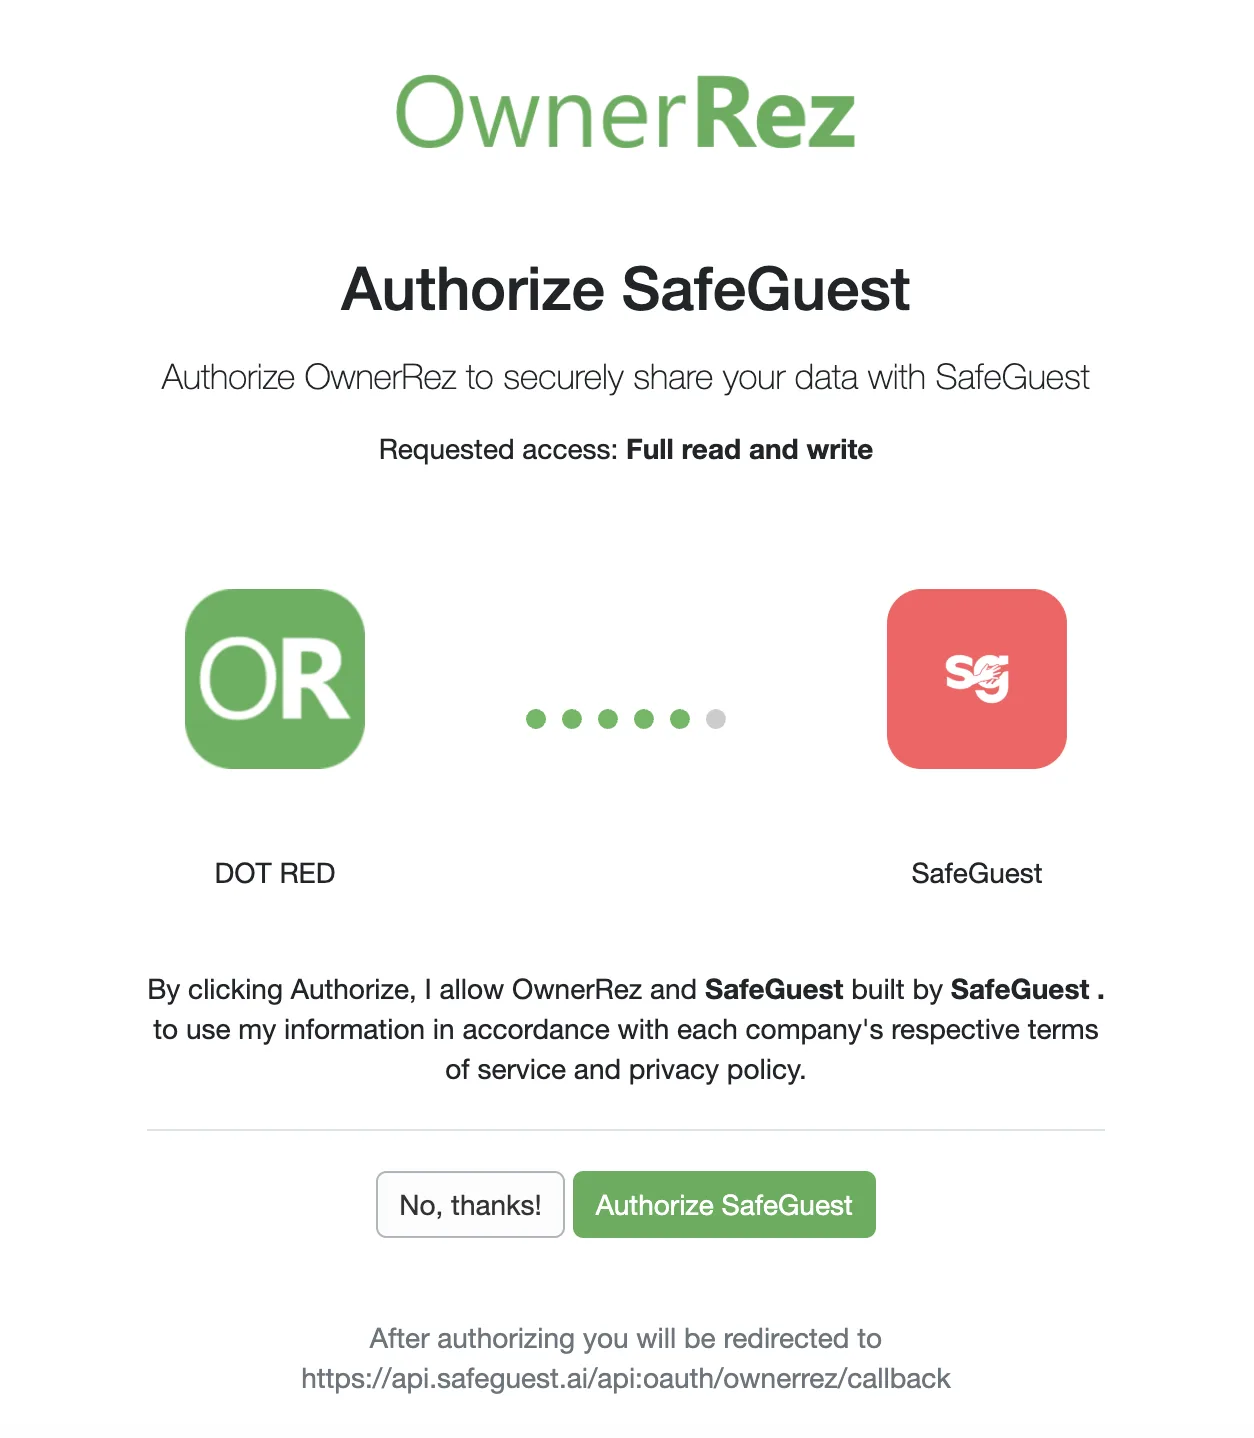
- Sign in to OwnerRez when prompted — this step is skipped if you are already logged in.
- Review the permissions to approve the connection between SafeGuest and your OwnerRez account.
- Select Authorize SafeGuest to authorize the integration.
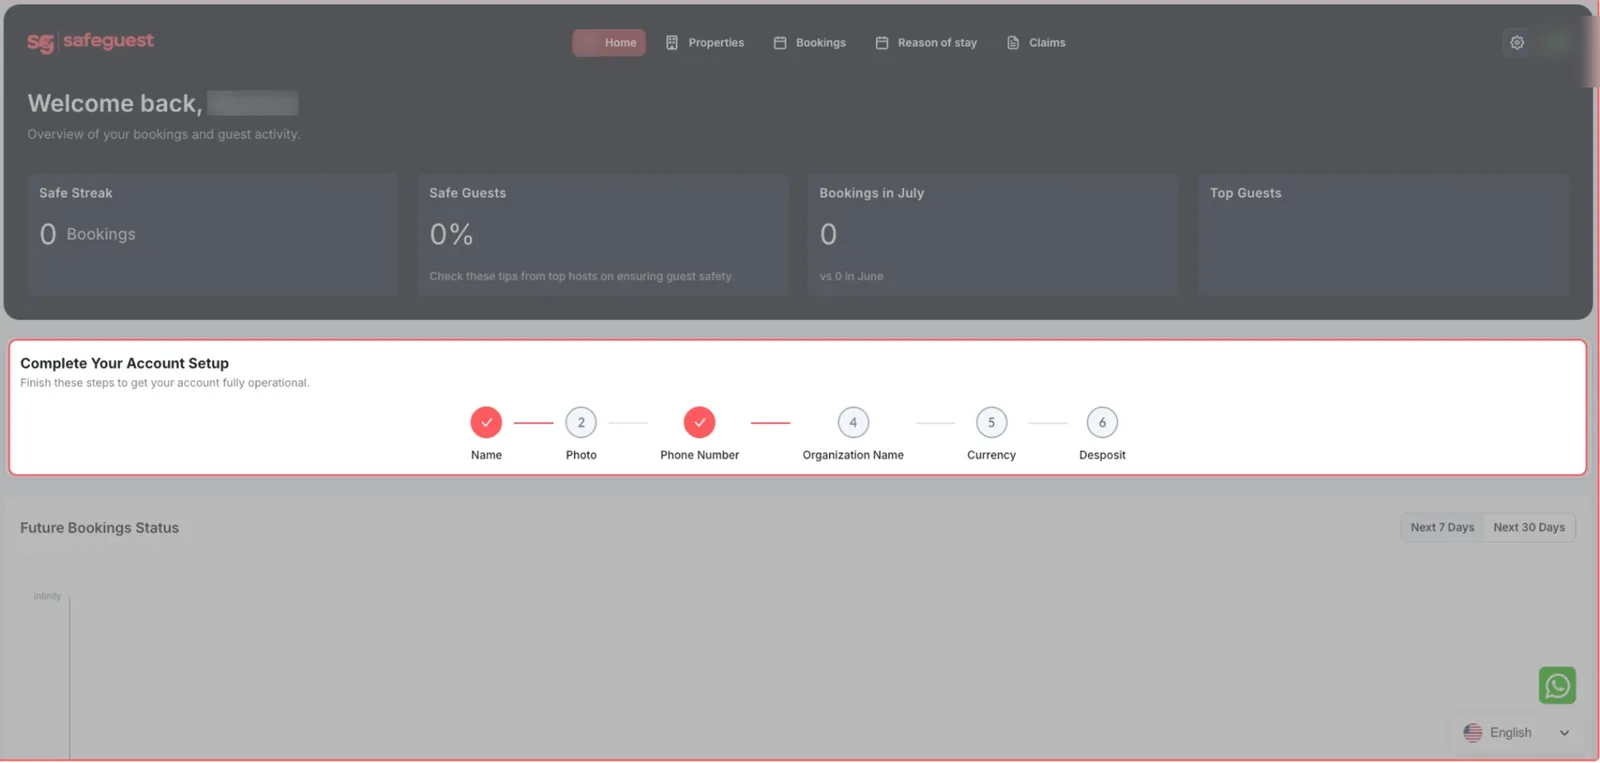
Step 5: Complete the setup banner steps
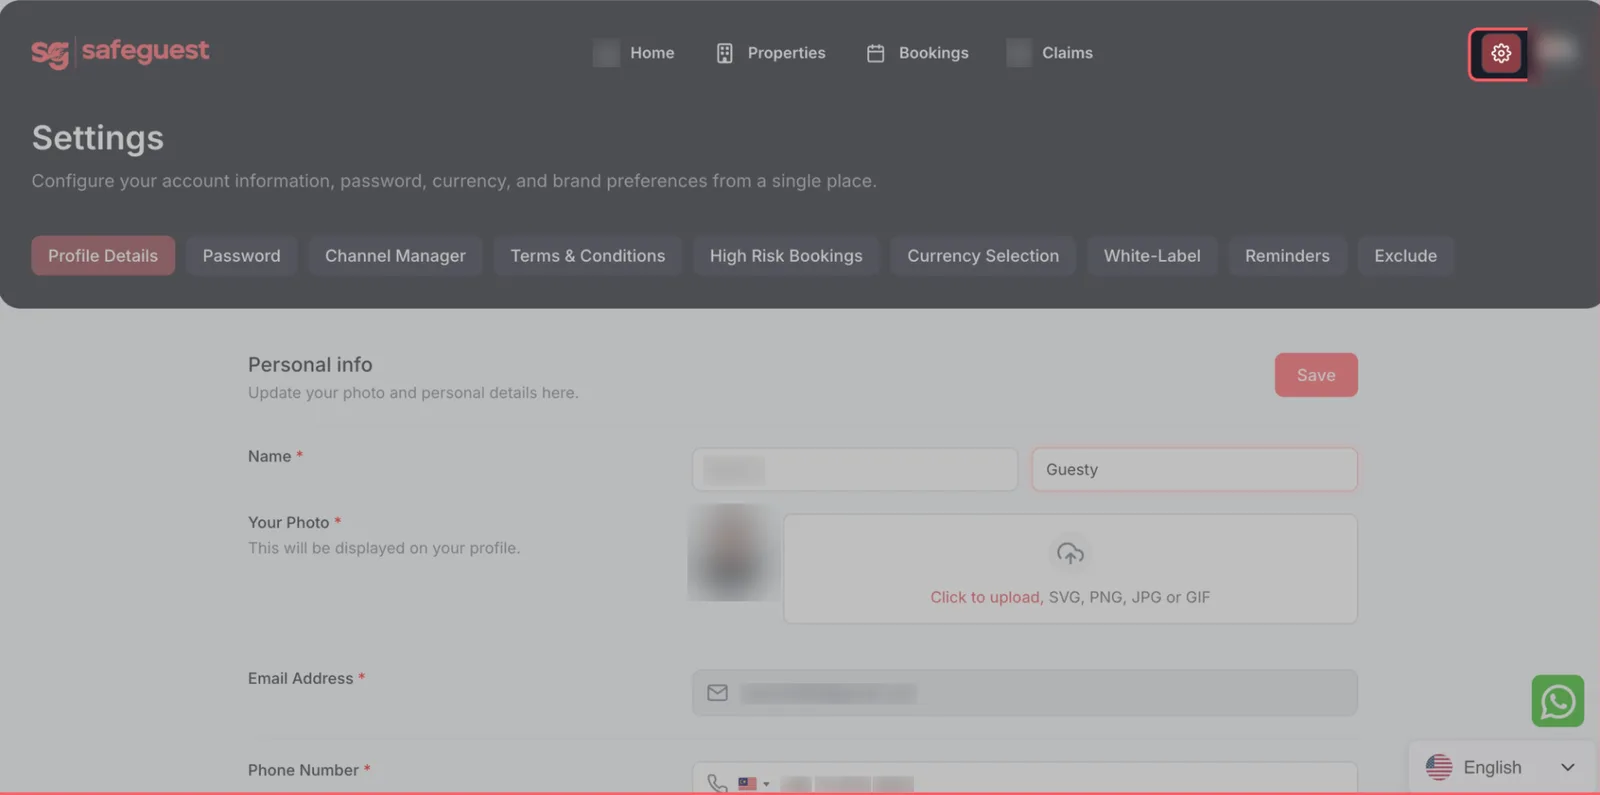
Open your SafeGuest Settings page and work through the setup banner.
Profile details
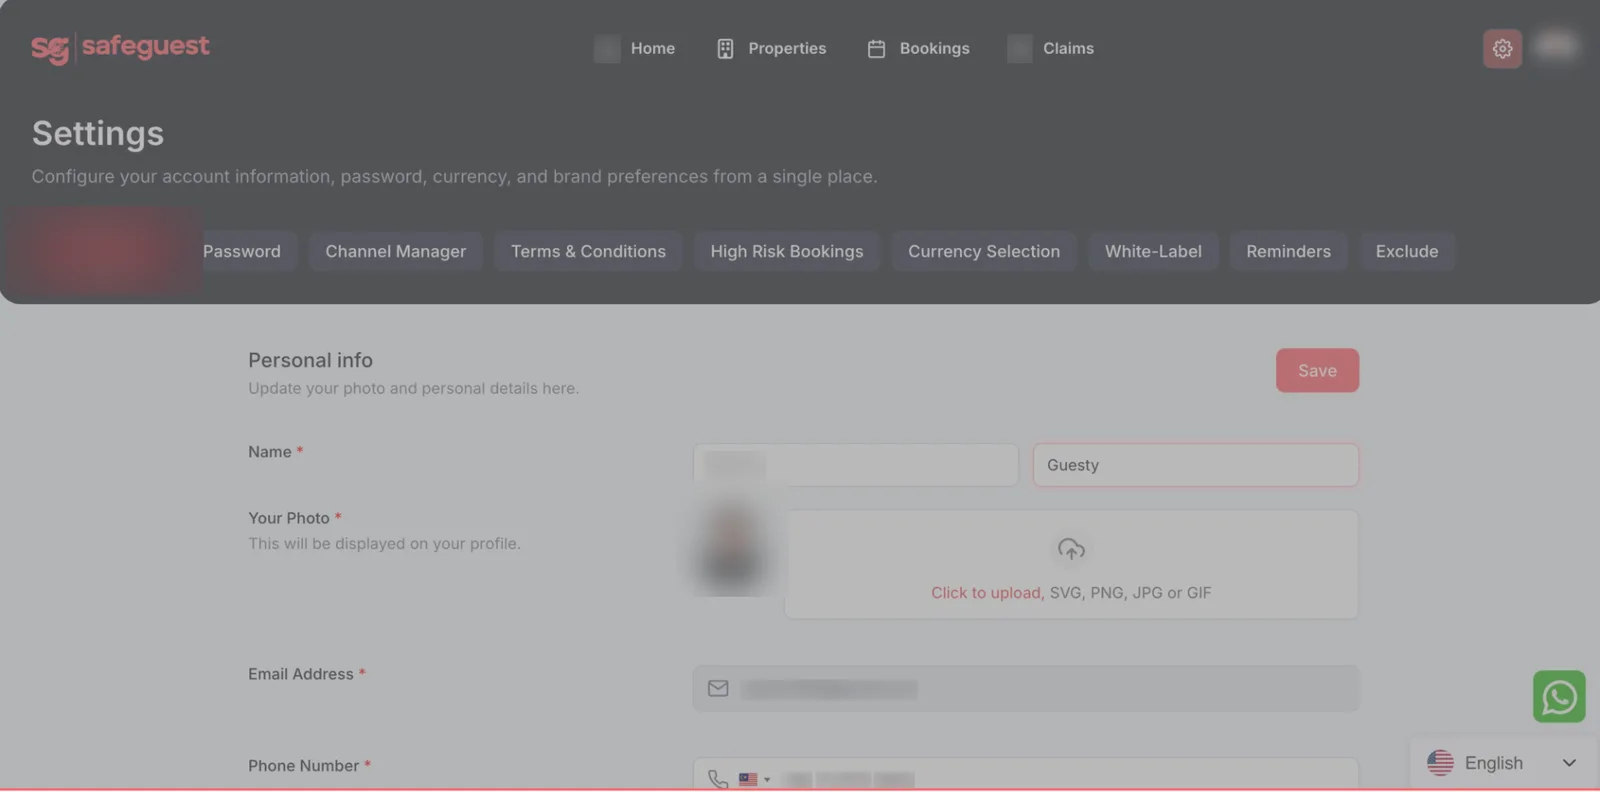
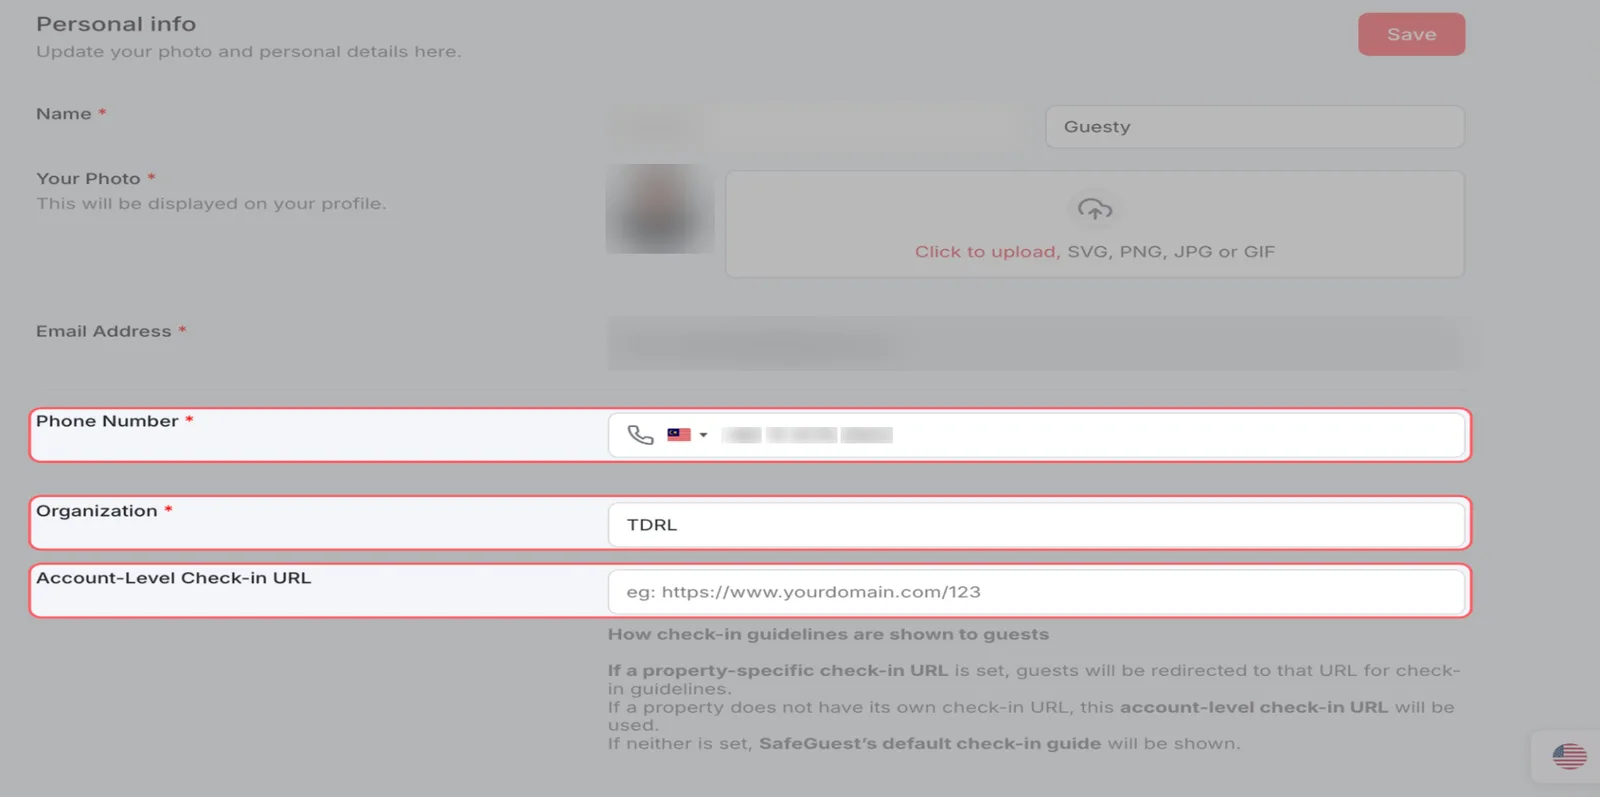
Navigate to the Profile Details page and update your profile information.
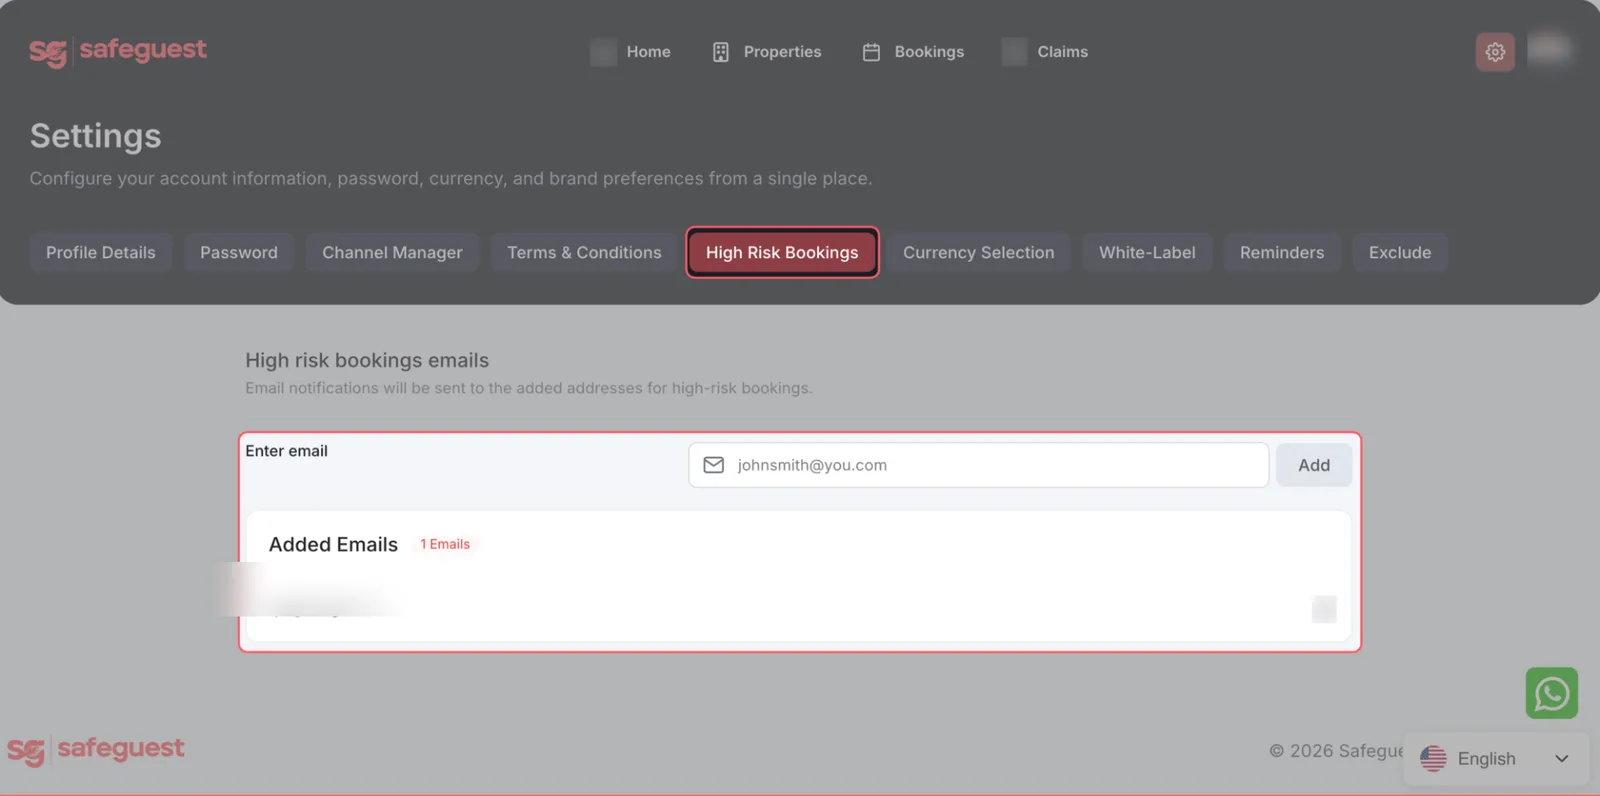
High risk bookings
- Add the email address(es) that will receive notifications for high-risk bookings.
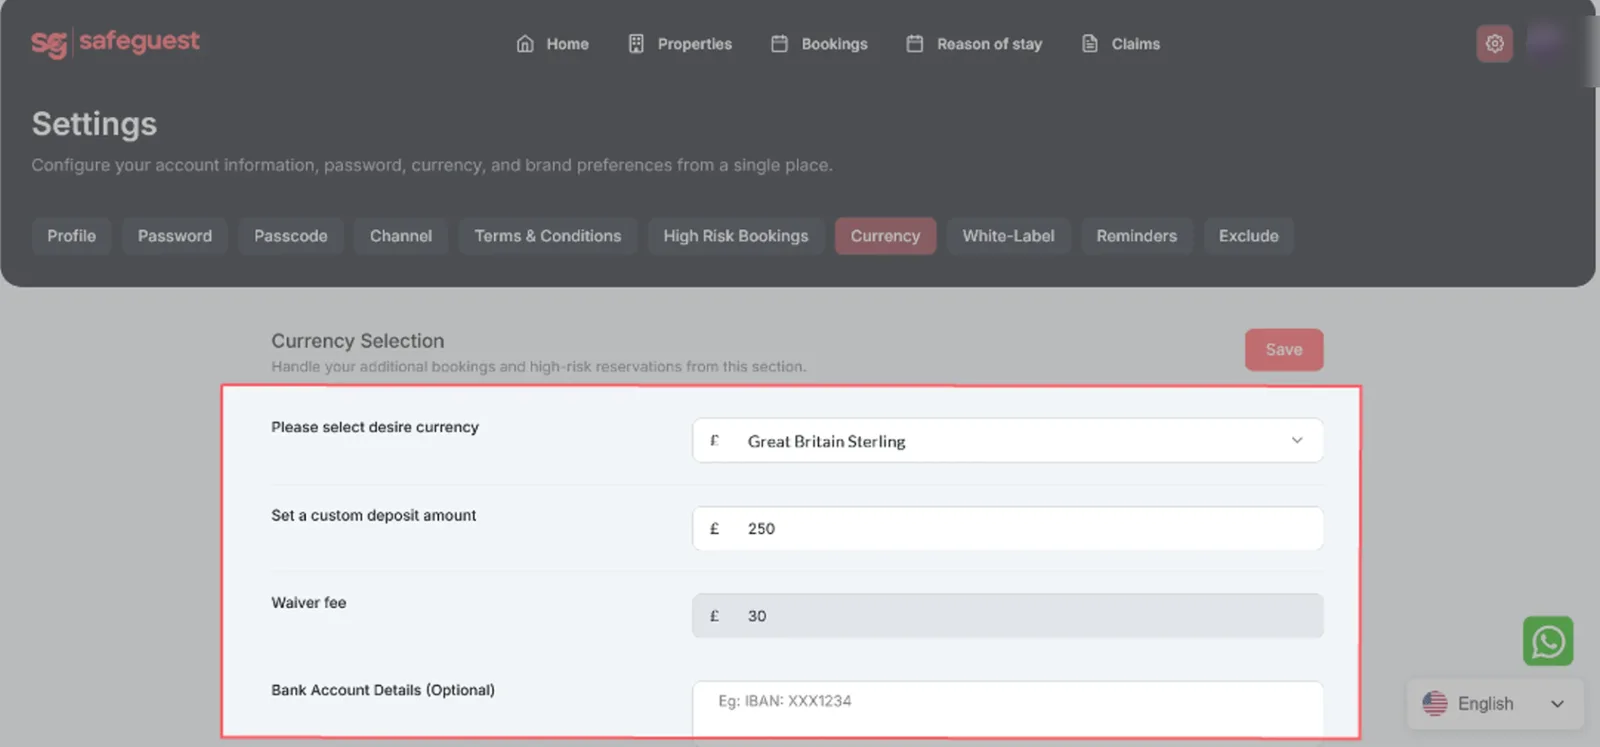
Currency and deposit settings
- Navigate to the Currency tab within your SafeGuest account settings.
- Select your account currency from the available options.
- Set a default deposit amount — the waiver amount is calculated automatically.
- Save your settings.
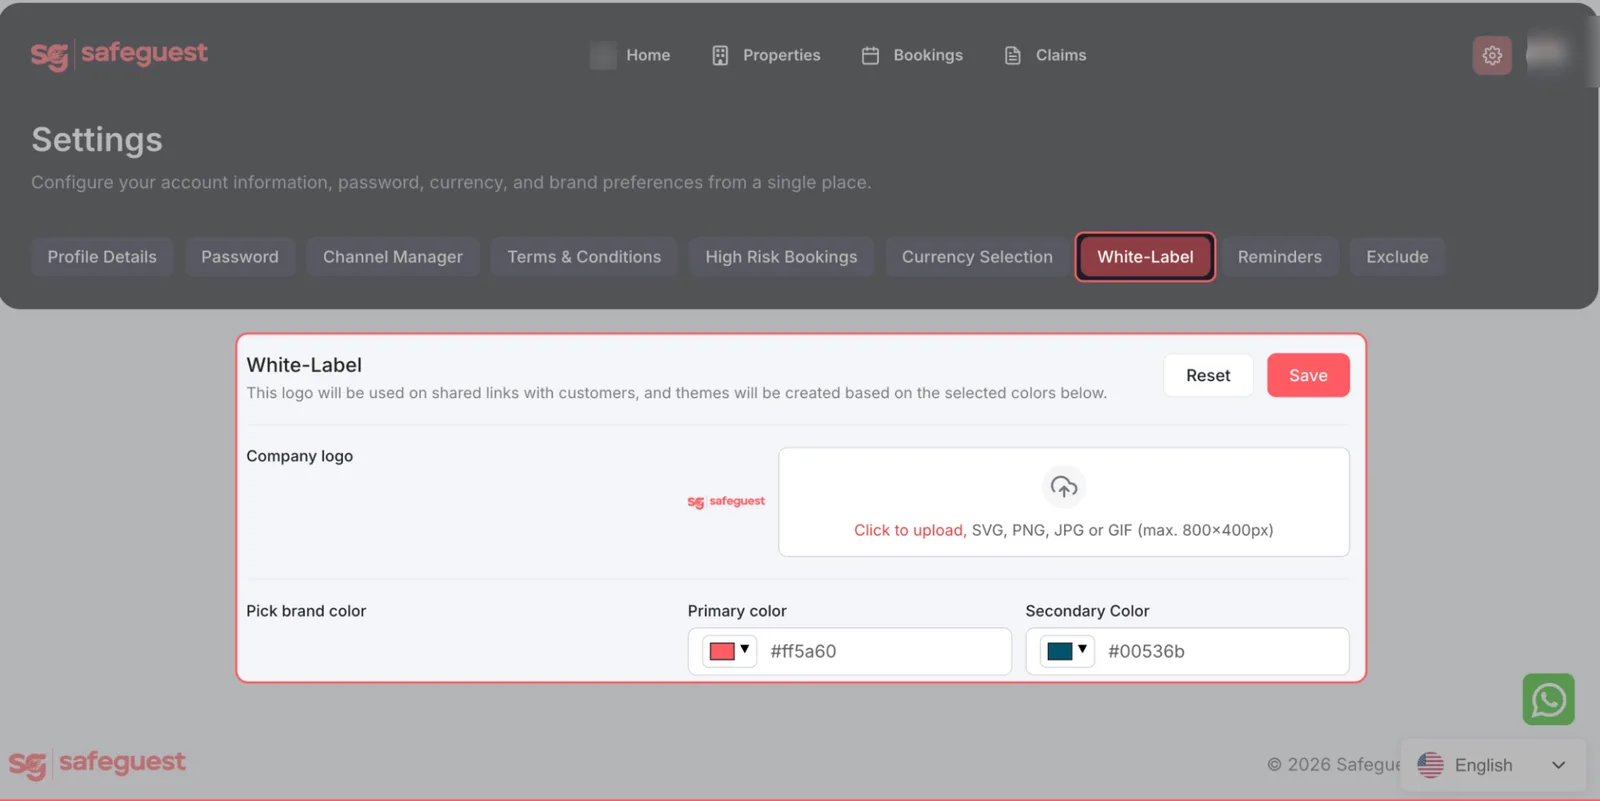
White-label
Add your company logo and brand colours so the guest-facing screens match your brand.
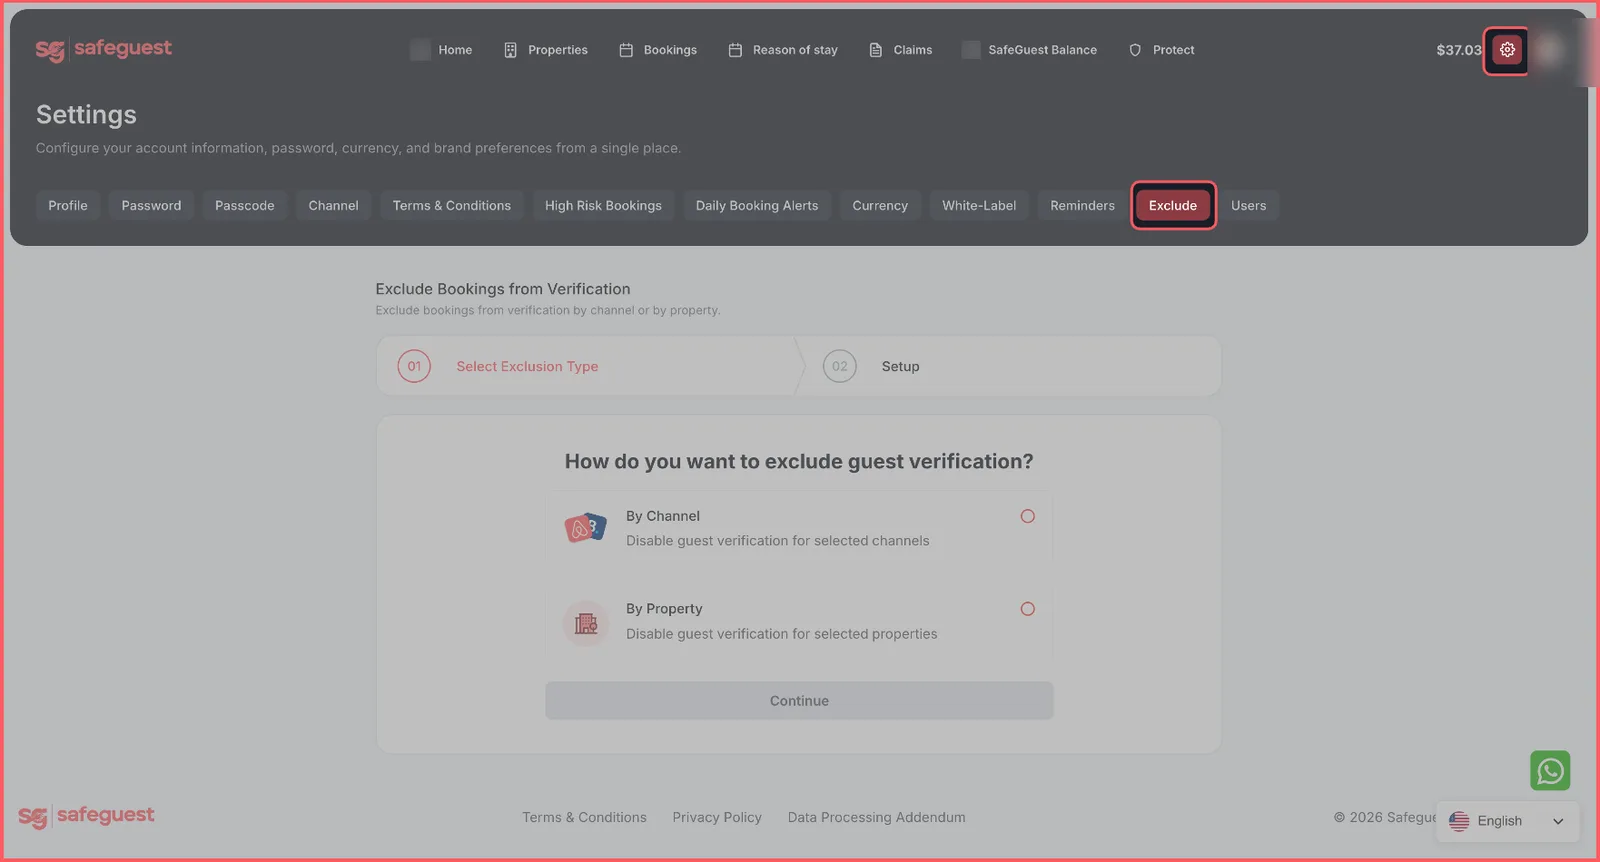
Step 6: Exclude SafeGuest verification URLs
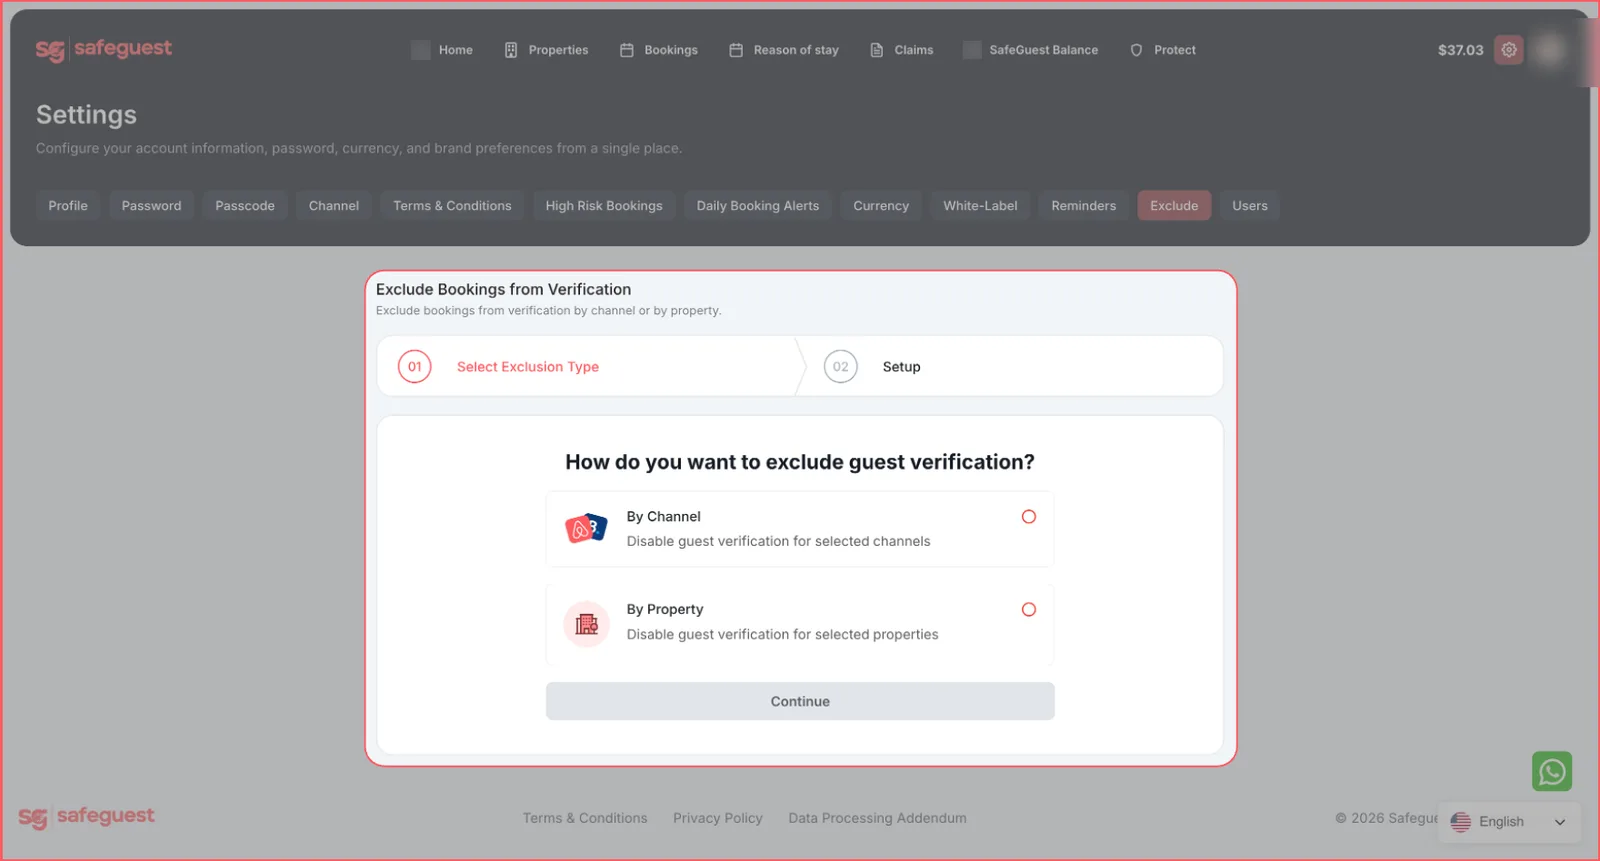
If you don’t want to generate SafeGuest verification URLs for bookings from a specific channel or property, use the Exclude option. You can exclude verification either by channel or by property, then select the specific channel or property you want to exclude and save the setting.
- Select the settings icon, then open the Exclude tab.
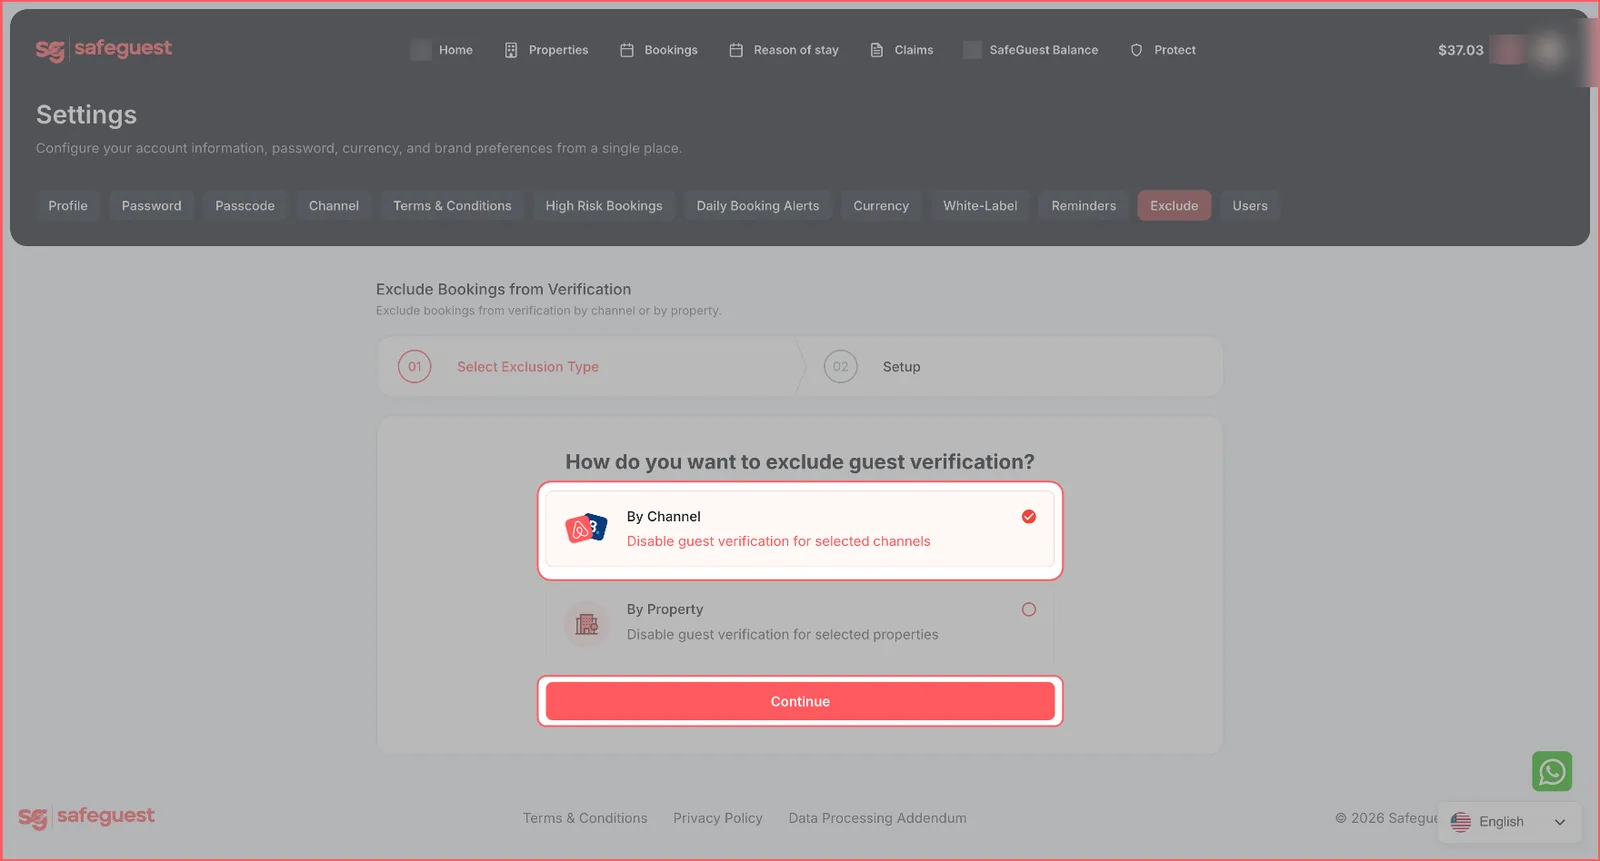
- Under Exclude Bookings from Verification, choose how you want to exclude guest verification: By Channel or By Property.
- For this demonstration we selected By Channel, then Continue.
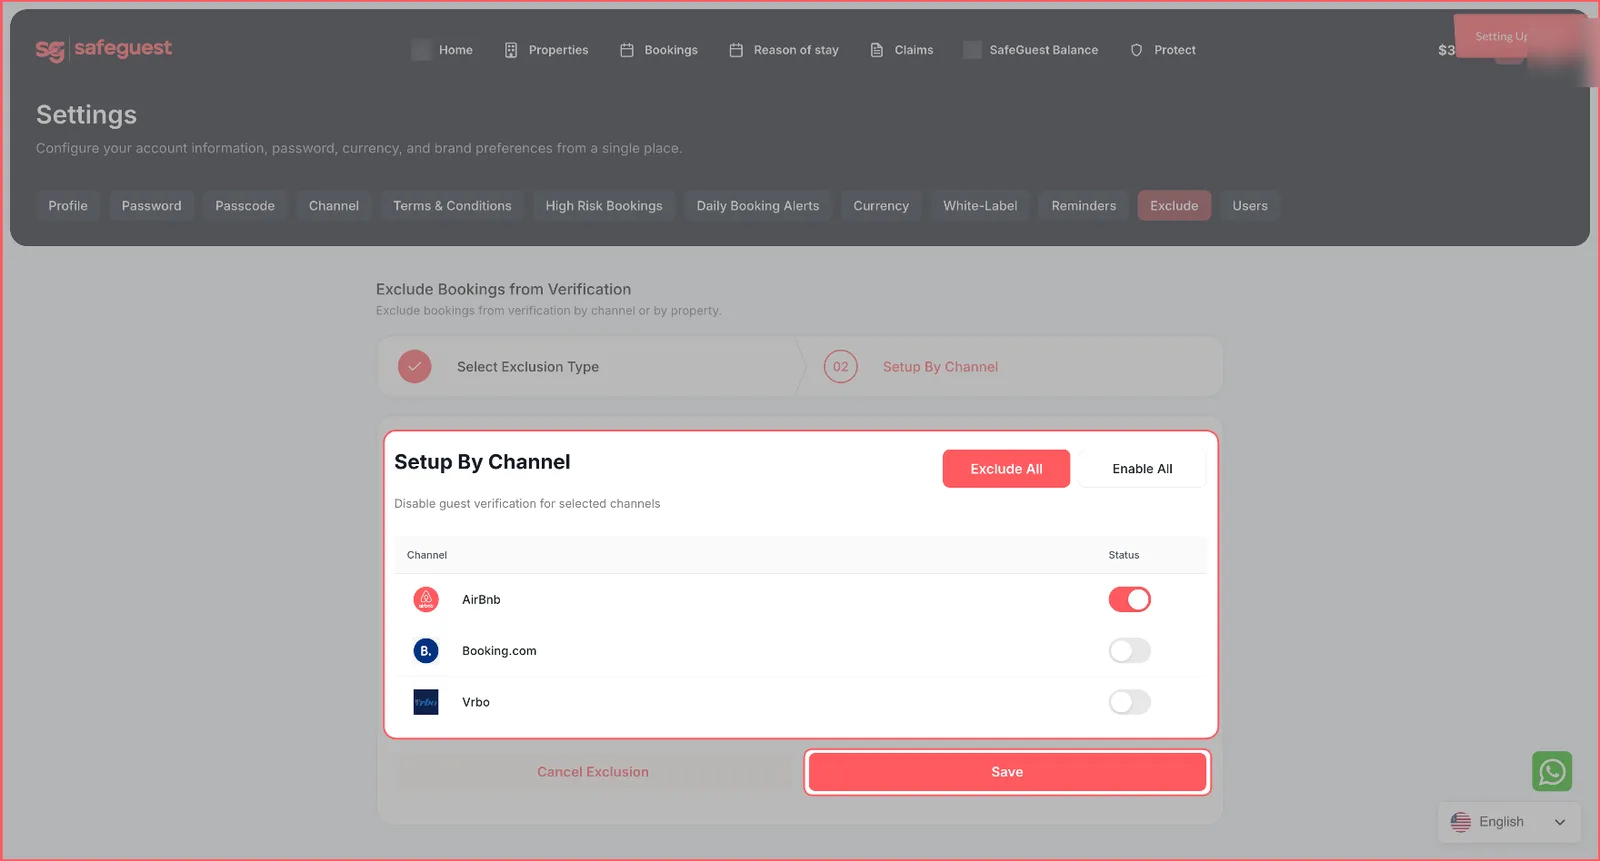
- Turn on the toggle for the channel you want to exclude (here, Airbnb), then select Save.
If you don’t want to exclude any channel or property, you can skip this step.
Step 7: Turn on the verification process
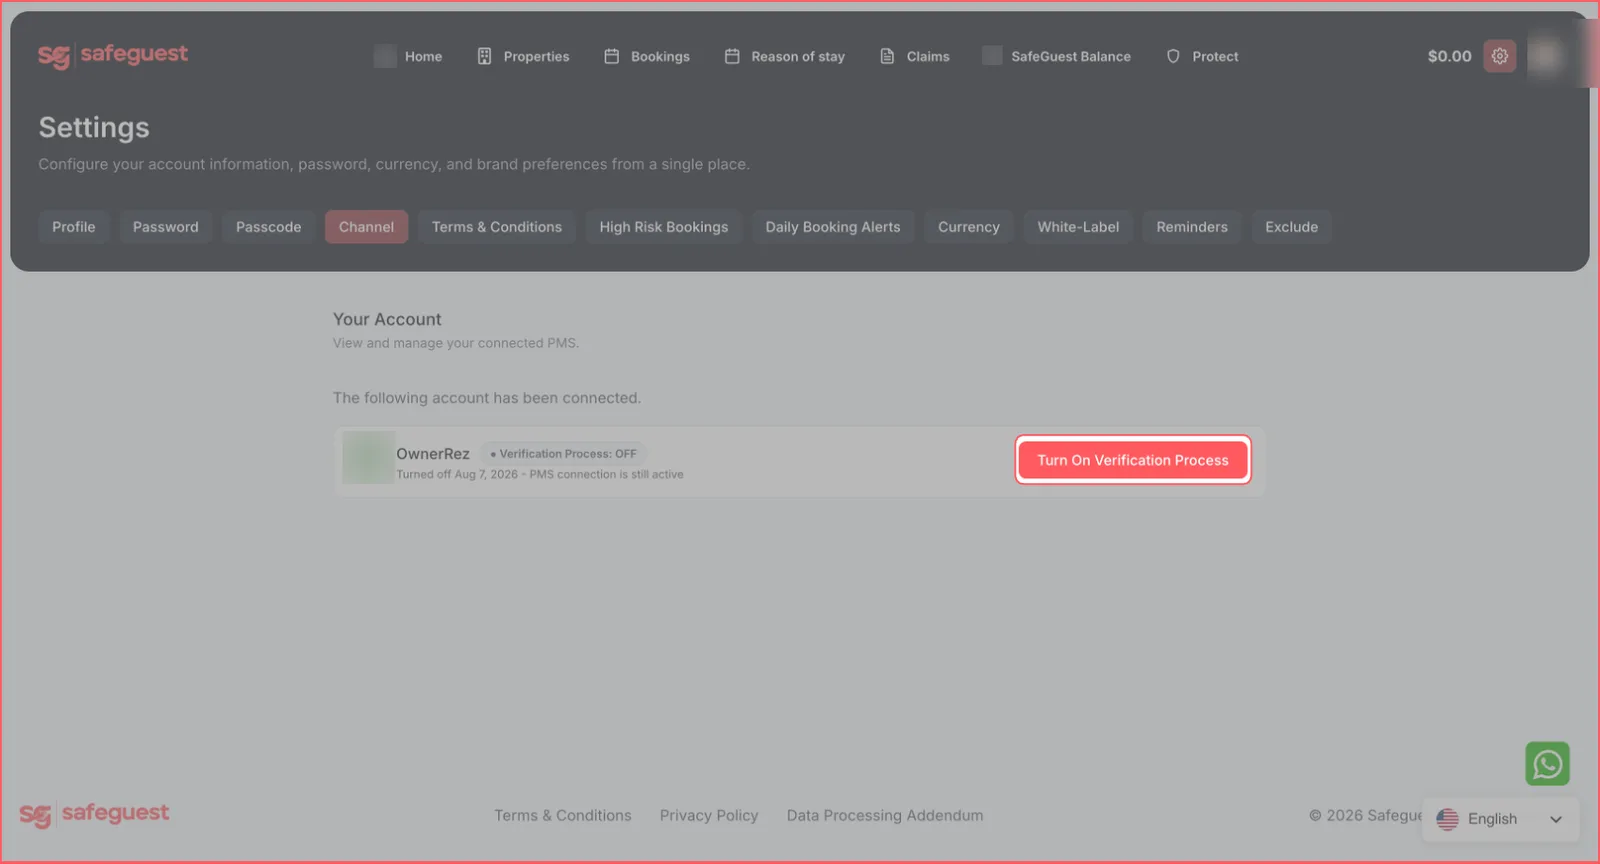
Turn on the verification process so guests receive their SafeGuest verification URLs and complete verification before check-in.
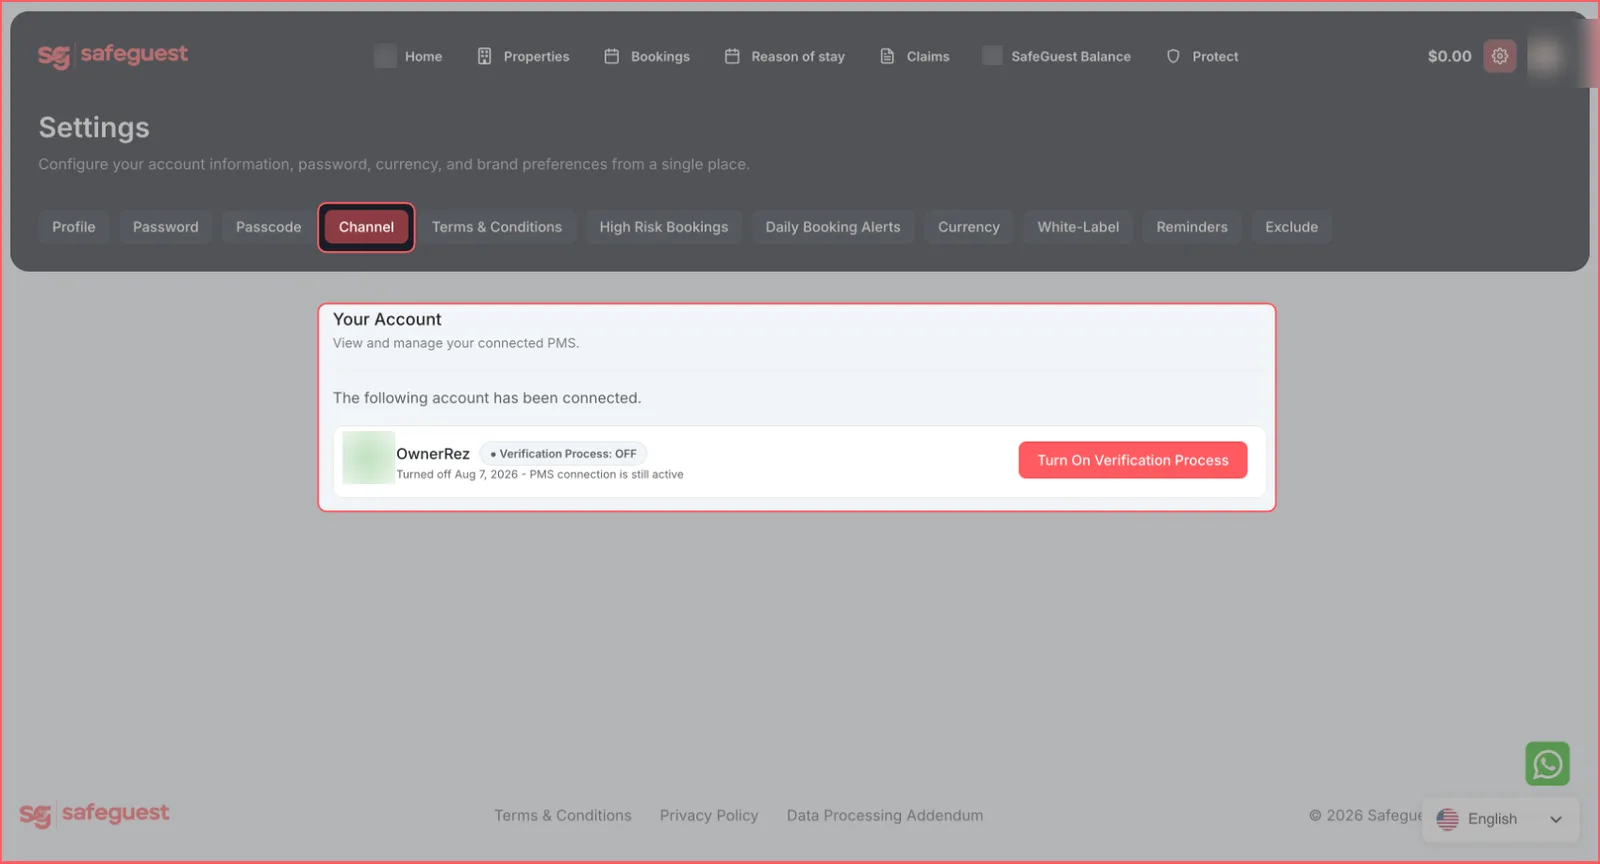
- Go to the Channel tab and review the connected OwnerRez account — the verification process shows as OFF.
- Select Turn On Verification Process.
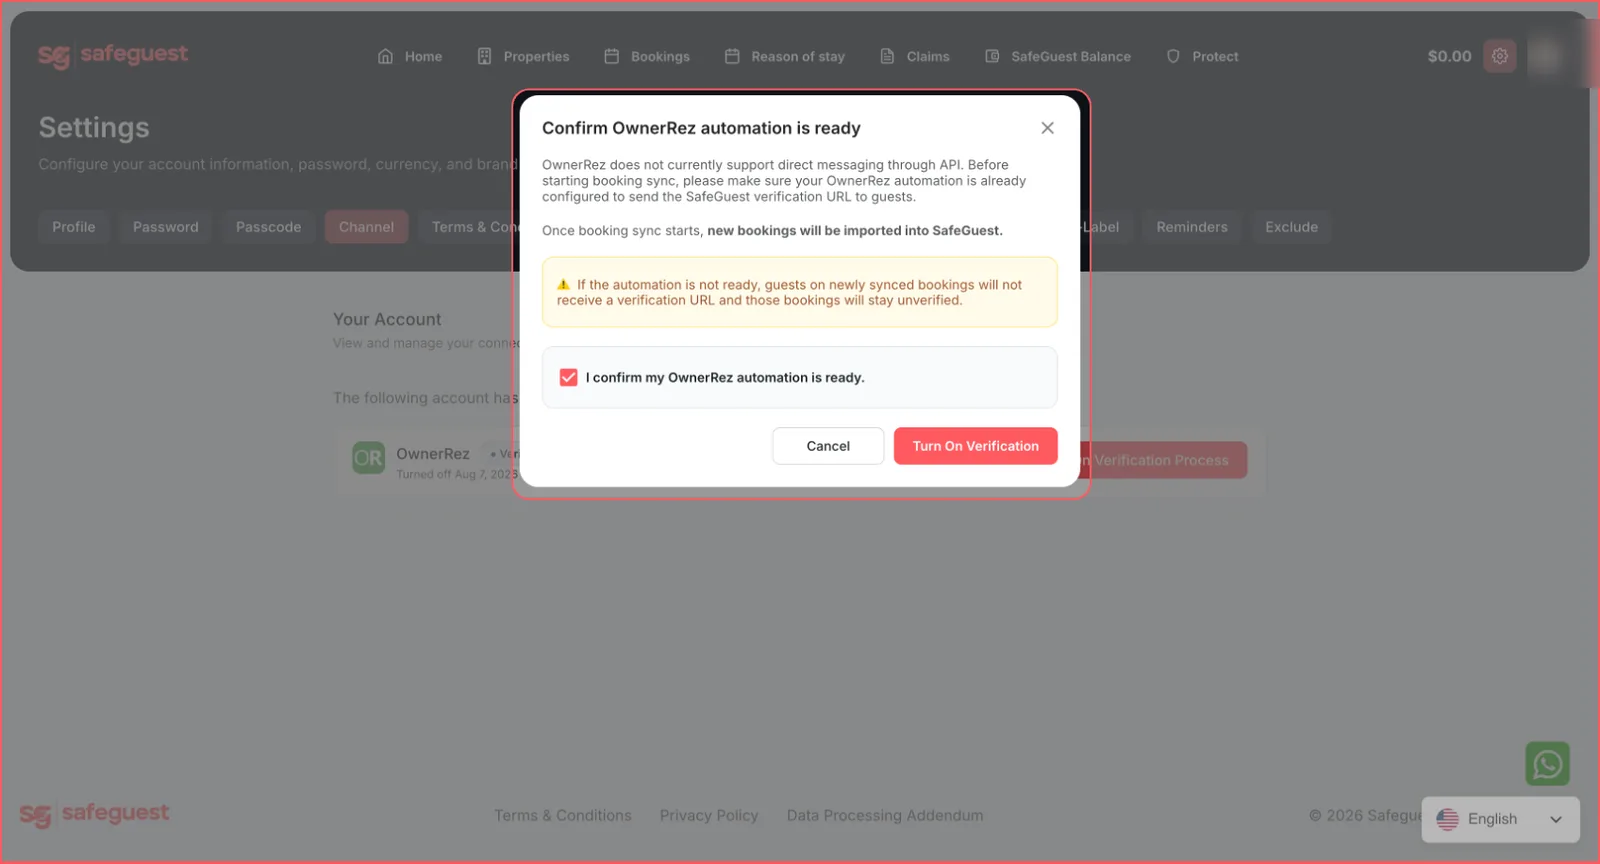
- A pop-up asks you to confirm that the automation is configured in your OwnerRez account. To configure automation in OwnerRez, follow Steps 10 and 11 below.
This is an important step: if the verification process is OFF, no verification URL is generated and guests are not asked to verify.
Step 8: Verify your properties in SafeGuest
- Go back to the browser tab with your SafeGuest dashboard.
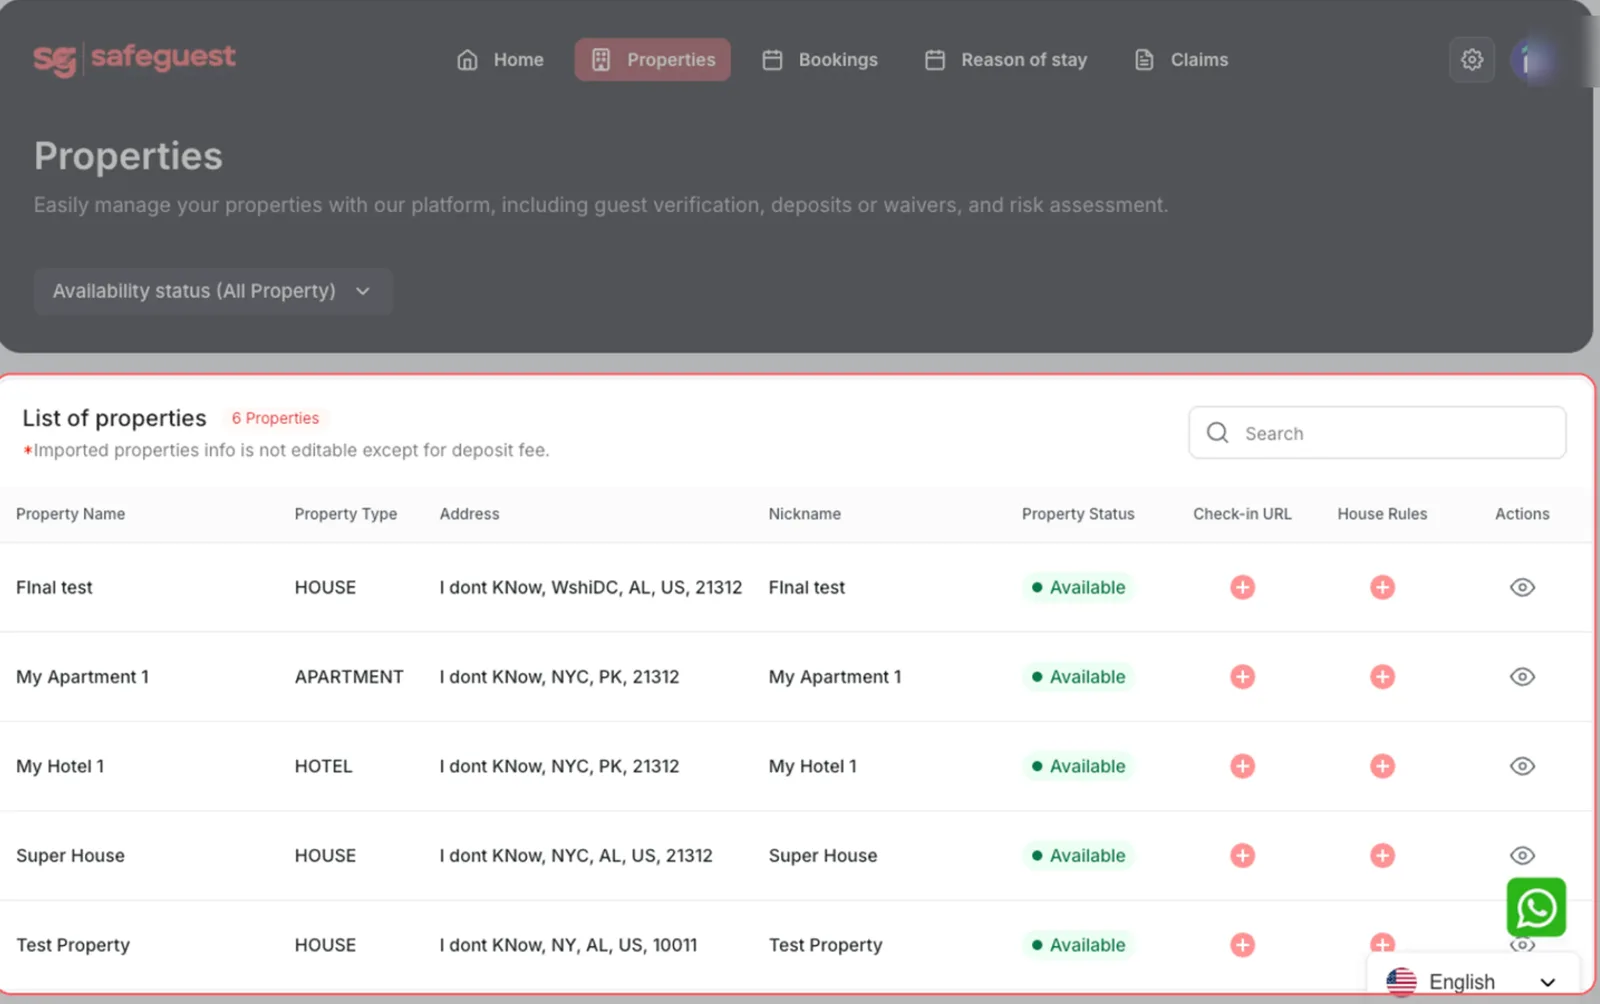
- Open the Properties page from the main menu.
- Check that your OwnerRez listings are now visible.
- Wait if needed — synchronisation usually takes less than a minute.
Step 9: Verify your bookings
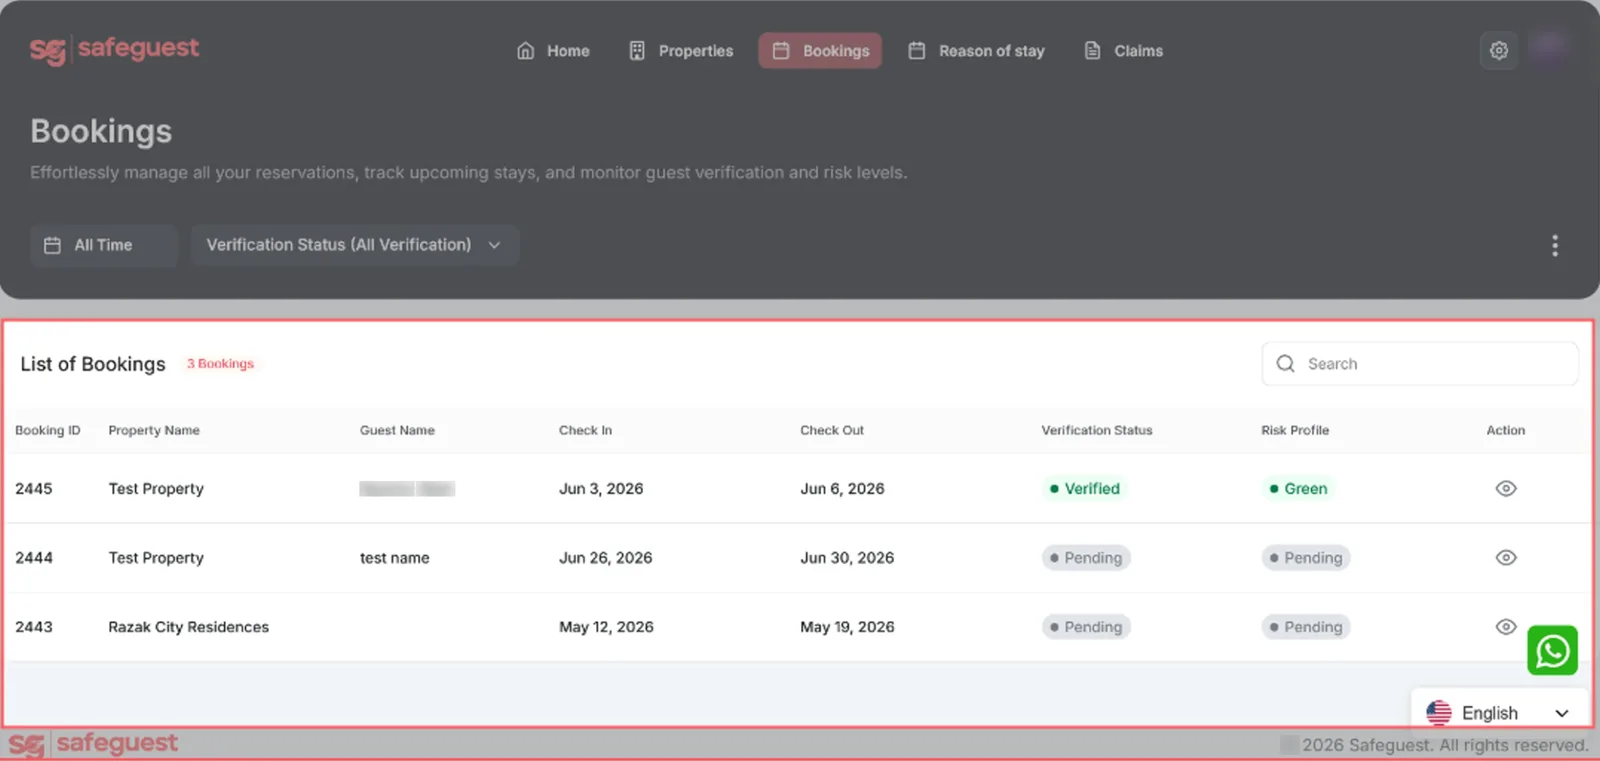
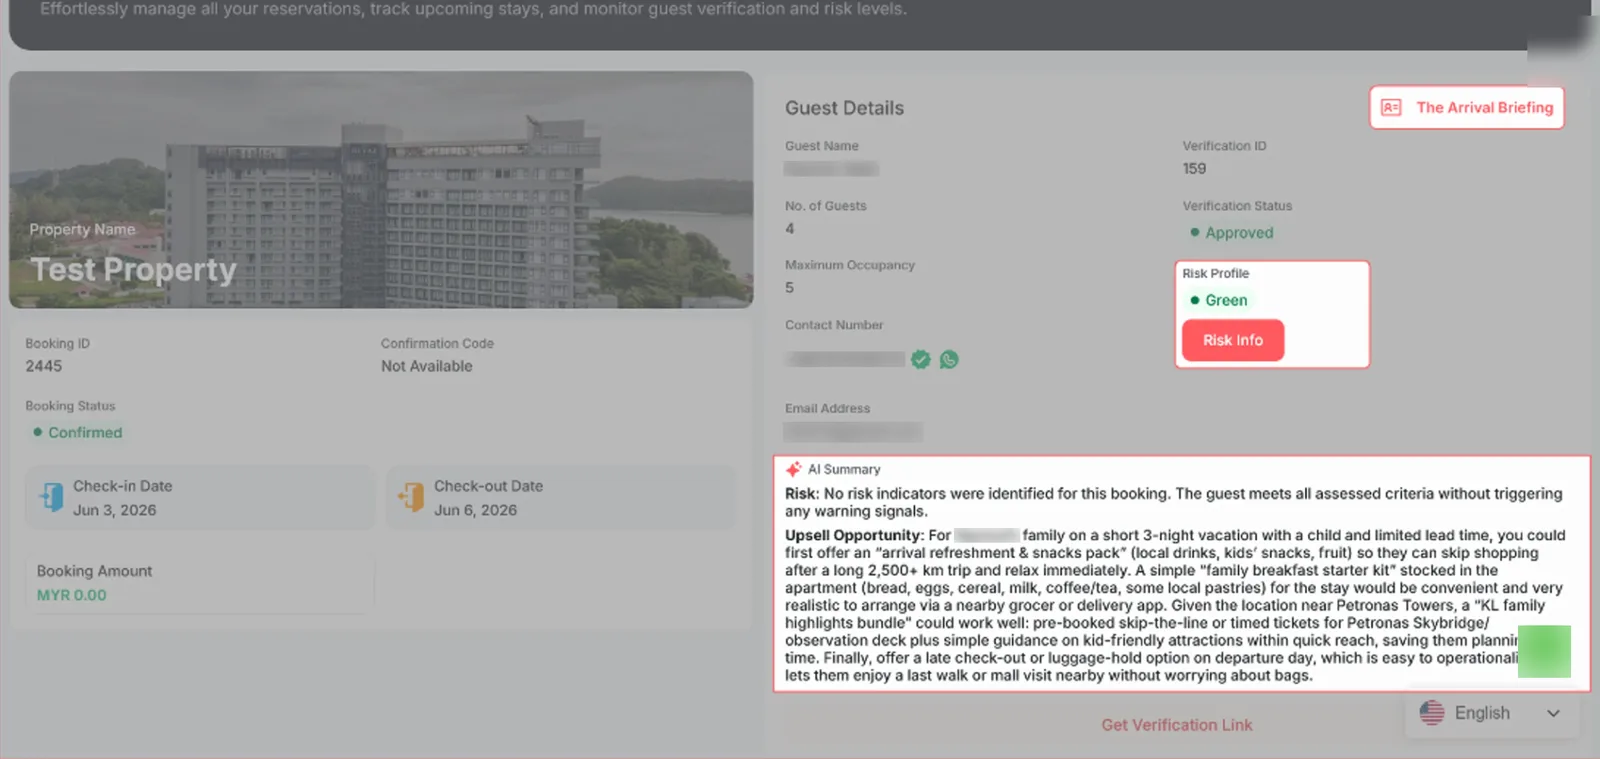
- Open the Bookings page from the navigation menu and review upcoming bookings.
- Select the eye icon next to a booking to open and review its details.
- Once the guest has completed SafeGuest verification, additional information becomes available in the booking details.
- Review the guest’s Arrival Briefing for relevant booking and stay information.
- Review the guest’s Risk Status to better assess potential booking risk.
- Read the AI-generated summary for an overview of the guest verification results.
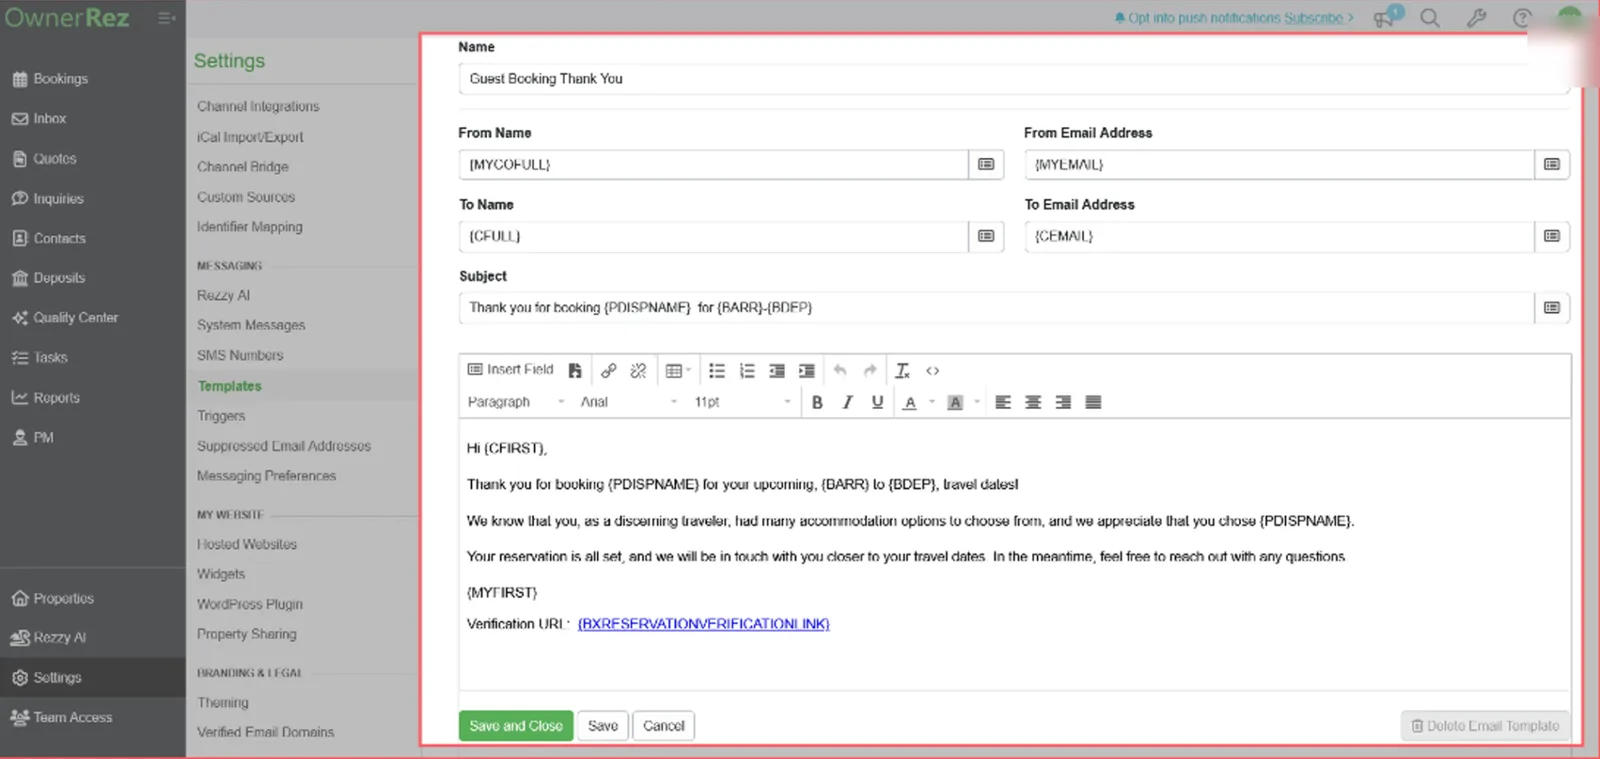
Step 10: Create the email template in OwnerRez
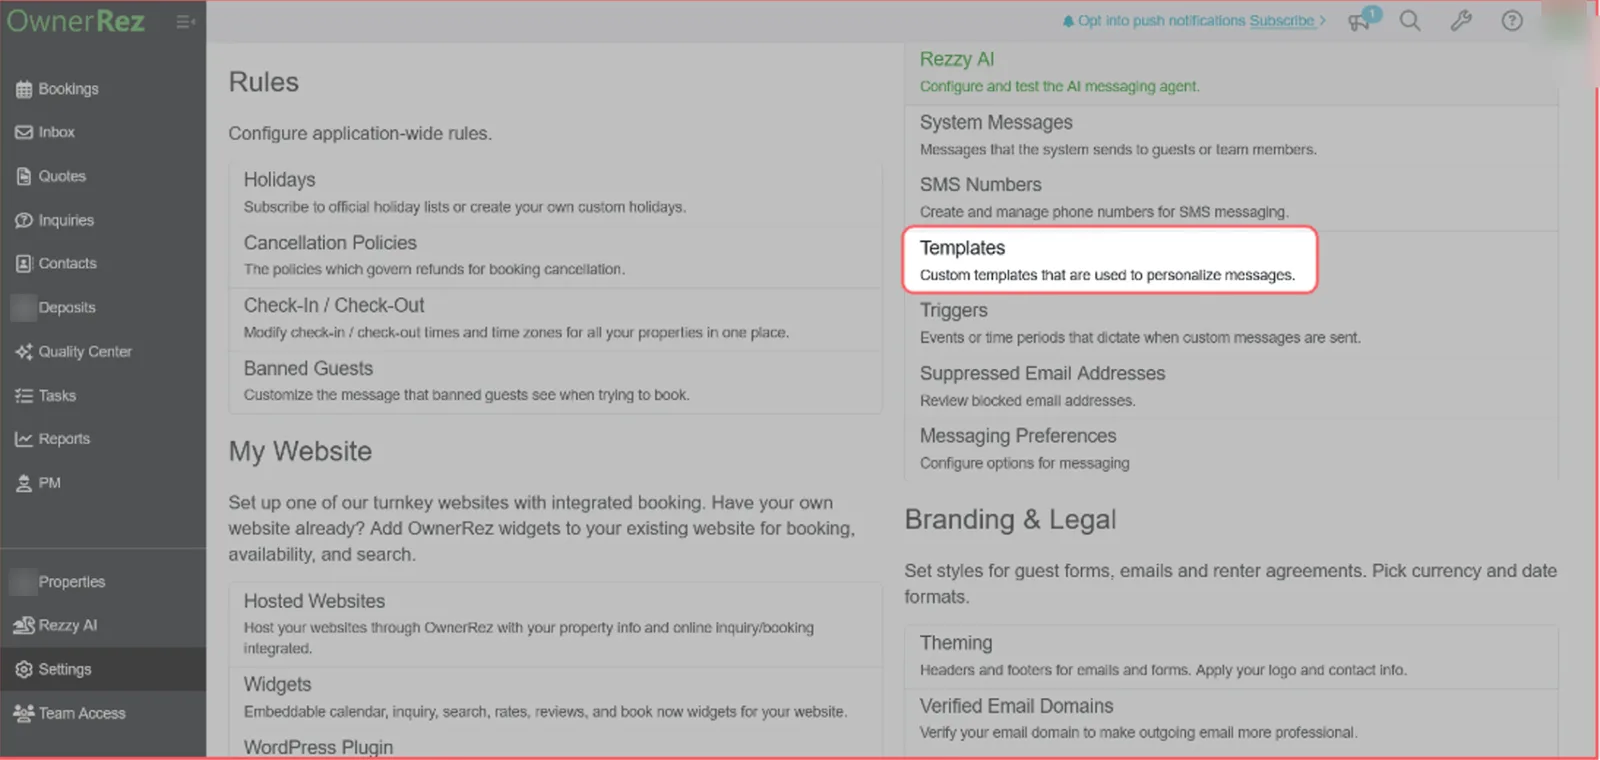
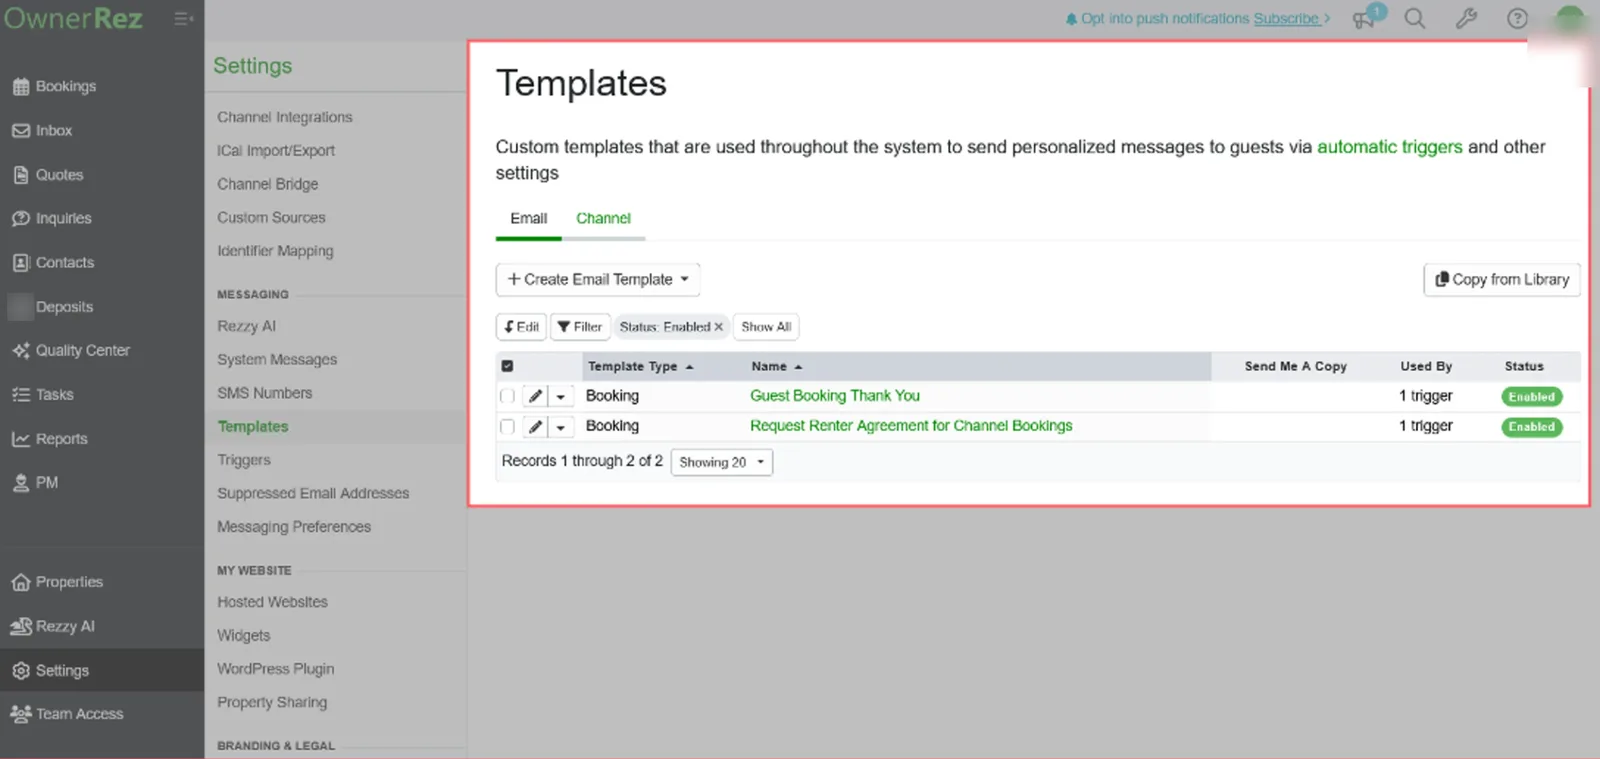
- In your OwnerRez account, select Settings from the main navigation menu.
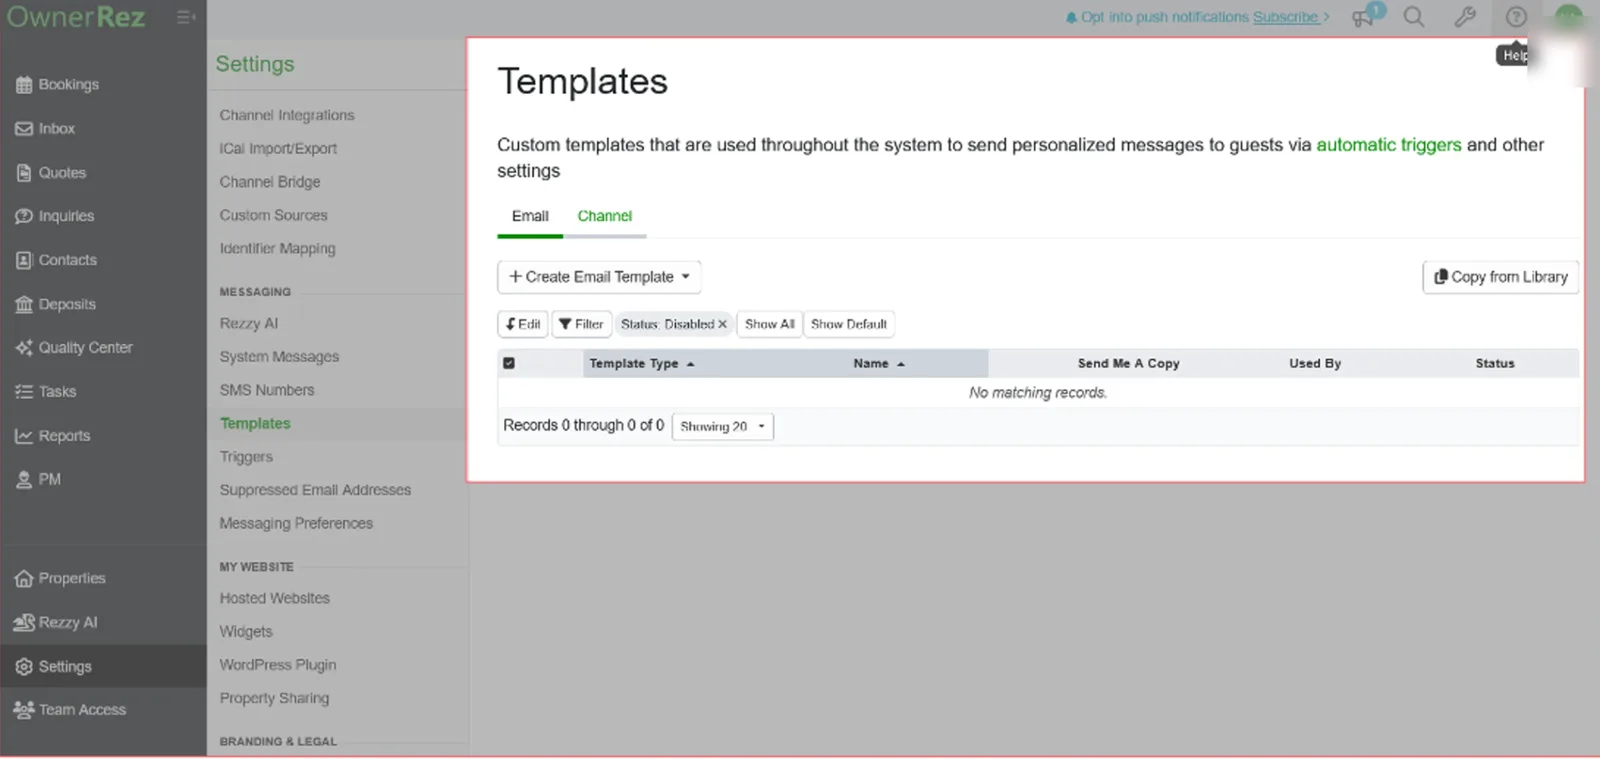
- Select Templates to view and manage your message templates.
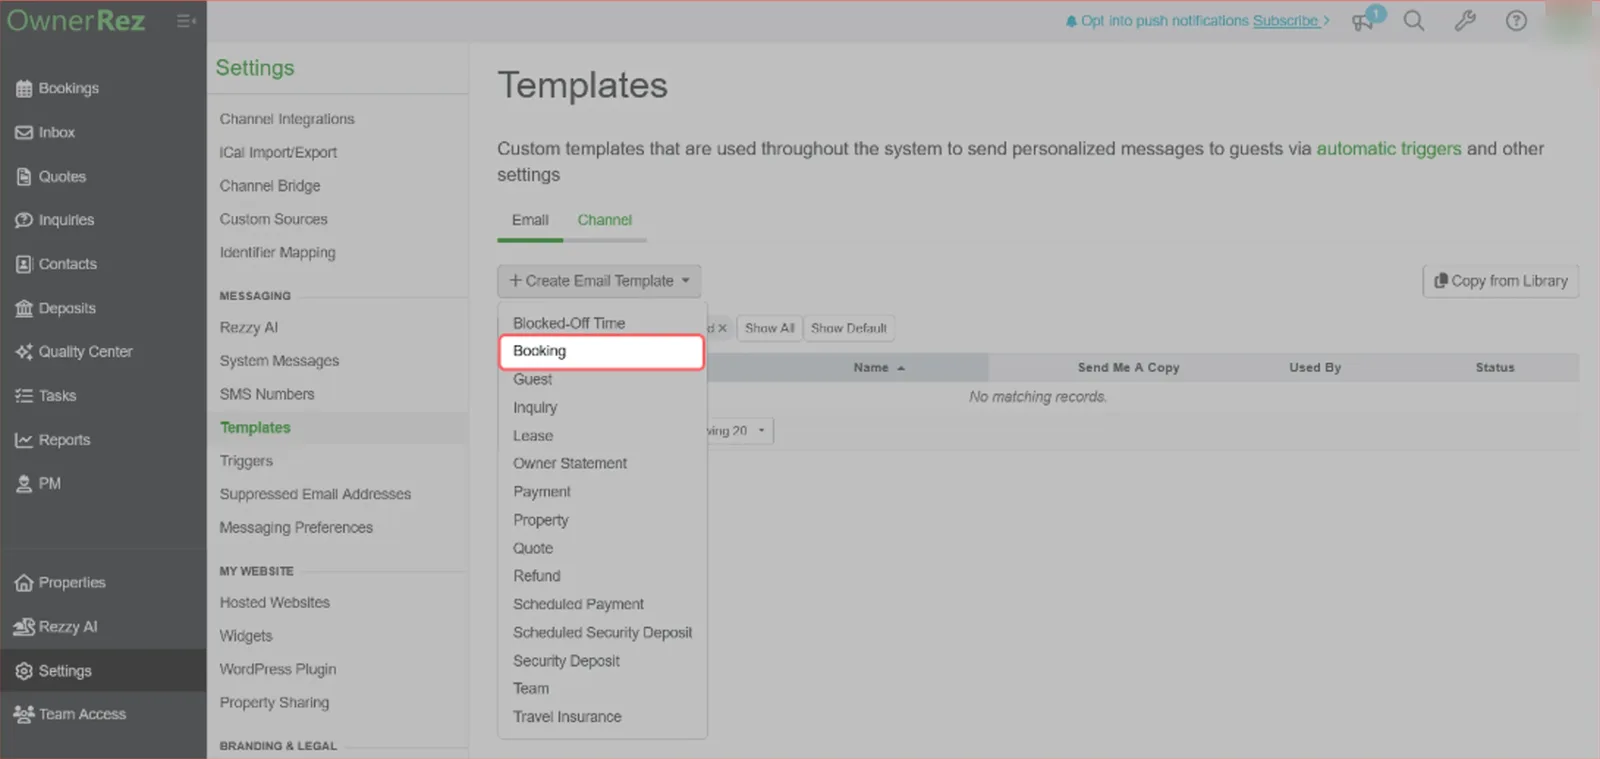
- On the Templates page, select Create Email Template.
- Choose Booking as the template category.
- Fill in the required fields: From Name
{MYCOFULL}, From Email Address{MYEMAIL}, To Name{CFULL}, To Email Address{CEMAIL}. - Subject:
{CFIRST}, your host requires ID verification before check-in.
For the message body, use:
Hi {CFIRST},
{MYFIRST} verifies every guest before sharing check-in details — their standard policy for all bookings, on every platform.
Your stay at {PNAME}, {BARR} – {BDEP}: under 2 minutes with your government photo ID (passport, residence card, driver’s licence, or any government photo ID card).
Complete it here:
{BXRESERVATIONVERIFICATIONLINK}🎥 The ID photo + selfie step trips most people up — 30-second demo:
https://www.youtube.com/watch?v=DzsknGhpZkUBooking reference: {BID} · booked via {BSOURCE}. Your host is happy to confirm this step — message them anytime.
Your ID is encrypted and used only to verify your identity.
— {MYFIRST}, host of {PNAME}
Sent securely via SafeGuest, your host’s verification partner
- Review the template for accuracy and confirm it is configured as intended.
- Select Save and Close to return to the Templates page.
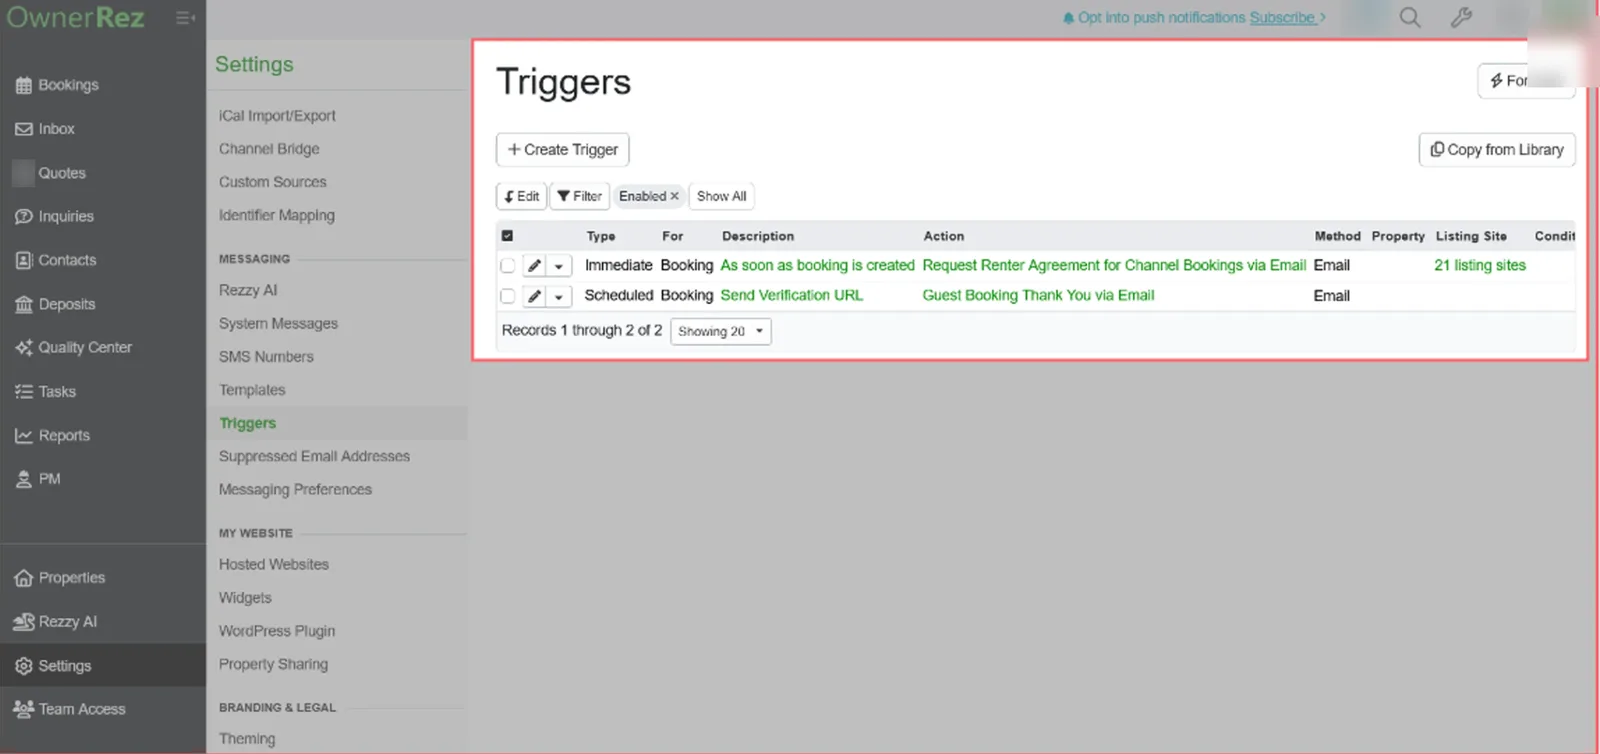
Step 11: Add the trigger in OwnerRez
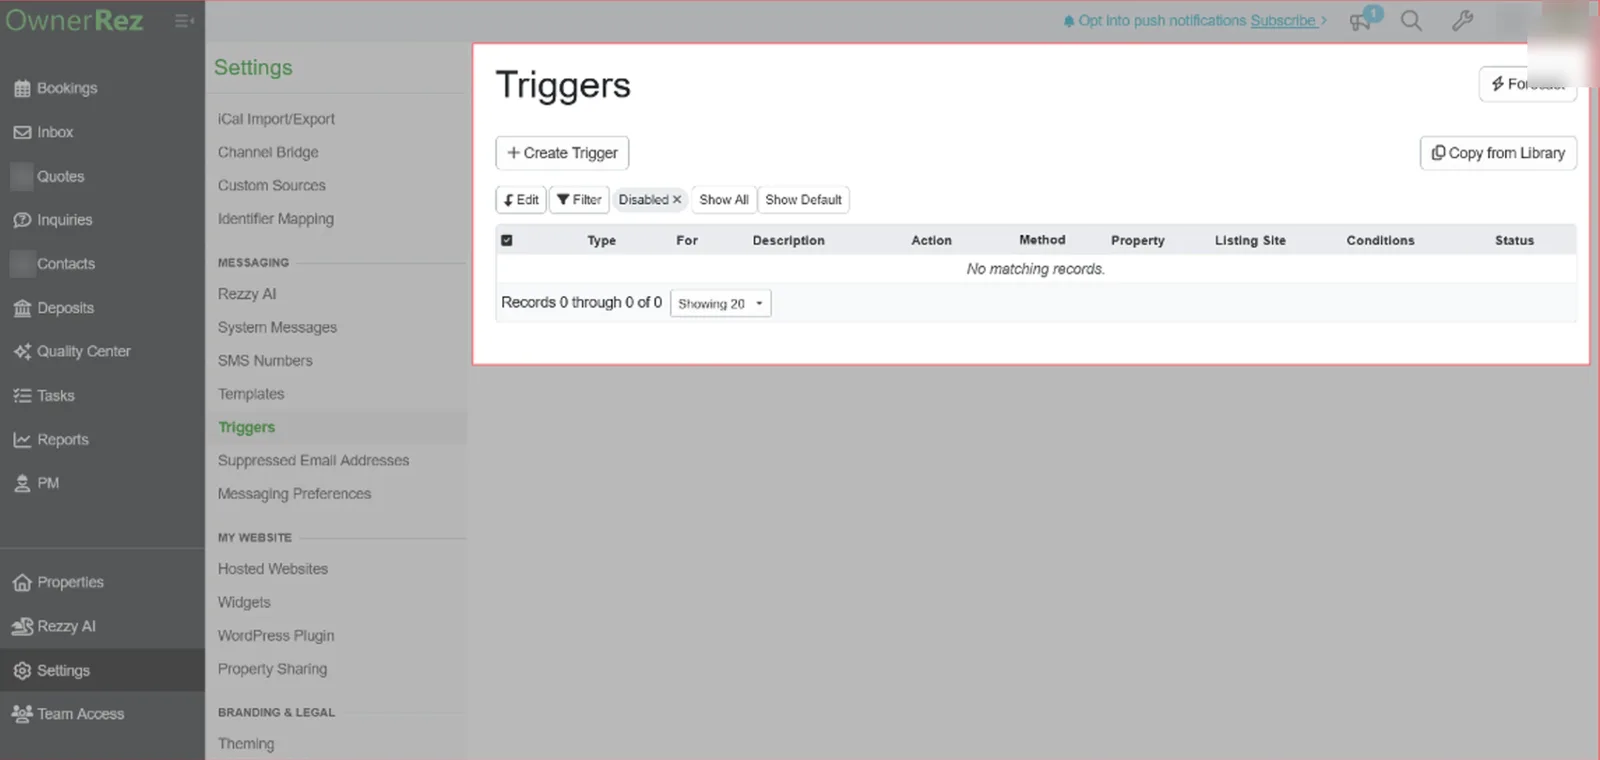
- Select Settings from the left navigation menu.
- Select Triggers to access and manage your trigger configurations.
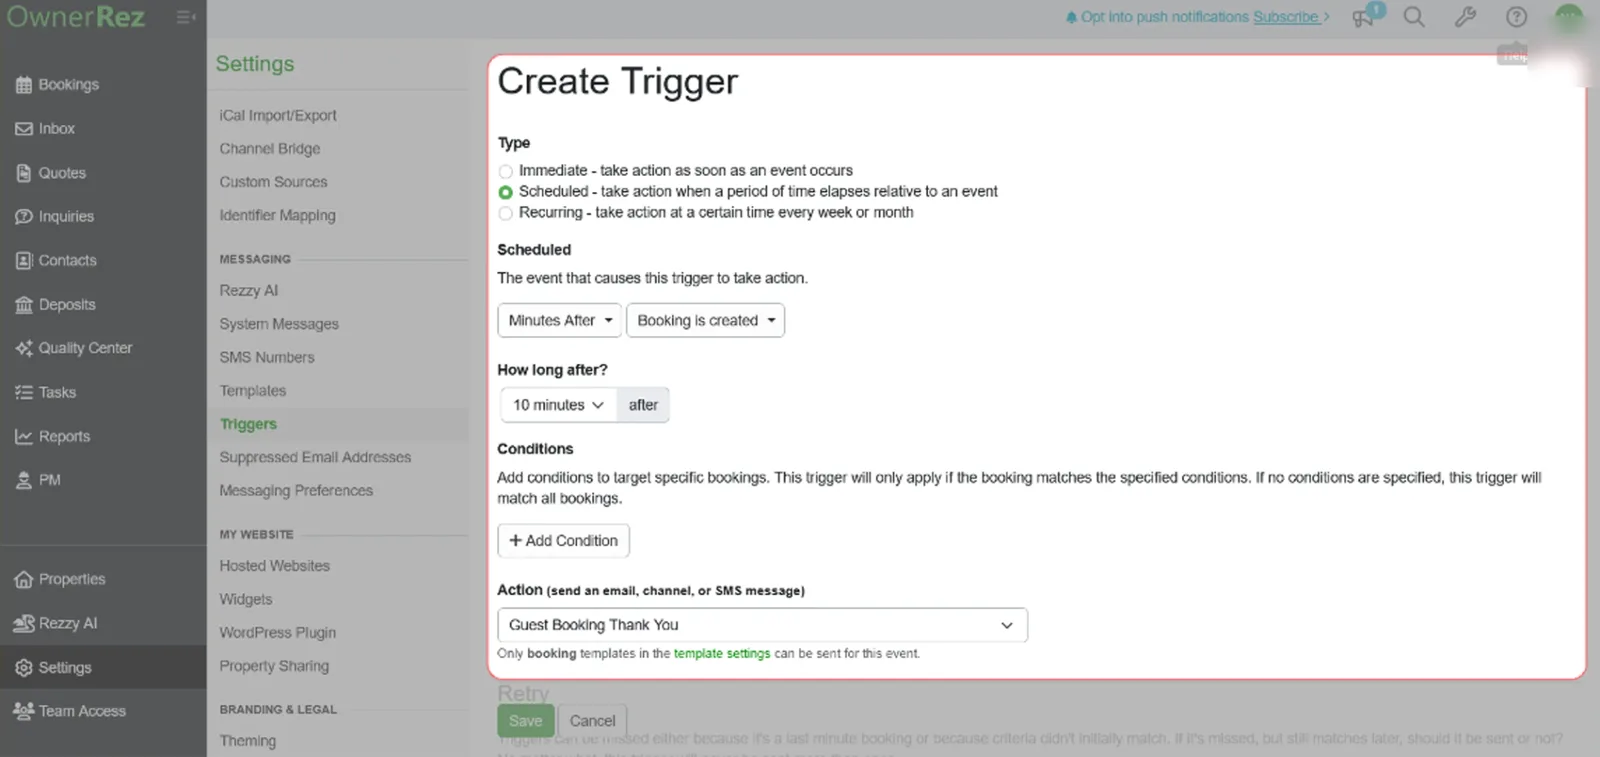
- Select Create Trigger.
- On the Create Trigger page, choose Scheduled as the trigger type.
- Under the scheduled settings, select Minutes After and choose Booking is Created.
- Under How Long After, enter 10 minutes.
- Under Action, select the template you created in Step 10.
- Select Save to create the trigger.
- You are redirected to the Triggers page — locate your new trigger in the list to confirm it saved successfully.
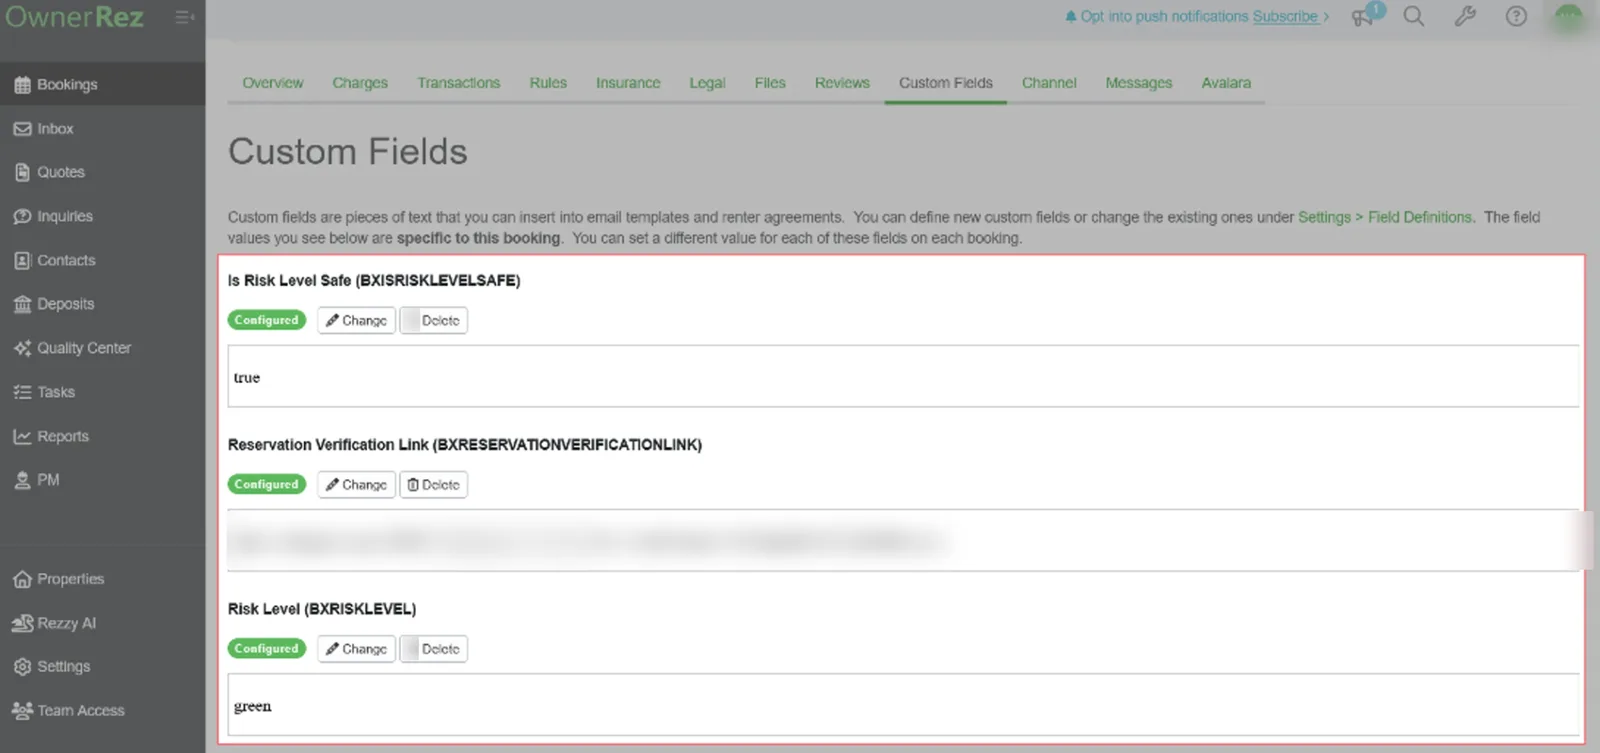
Step 12: View custom verification fields
- Open the booking you want to review.
- Select the Custom Fields tab.
- Review the verification data, including risk level, verification link, and related details.
Your setup is complete
That’s it — every new OwnerRez booking now triggers a SafeGuest verification request, and you can see each guest’s Risk Status before they arrive. Safeguest Prevent is free for hosts, and Safeguest Protect is available as an optional paid add-on on eligible stays. See pricing for details.
Know before they knock.
Safeguest Prevent verifies every guest before arrival. Free for hosts.