Este artículo solo está disponible en inglés.
SafeGuest + Hostaway: Smarter Guest Protection, Seamless Operations
15 September 2026
SafeGuest is excited to announce our new integration with Hostaway, bringing AI-powered guest verification and booking protection directly into the Hostaway platform. Hostaway users can now automate guest verification, risk assessments, security deposits, and damage protection, completely free for hosts, making every reservation more secure and every workflow more efficient.
The smarter way to protect every reservation
Hostaway is an all-in-one vacation rental software solution built for ambitious property managers looking to scale their business. Through its partnership with SafeGuest, Hostaway users can automate guest verification, AI-powered risk assessments, ID verification, security deposits, damage waivers, and damage protection — all free for hosts.
Together, the integration creates a safer, more efficient booking experience from reservation to checkout.
Open the interactive Hostaway walkthrough
About Hostaway
Designed to scale alongside your business, Hostaway simplifies marketing, sales, guest communications, operations, reporting, and accounting through powerful automation and a flexible, customisable platform. Combined with award-winning customer support and an extensive marketplace of software partners, Hostaway gives property managers the tools they need to operate more efficiently and confidently.
The partnership with SafeGuest builds on that mission by adding intelligent guest protection directly into the Hostaway workflow. Together, Hostaway and SafeGuest help property managers automate critical risk-management tasks, streamline operations, and confidently welcome every guest.
Connect your Hostaway account to SafeGuest
Step 1: Log in to Hostaway
- Log in to your Hostaway account.
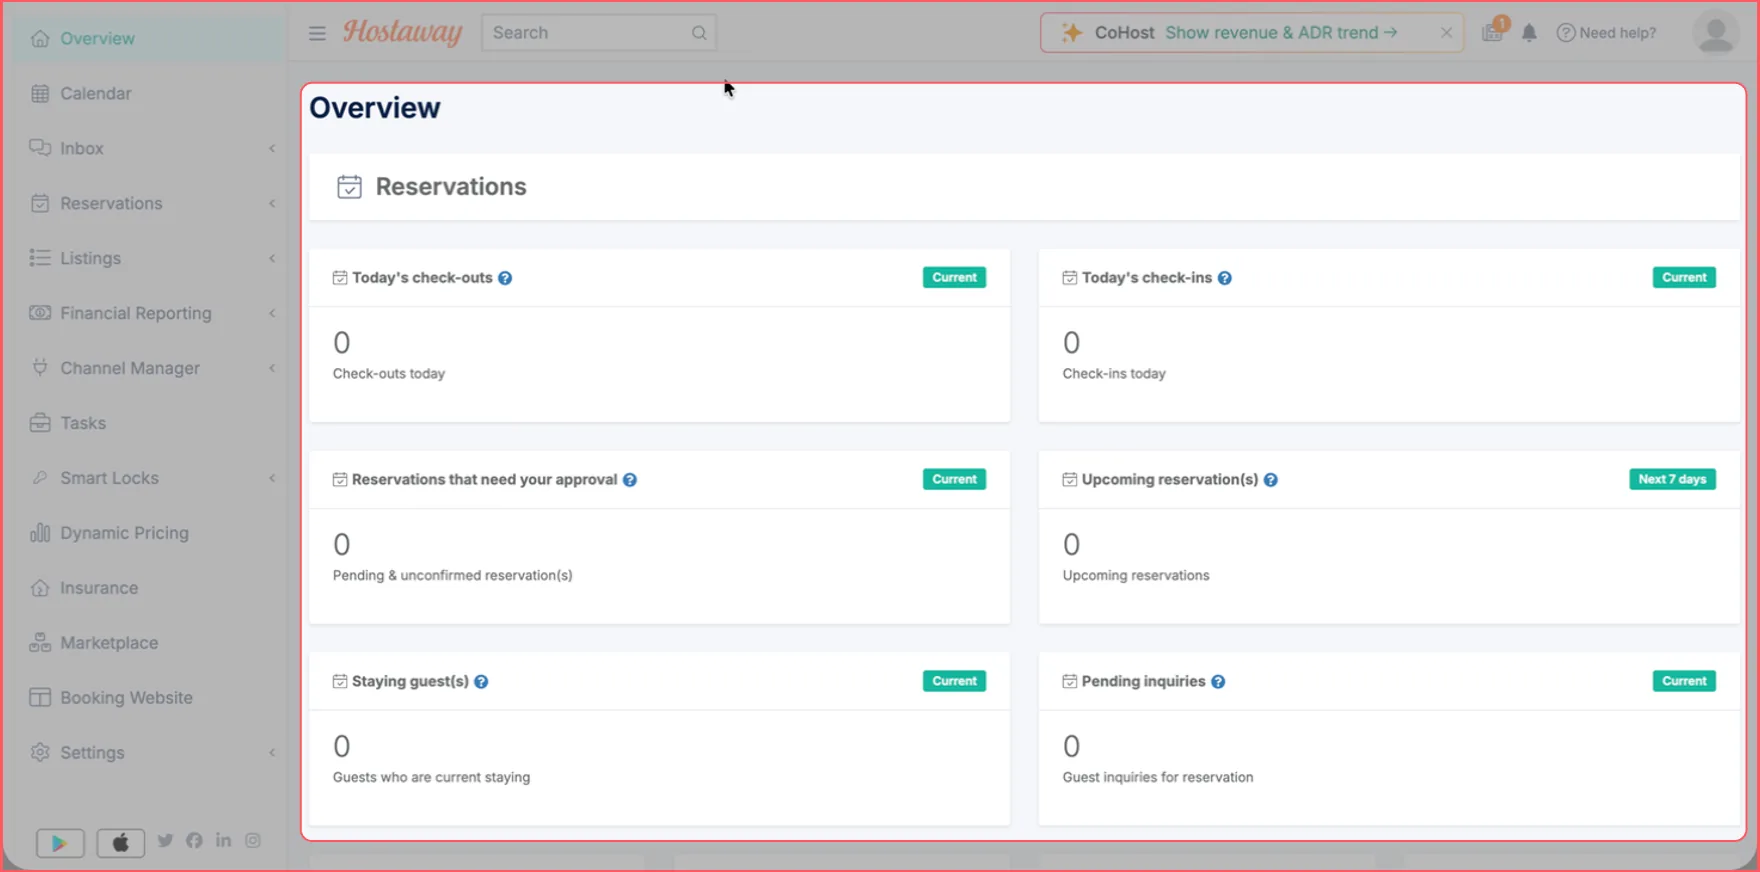
- You will land on the Overview page.
Step 2: Navigate to the Marketplace
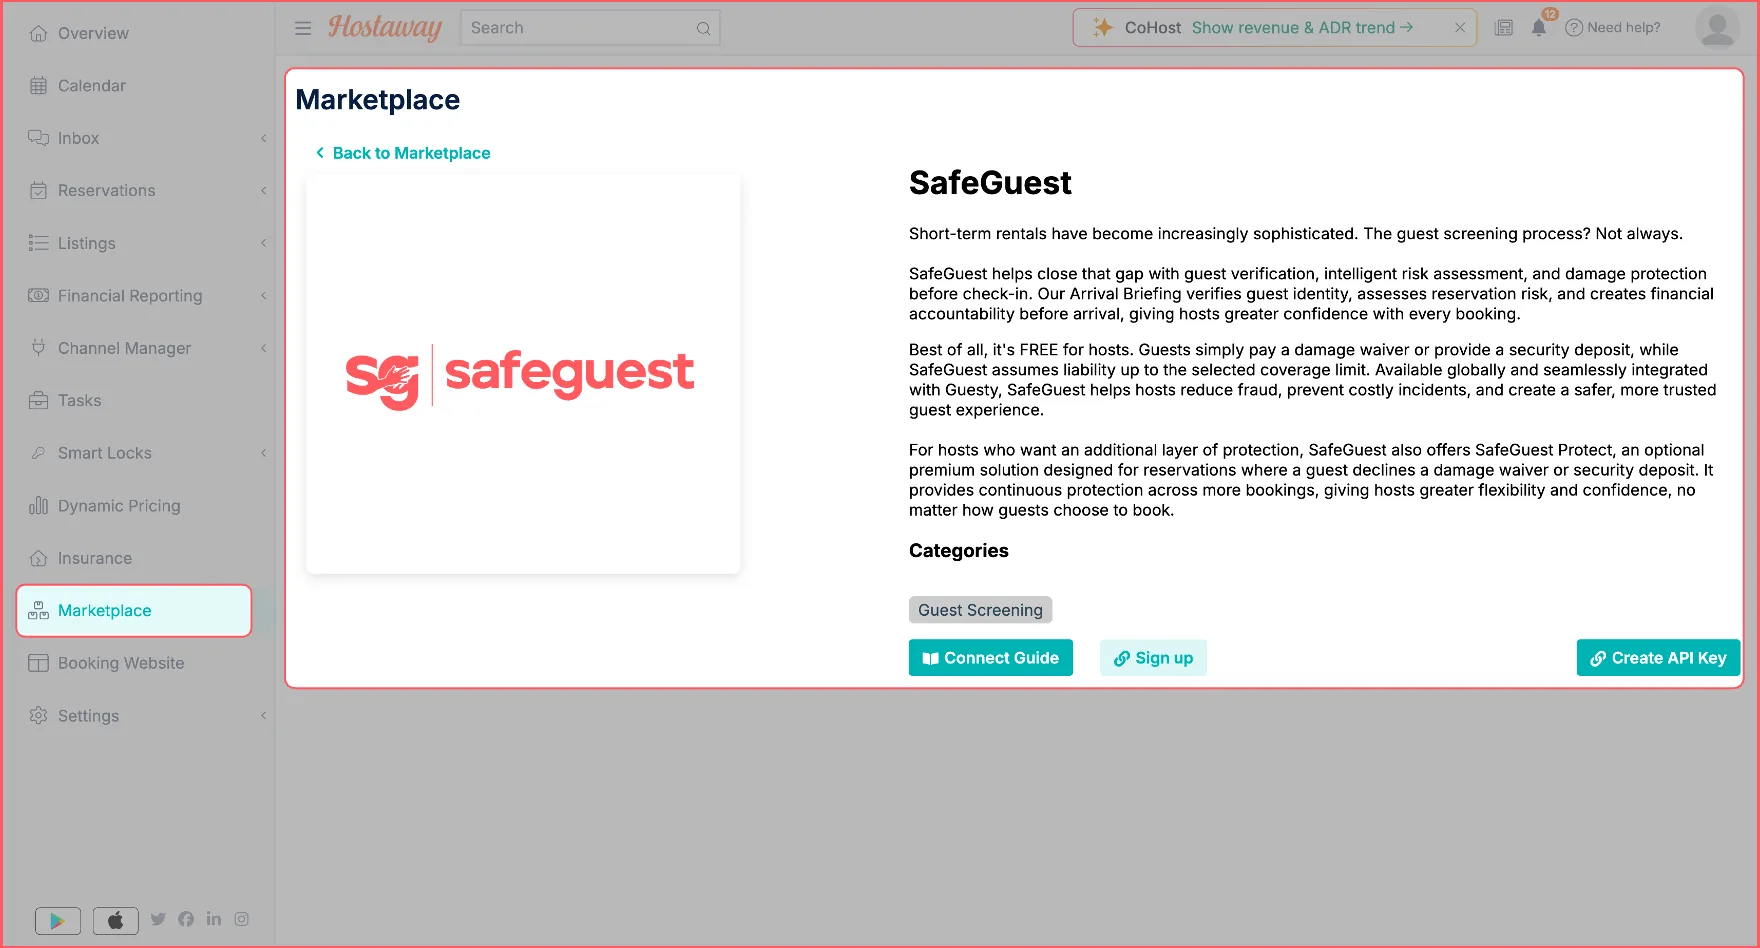
- Select Marketplace from the side navigation.
- Search for SafeGuest, then select Connect.
- Hostaway will open the SafeGuest details page.
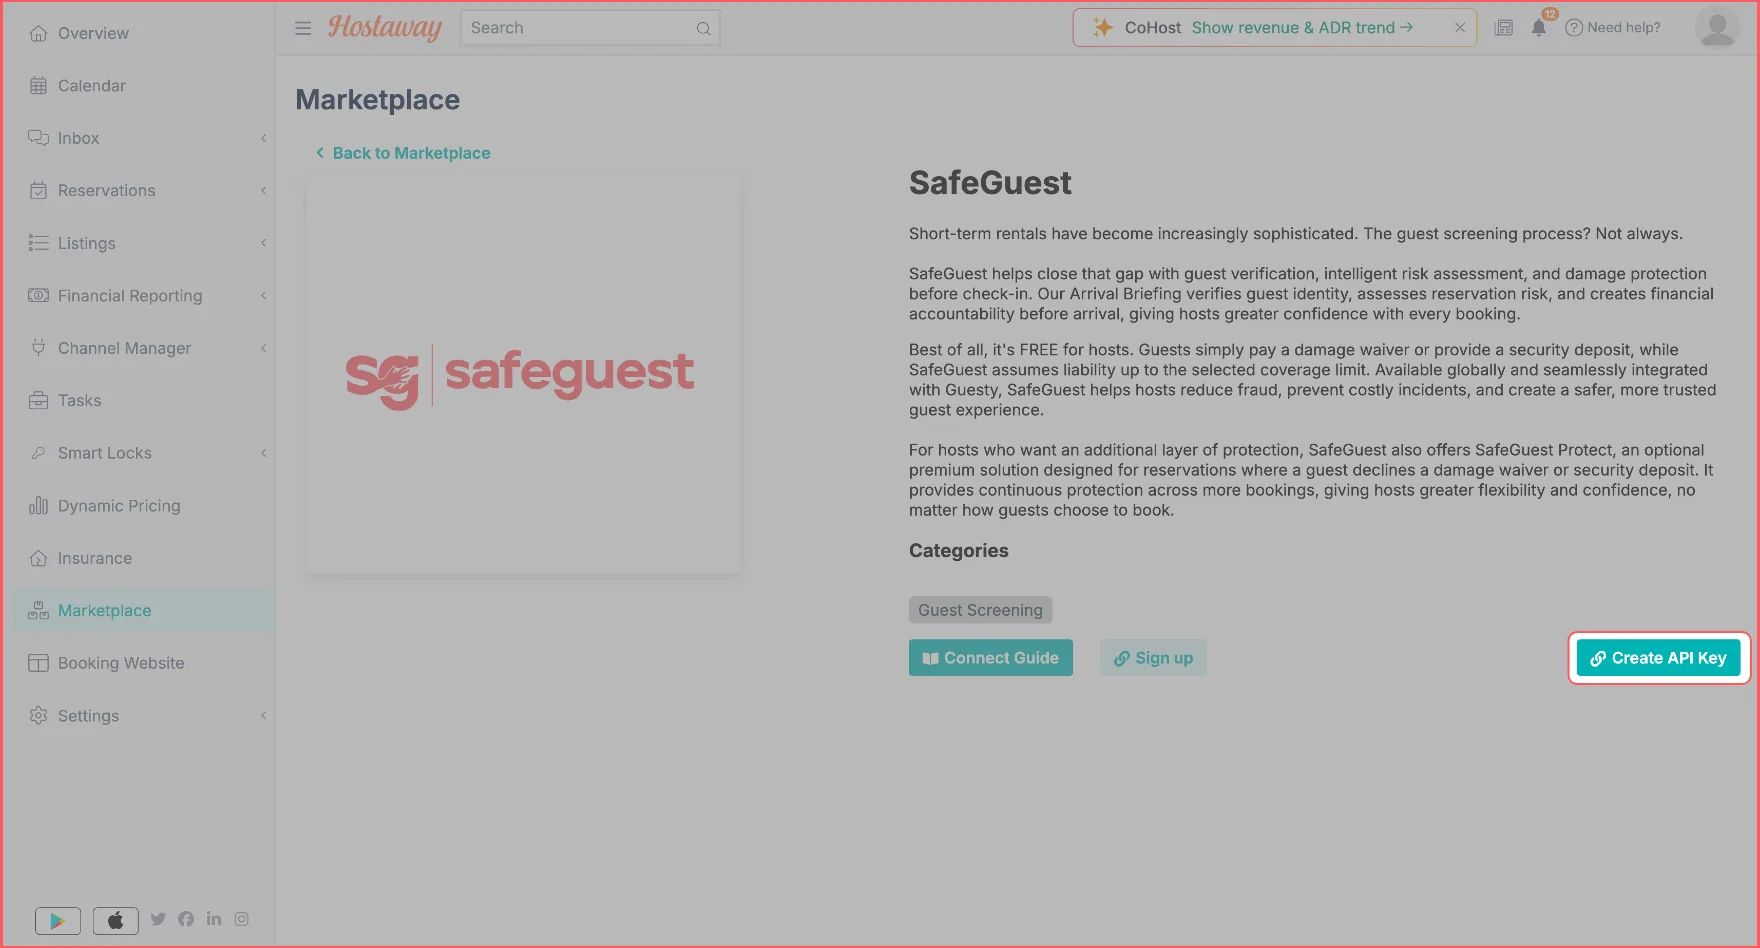
Step 3: Create a new API key
- Select Create API Key to open the setup panel.
- Select Create.
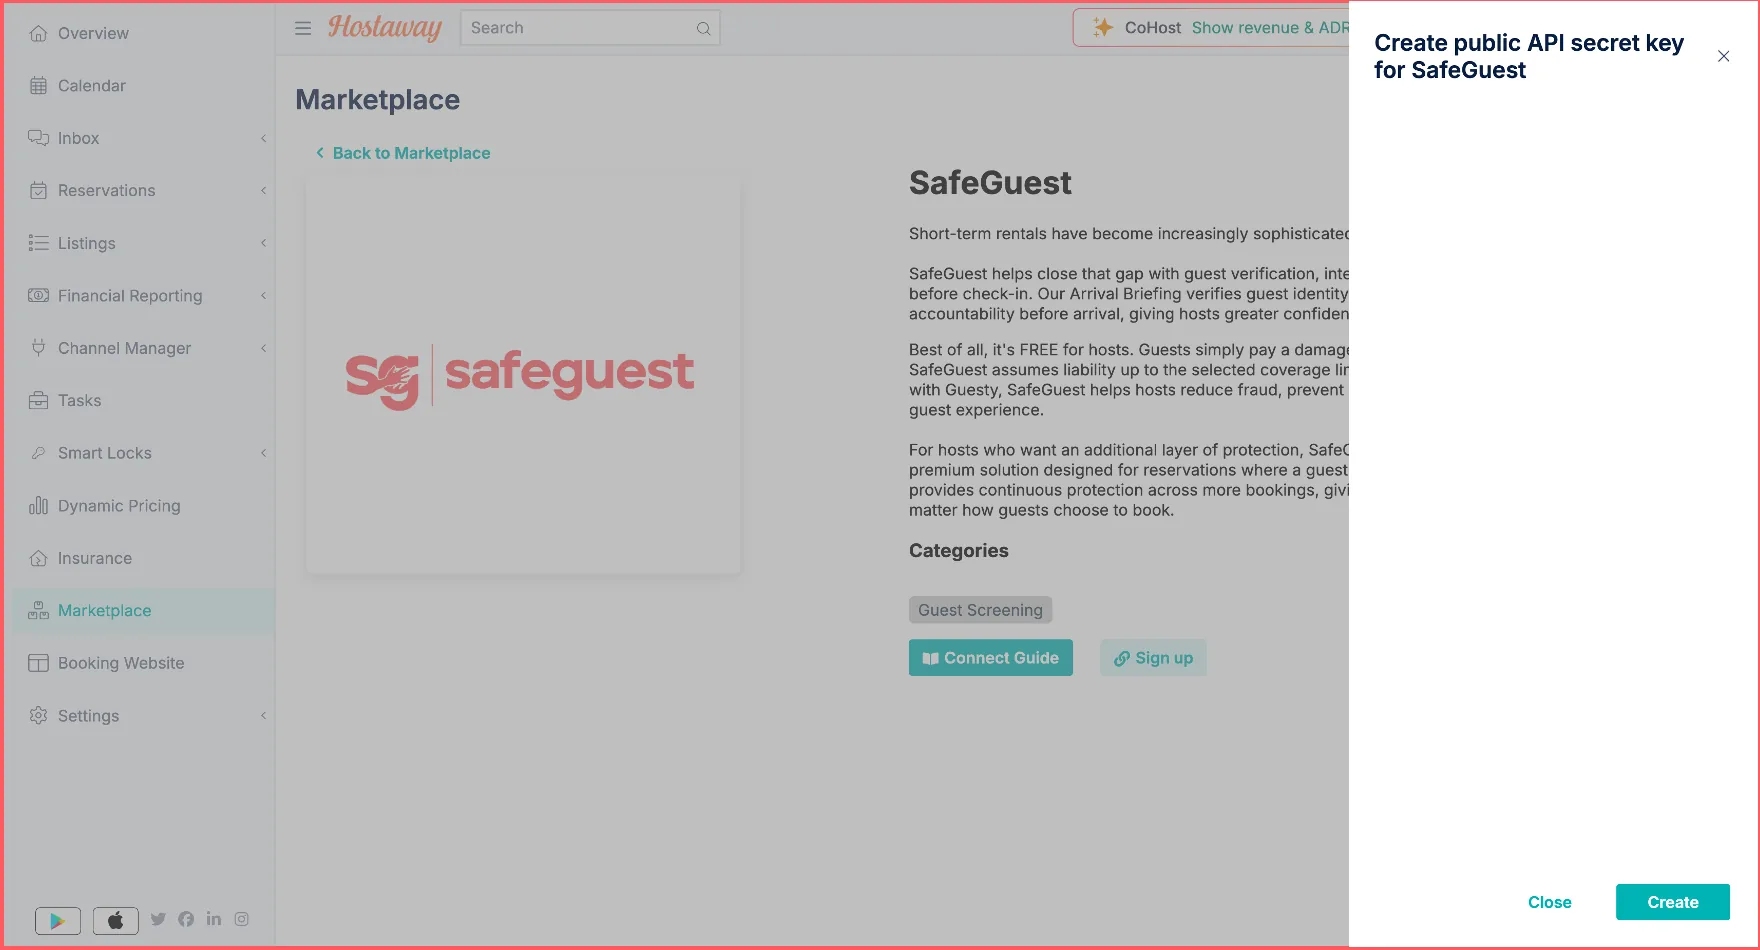
Step 4: Copy your API credentials
- Hostaway generates an Account ID and API Key.
- Copy both credentials and keep them secure.
- Select Close, then Sign up.
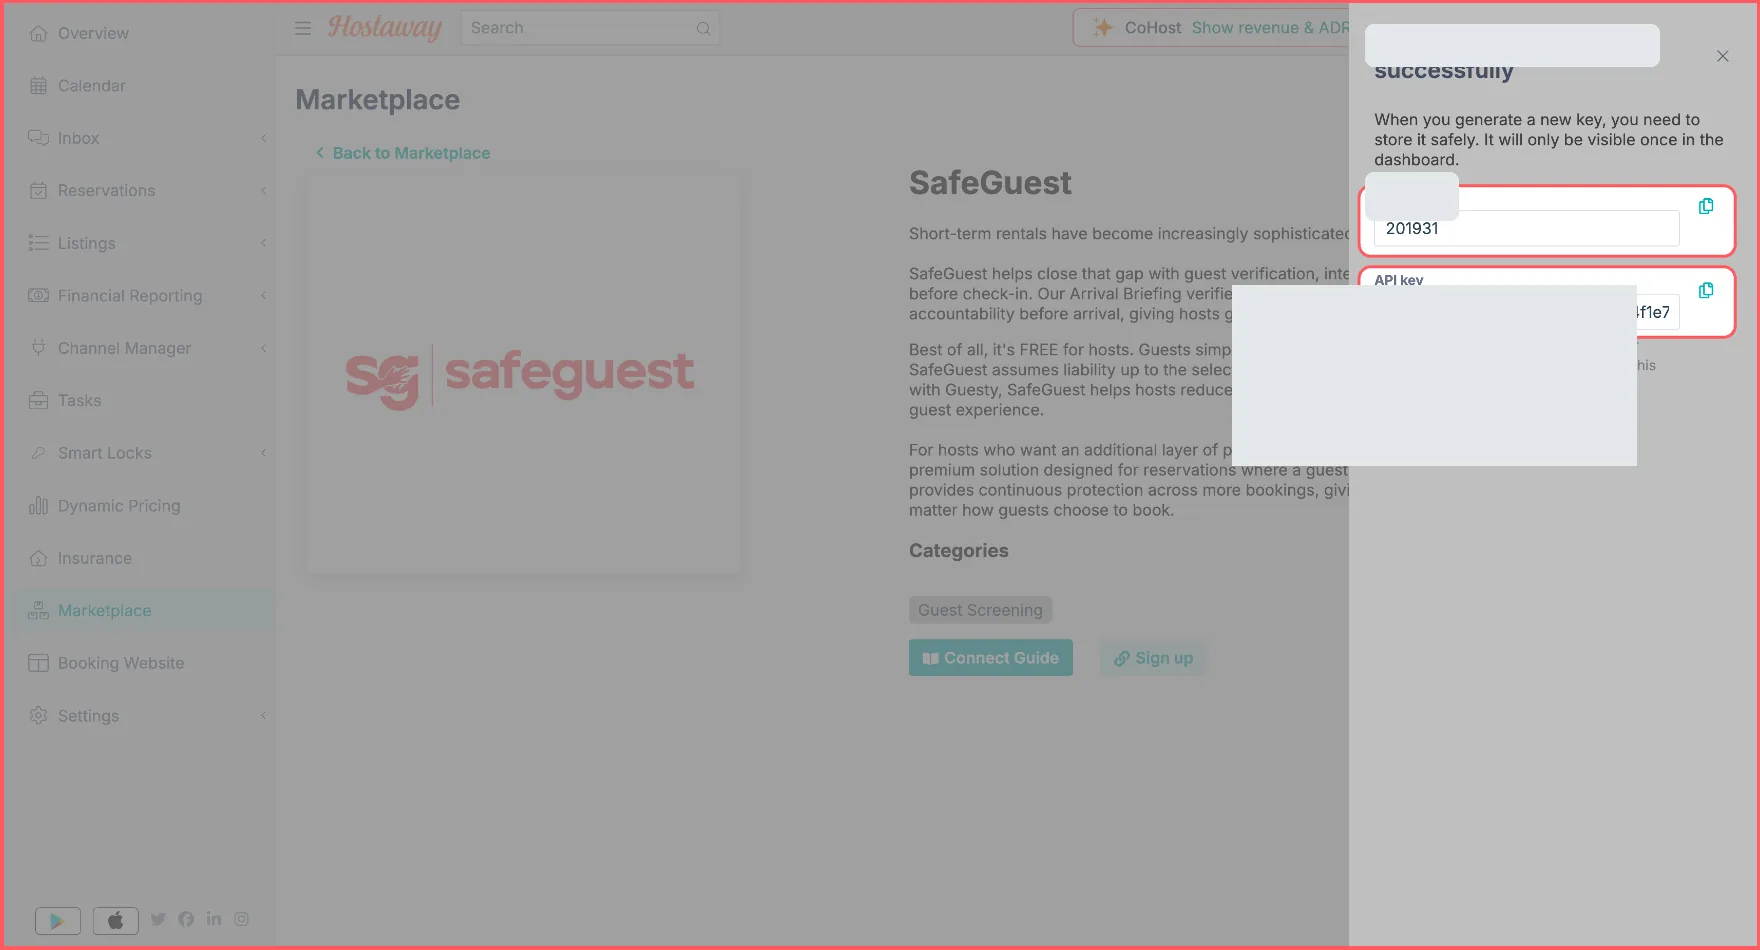
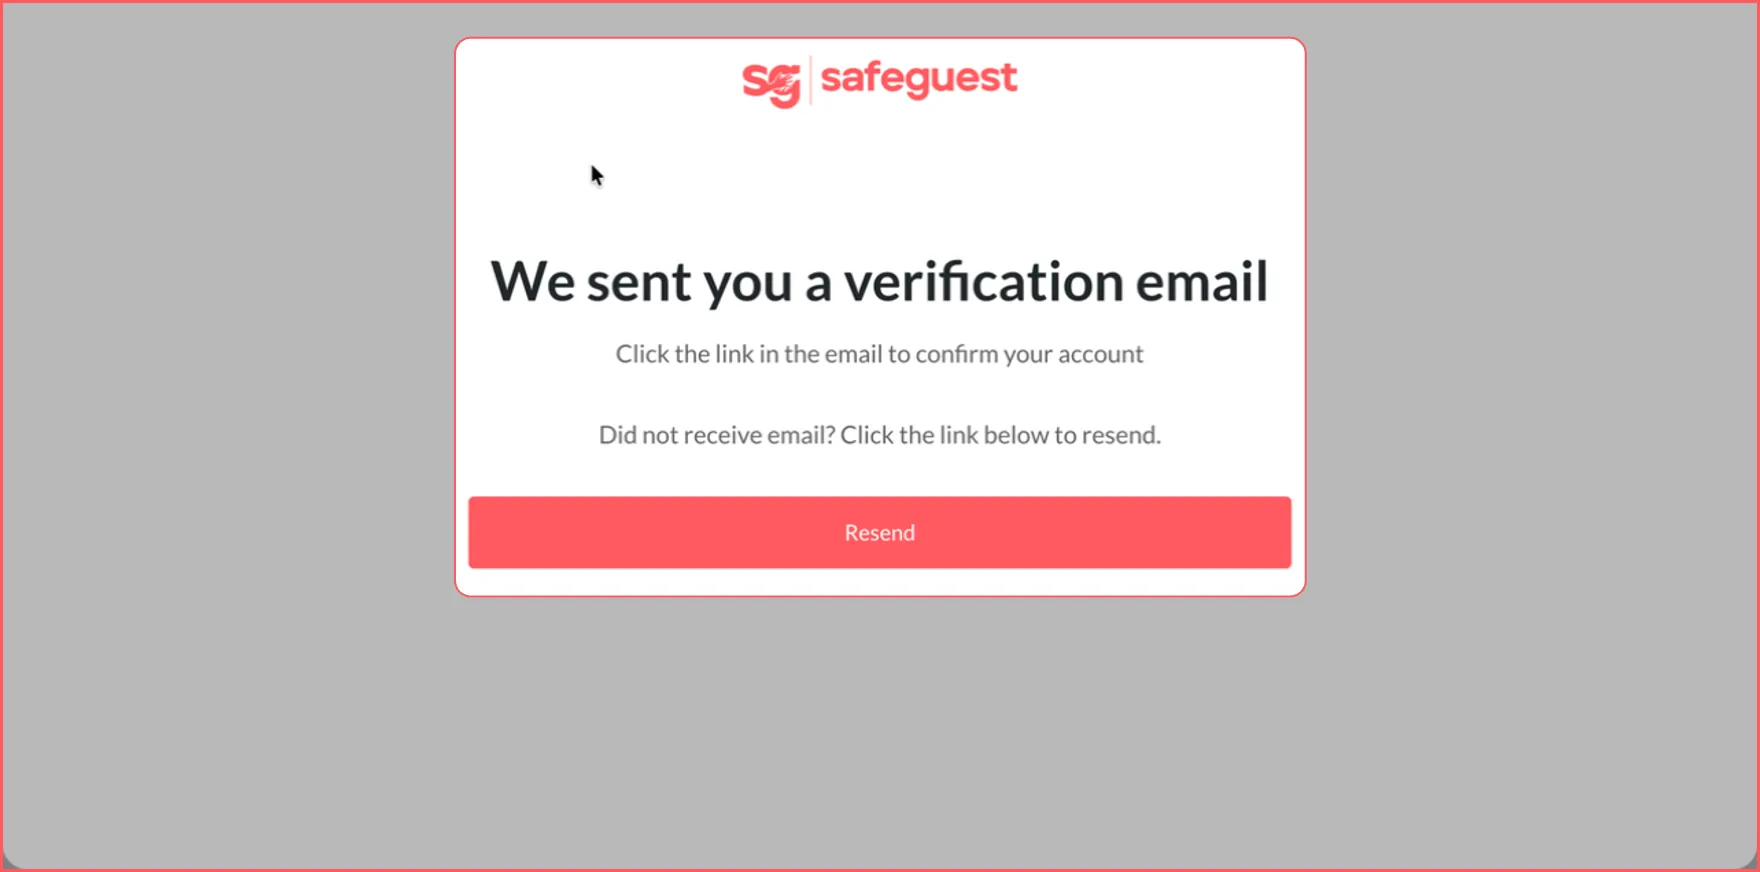
Step 5: Create and verify your SafeGuest account
- Enter your account details, accept the terms and conditions, and select Create an account.
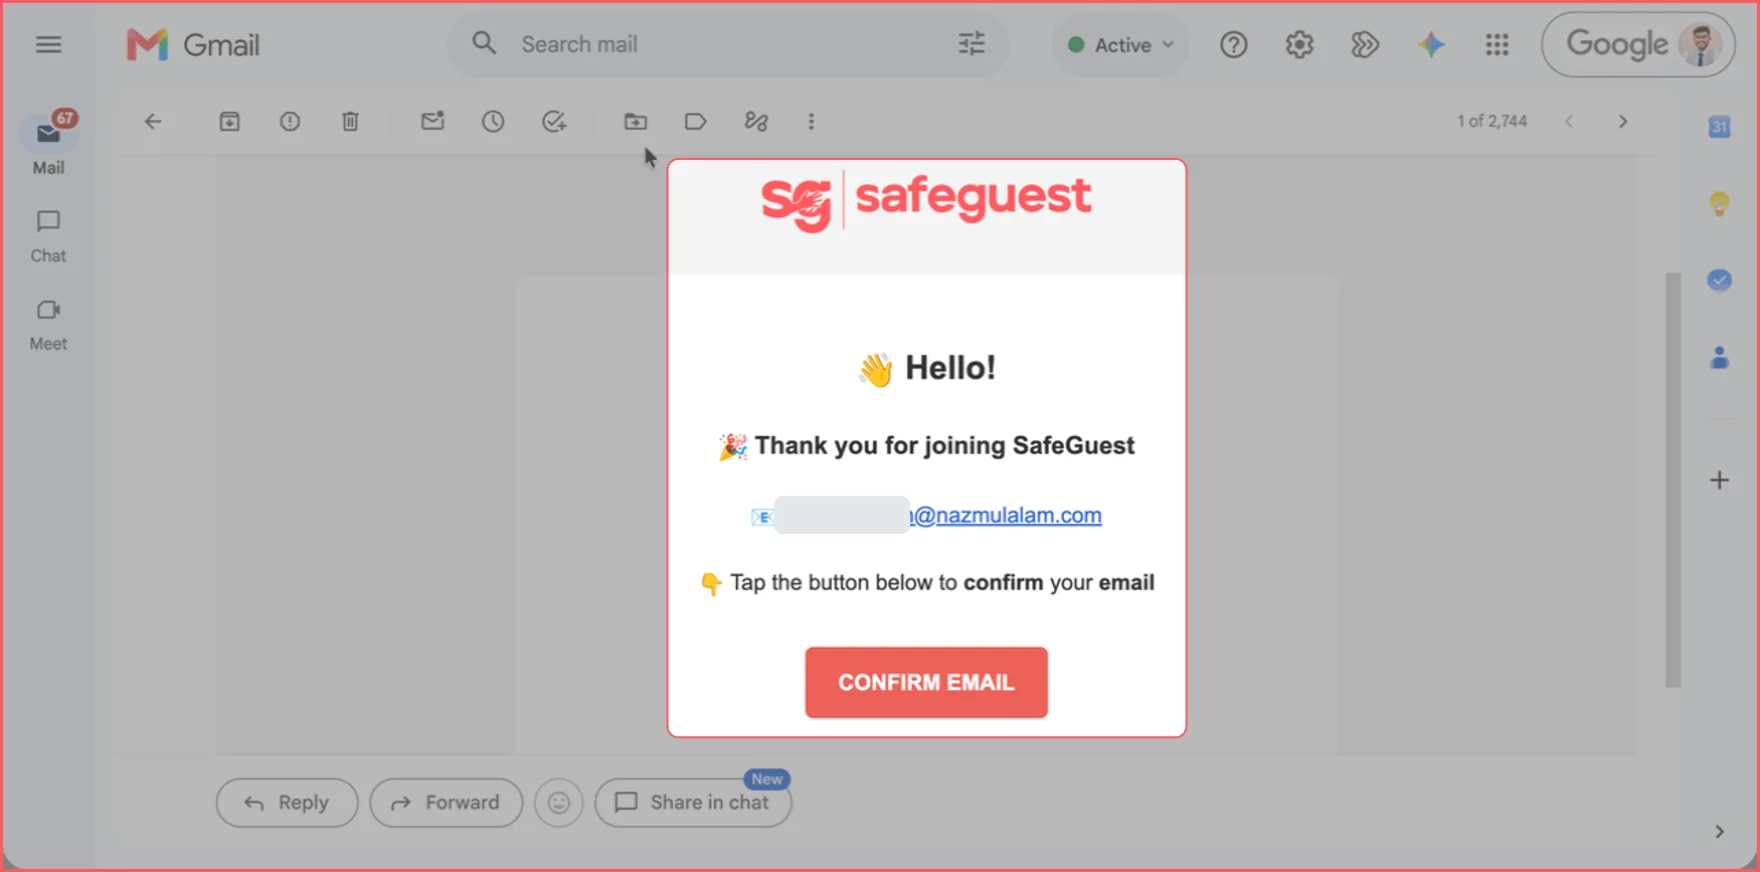
- Open the verification email sent to your registered address and select Confirm Email.
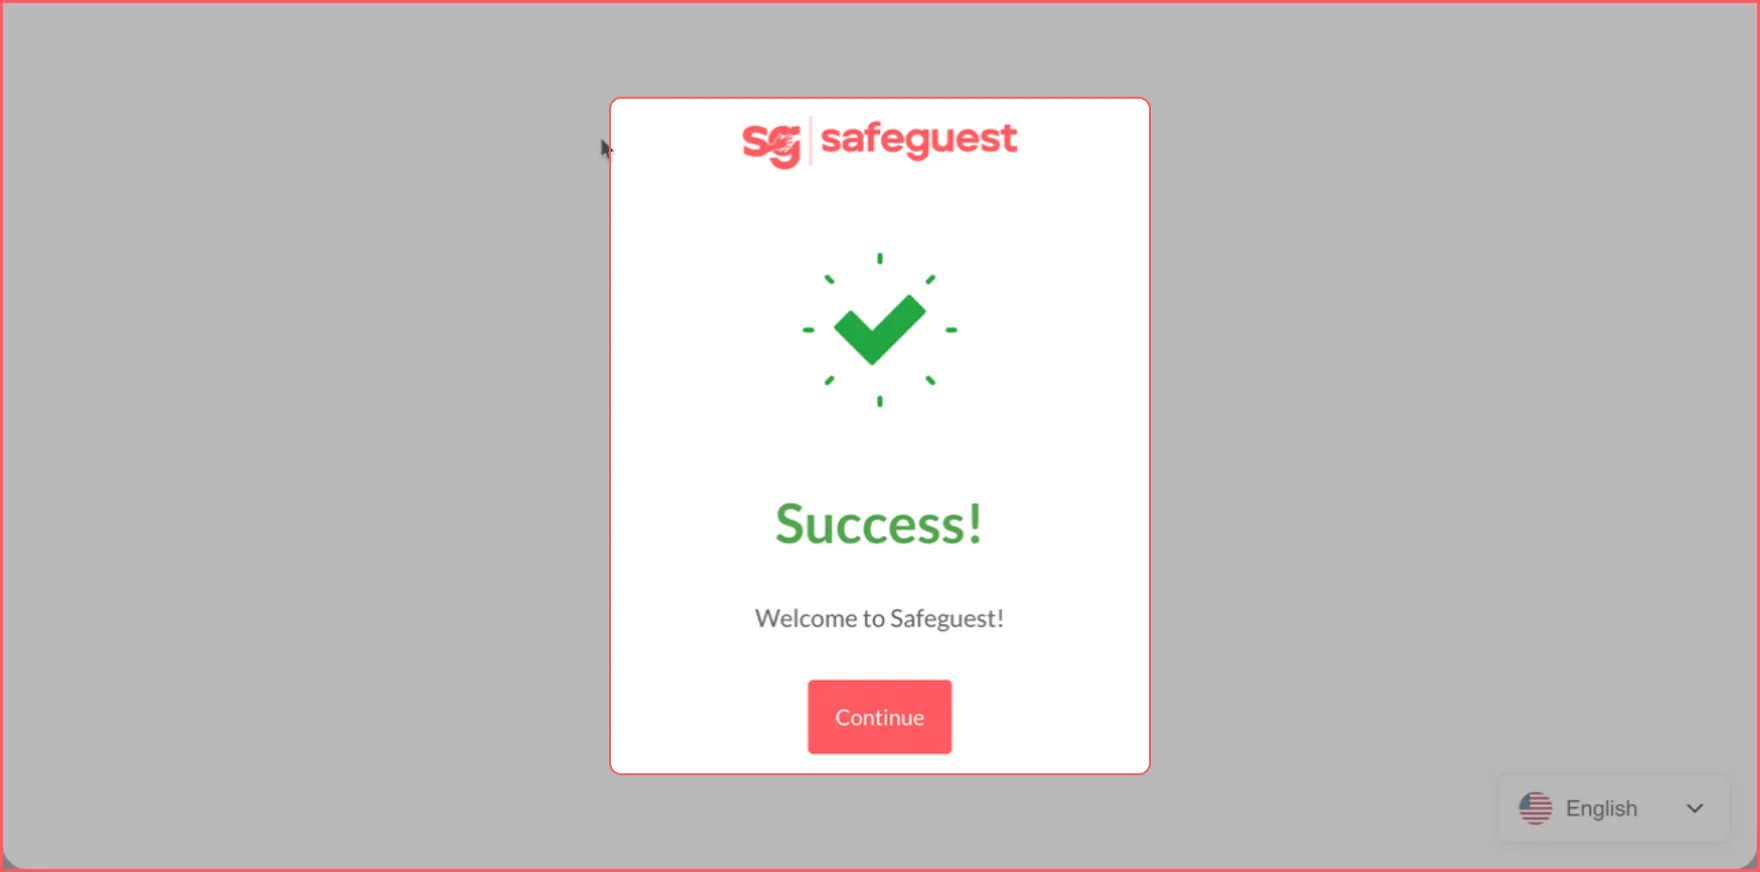
- Select Continue on the confirmation page.
Step 6: Select Hostaway during onboarding
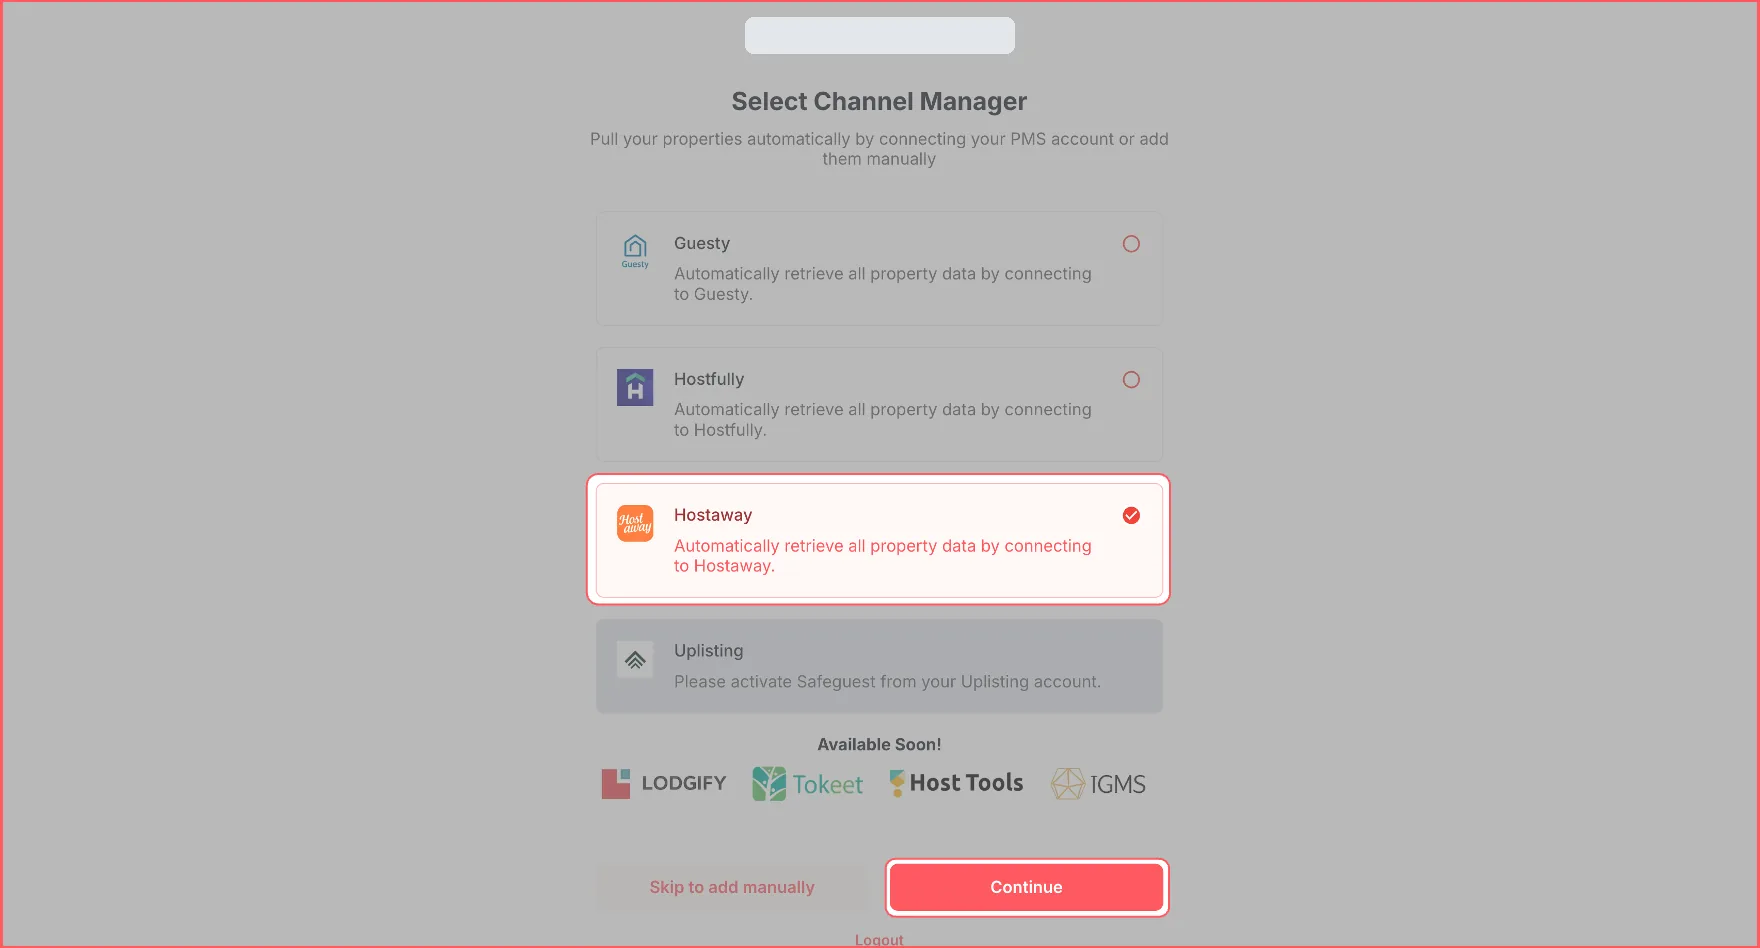
- Select Hostaway from the list of integrations, then select Continue.
- Enter the Account ID and API Key copied from Hostaway, then select Continue.
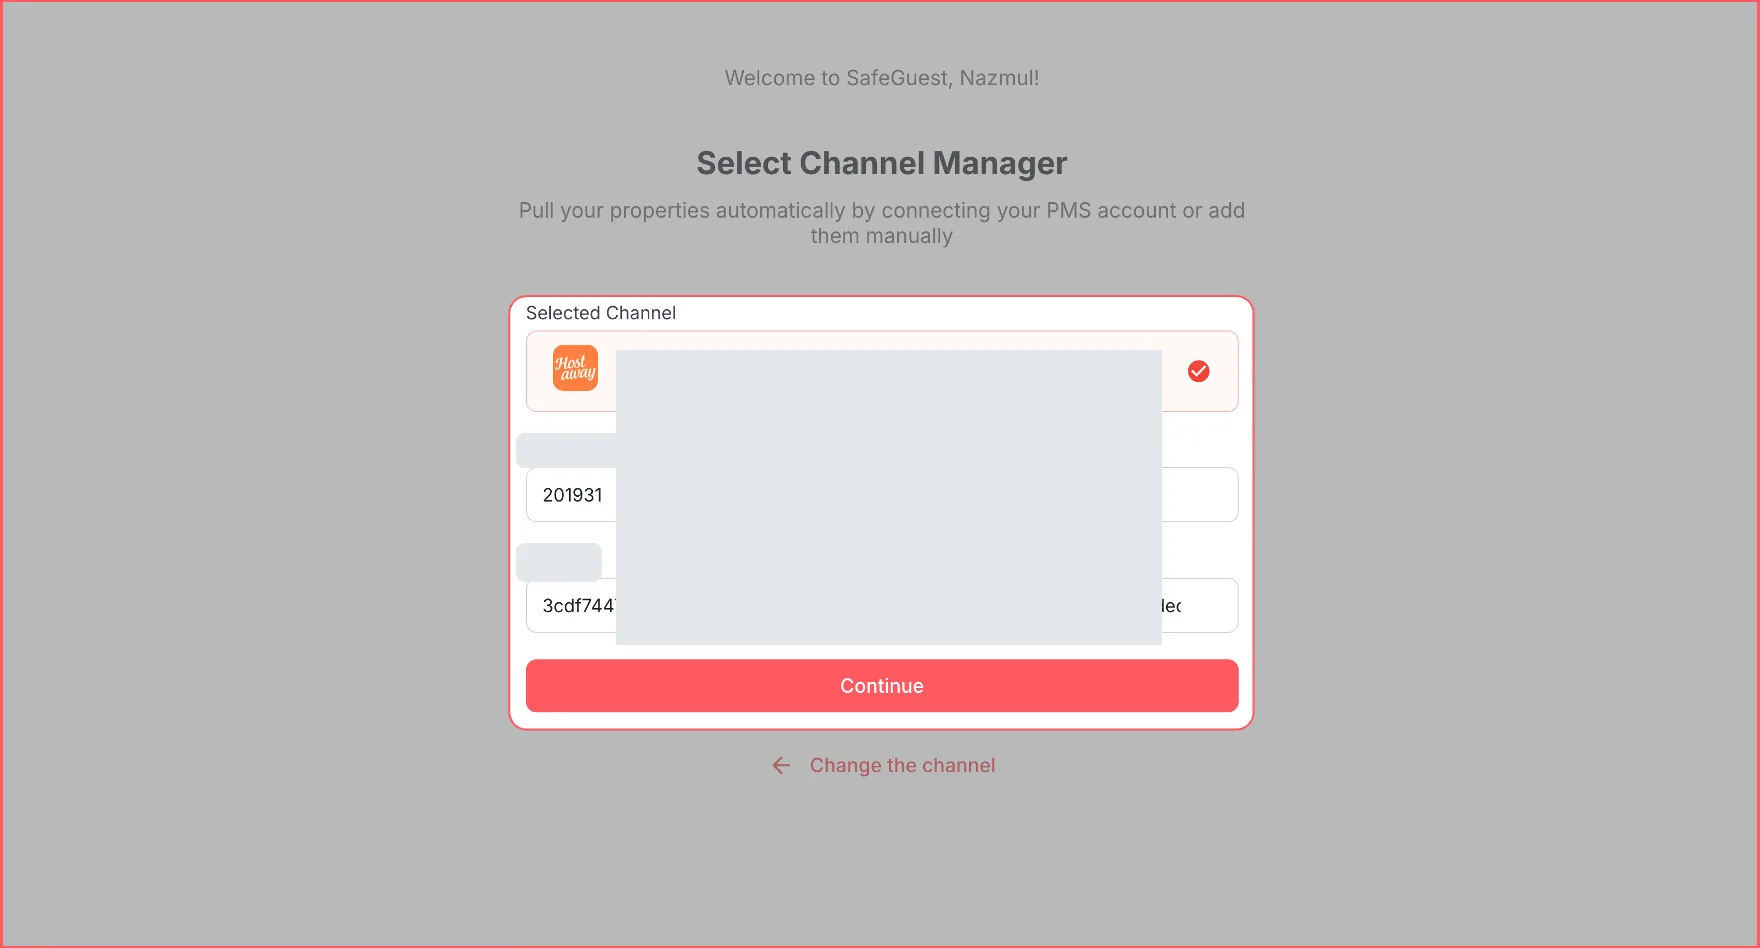
Step 7: Complete the setup banner steps
Follow the setup banner in your SafeGuest dashboard to complete the required account details.
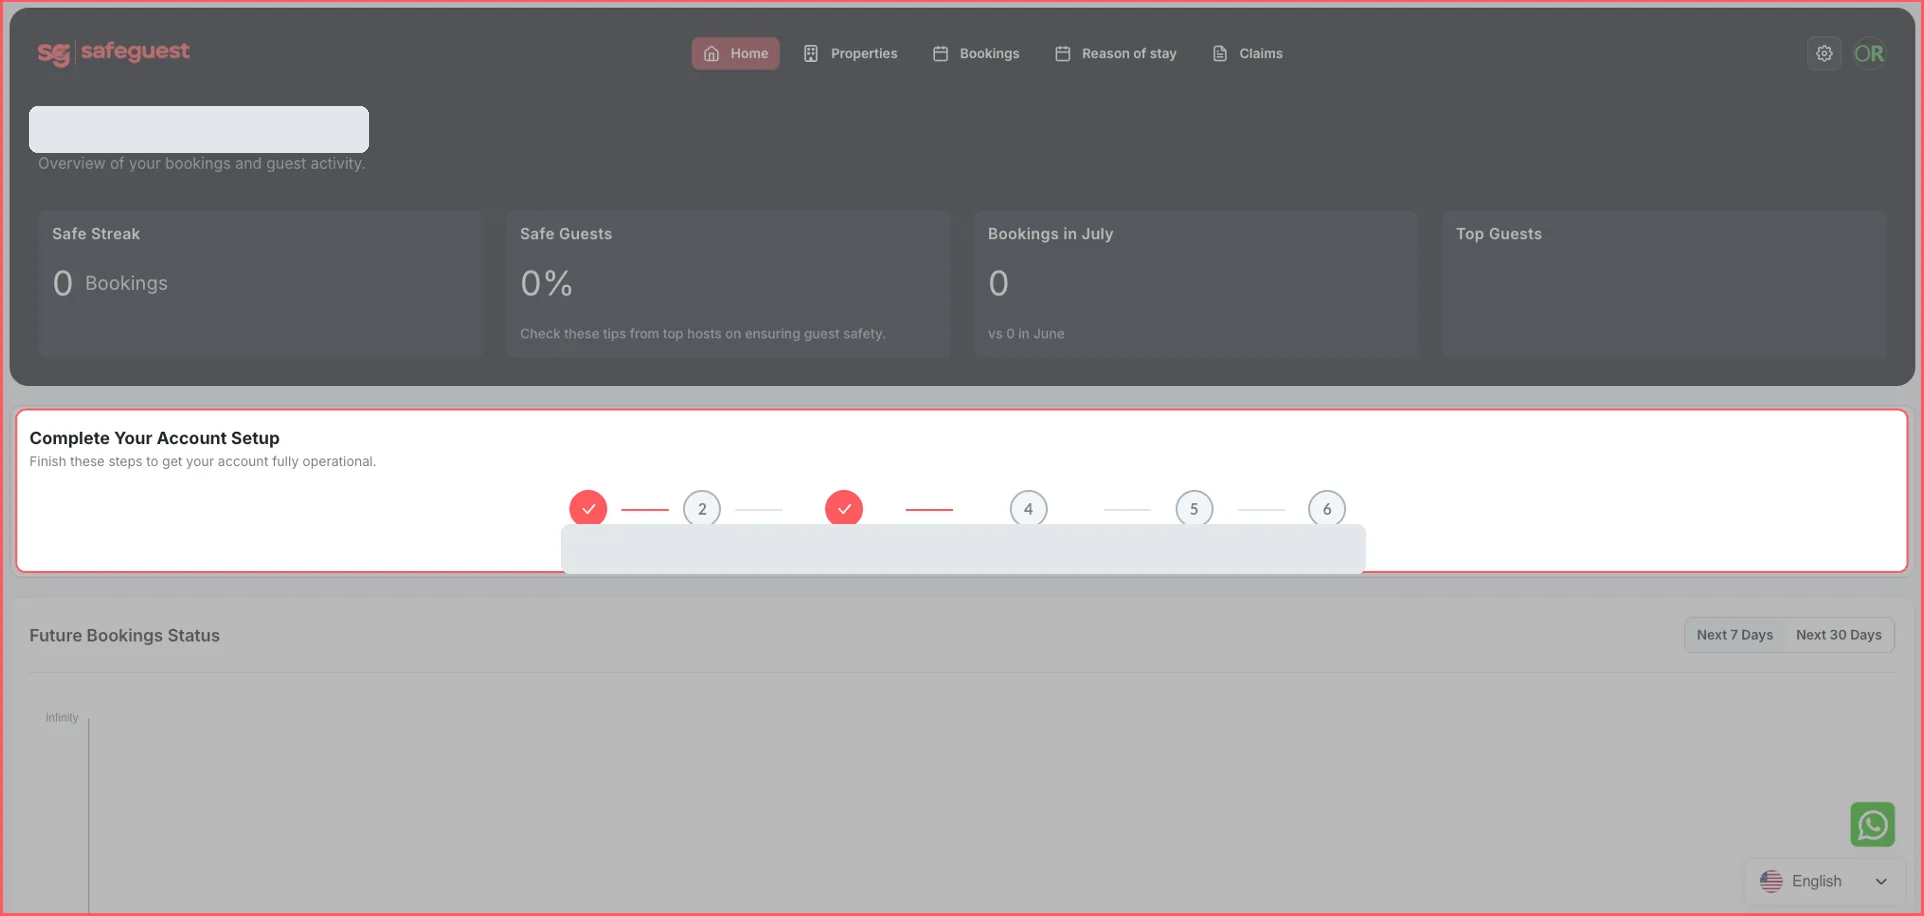
Step 8: Go to your SafeGuest Settings page
Open Settings from your SafeGuest dashboard.
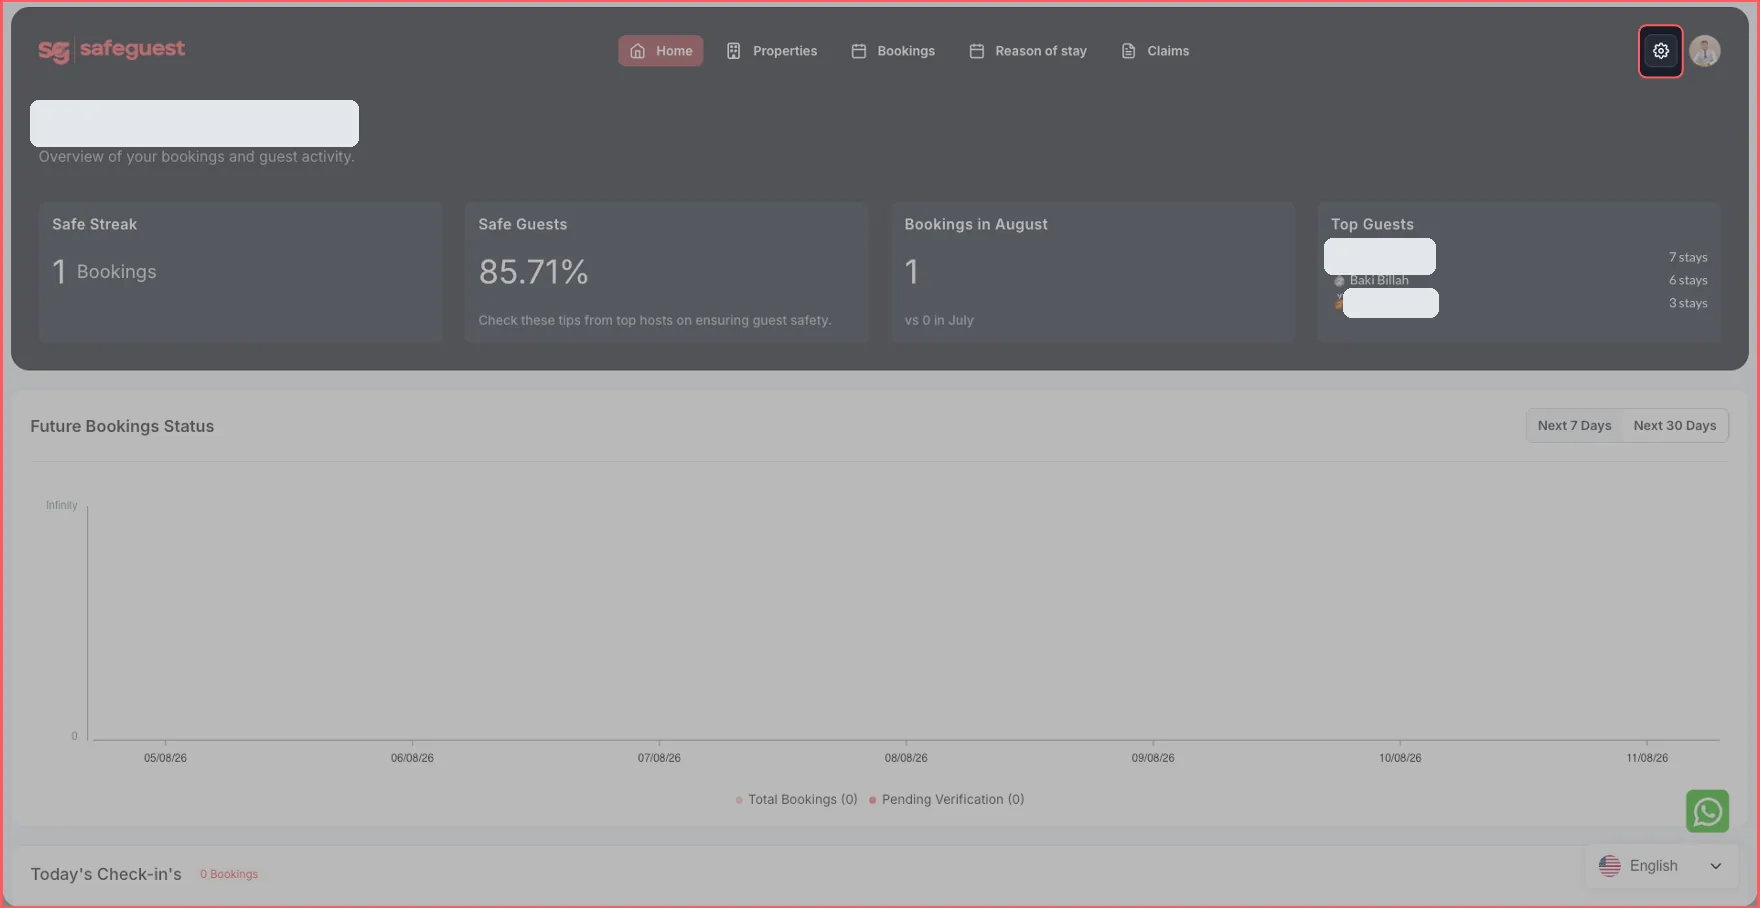
Step 9: Update profile details
Complete your profile details so guest communications and account information are accurate. Personal data is redacted in the example below.
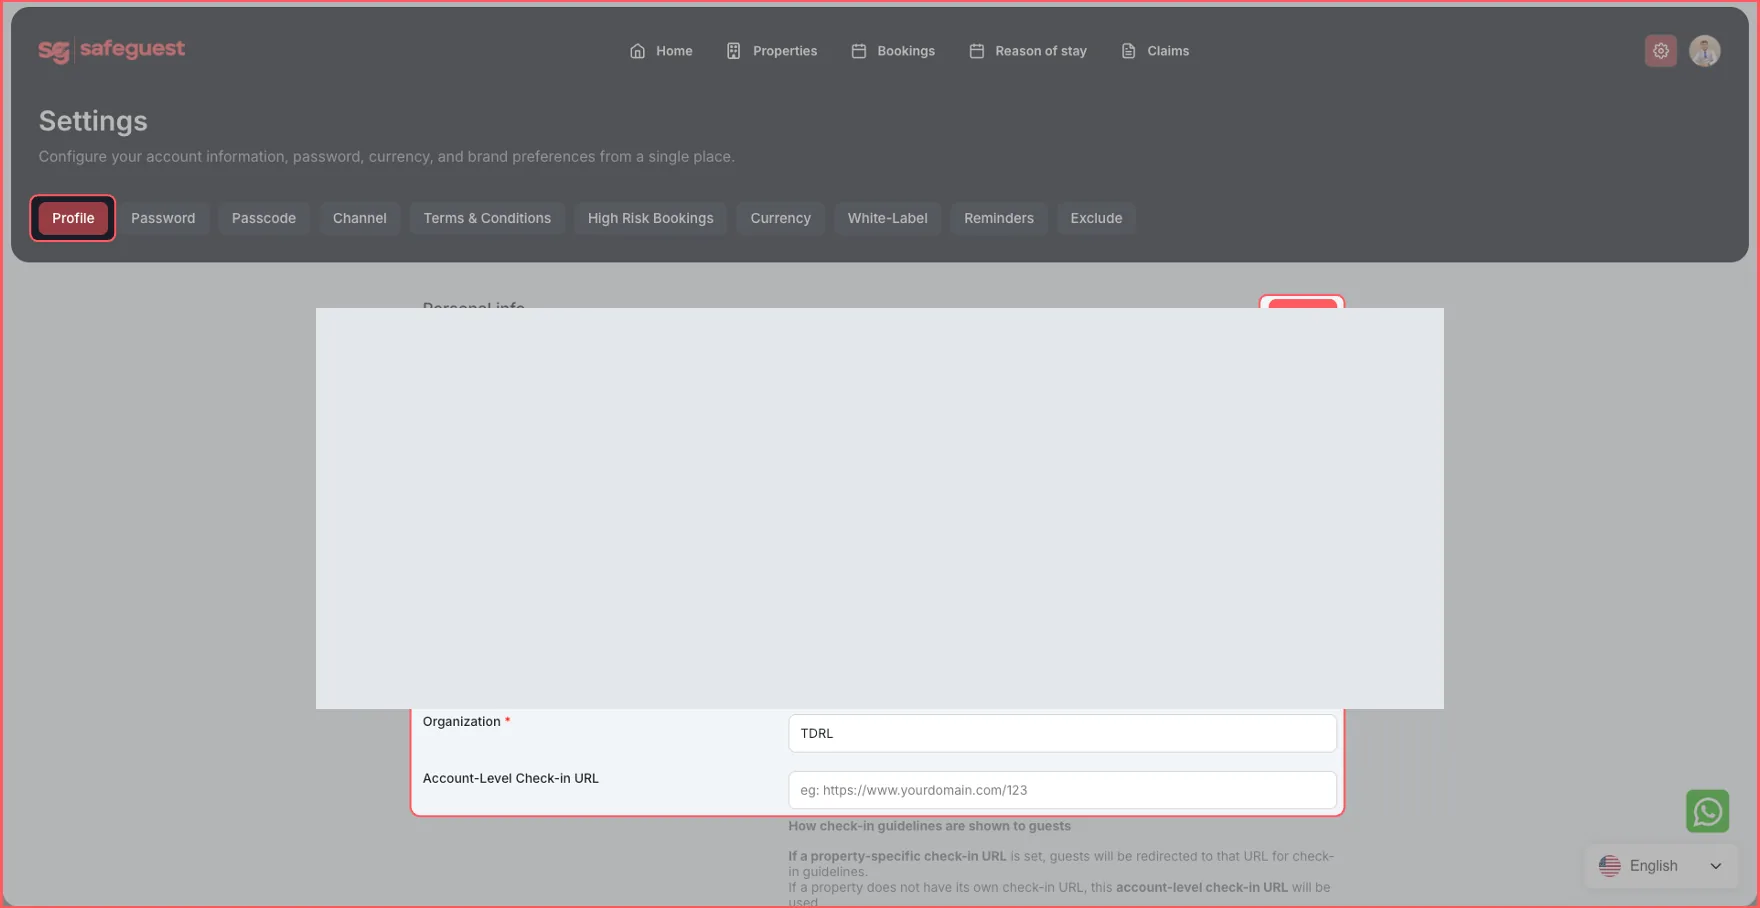
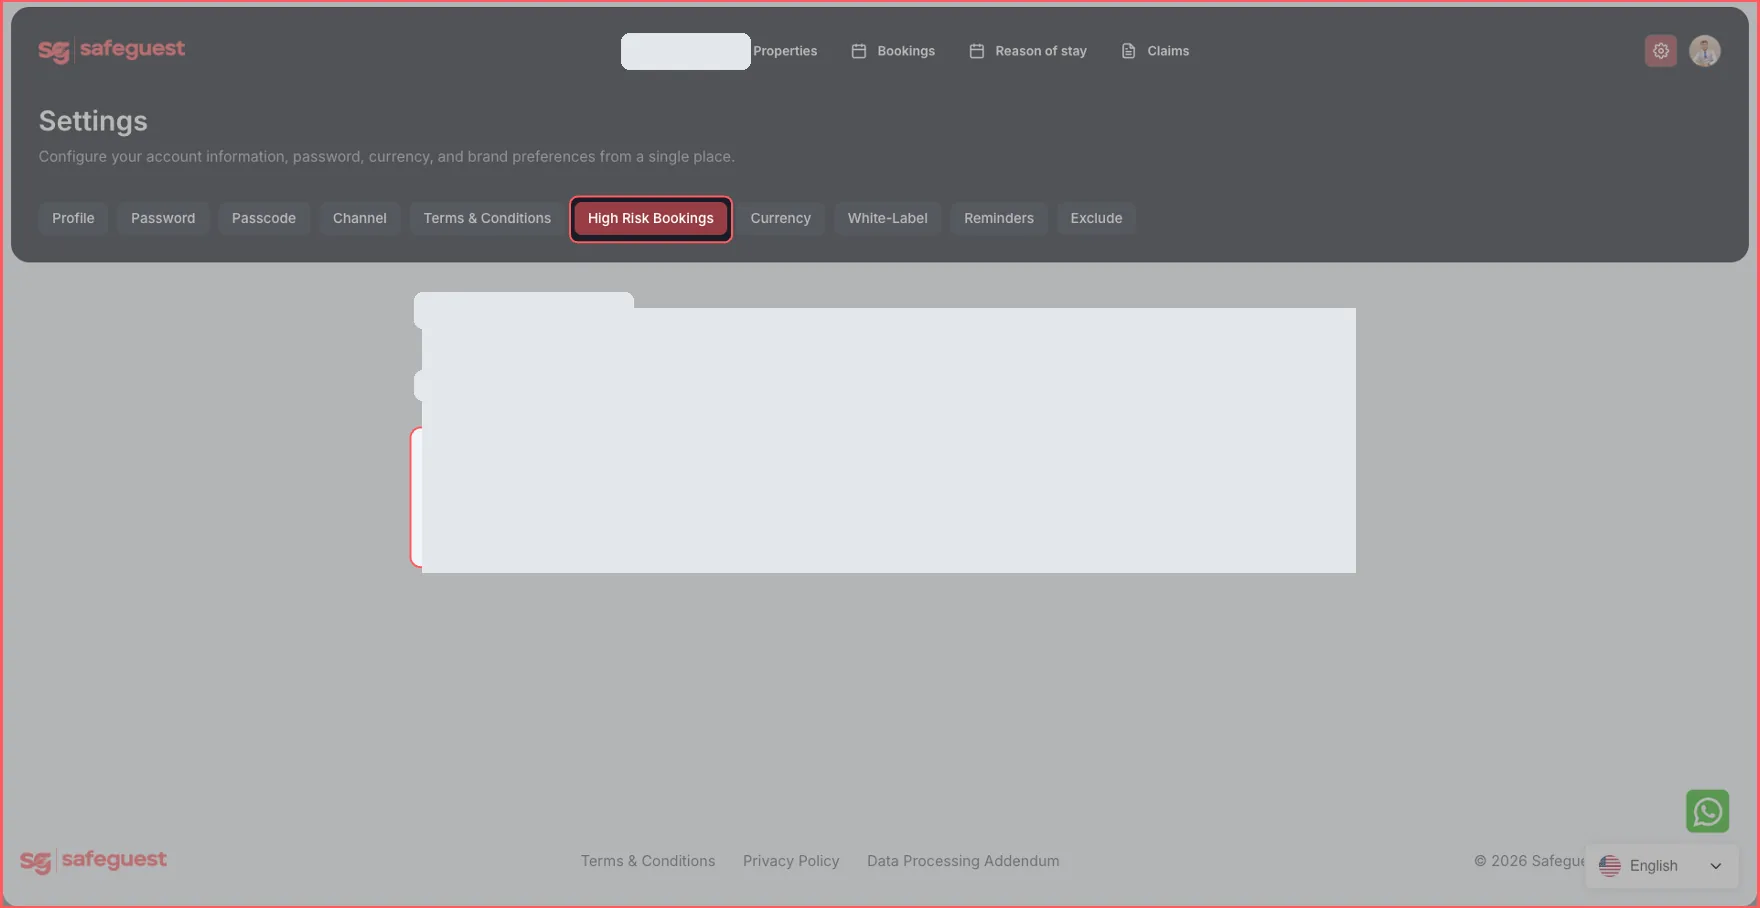
Step 10: Set up high-risk booking alerts
Add the email addresses that should receive alerts when SafeGuest identifies a high-risk booking.
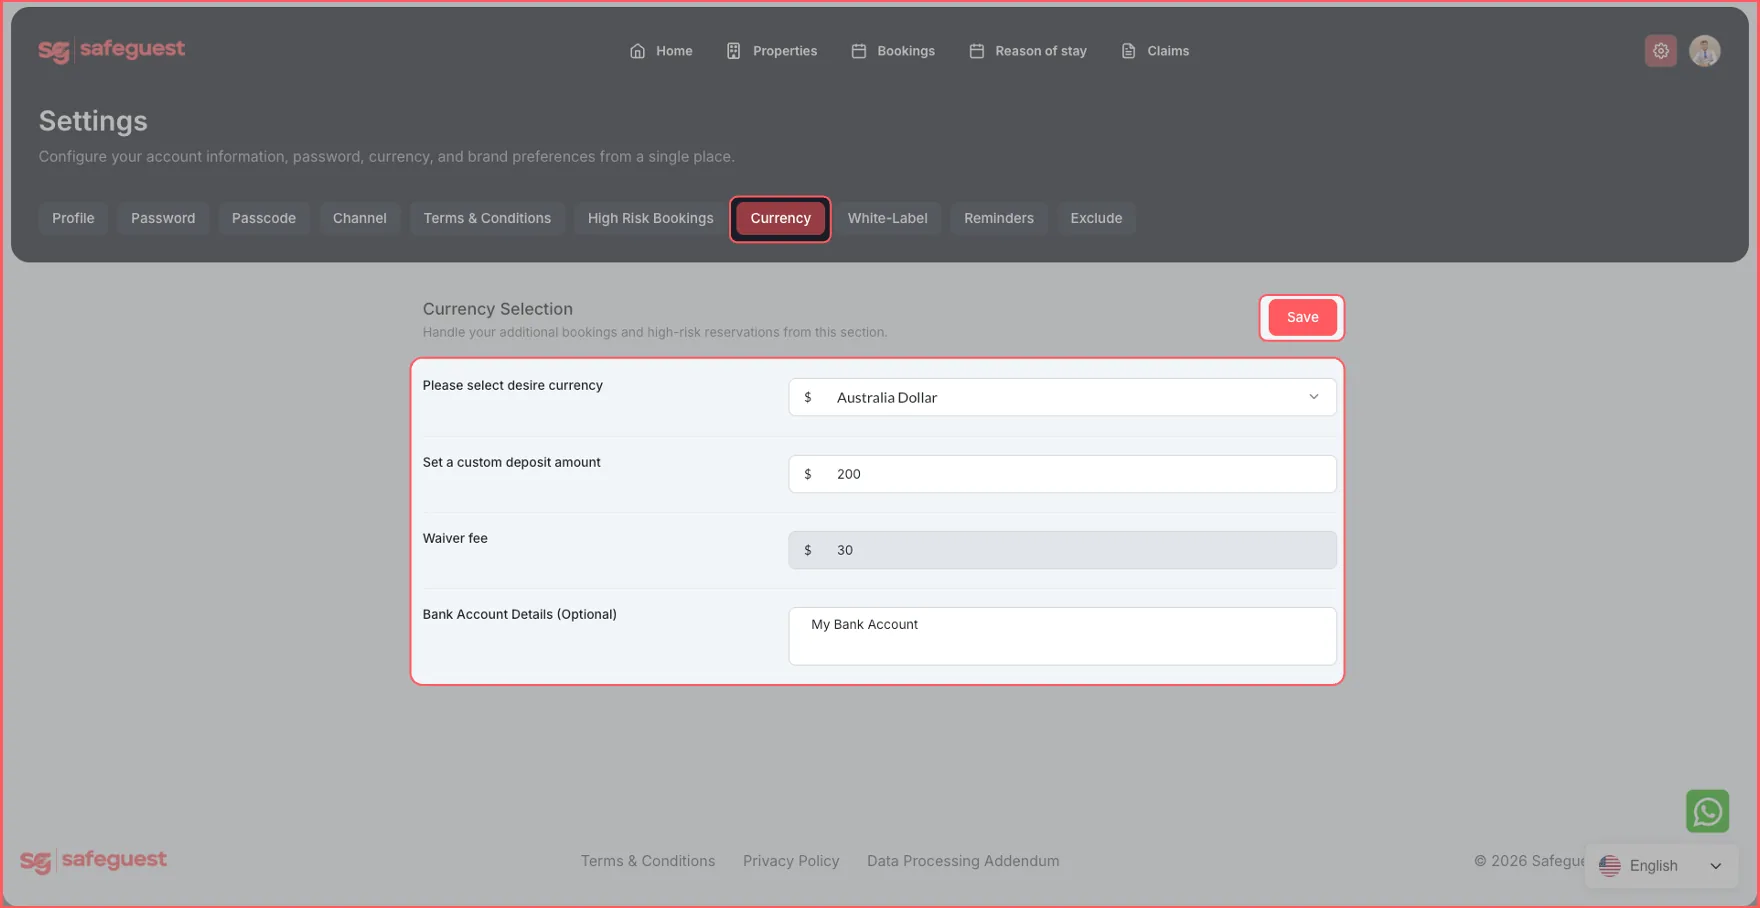
Step 11: Set currency and security deposit details
Choose the currency used by your properties and configure the security deposit settings that fit your operation.
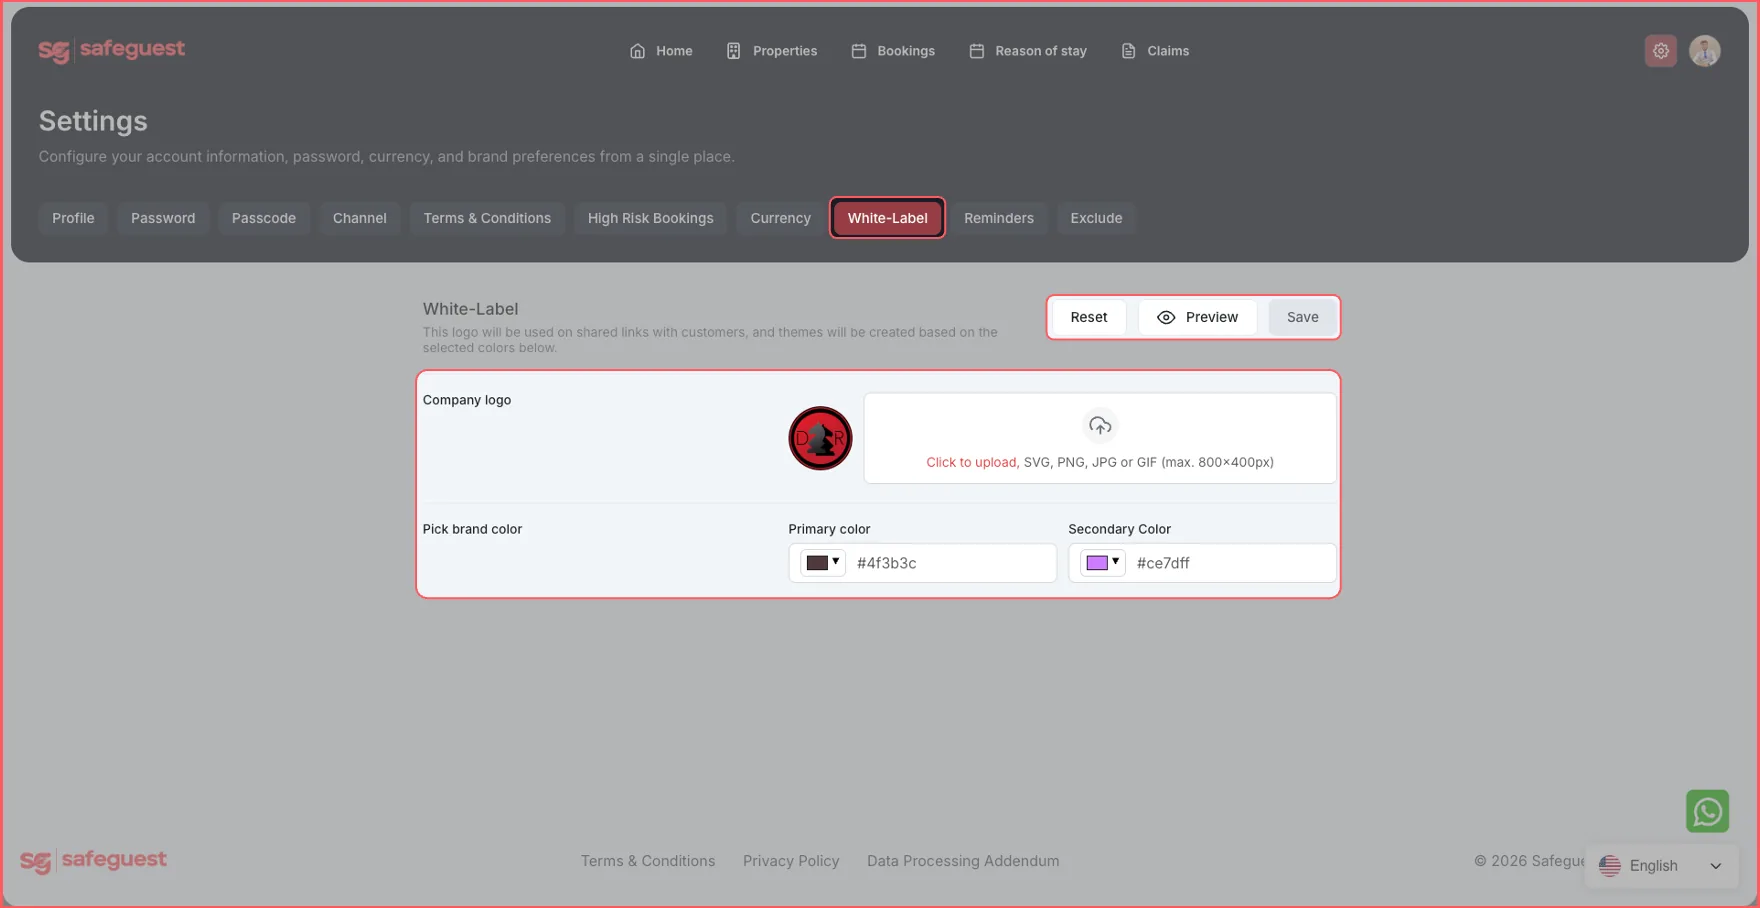
Step 12: Set up white label details
- Add your company logo.
- Choose your brand colours for the guest experience.
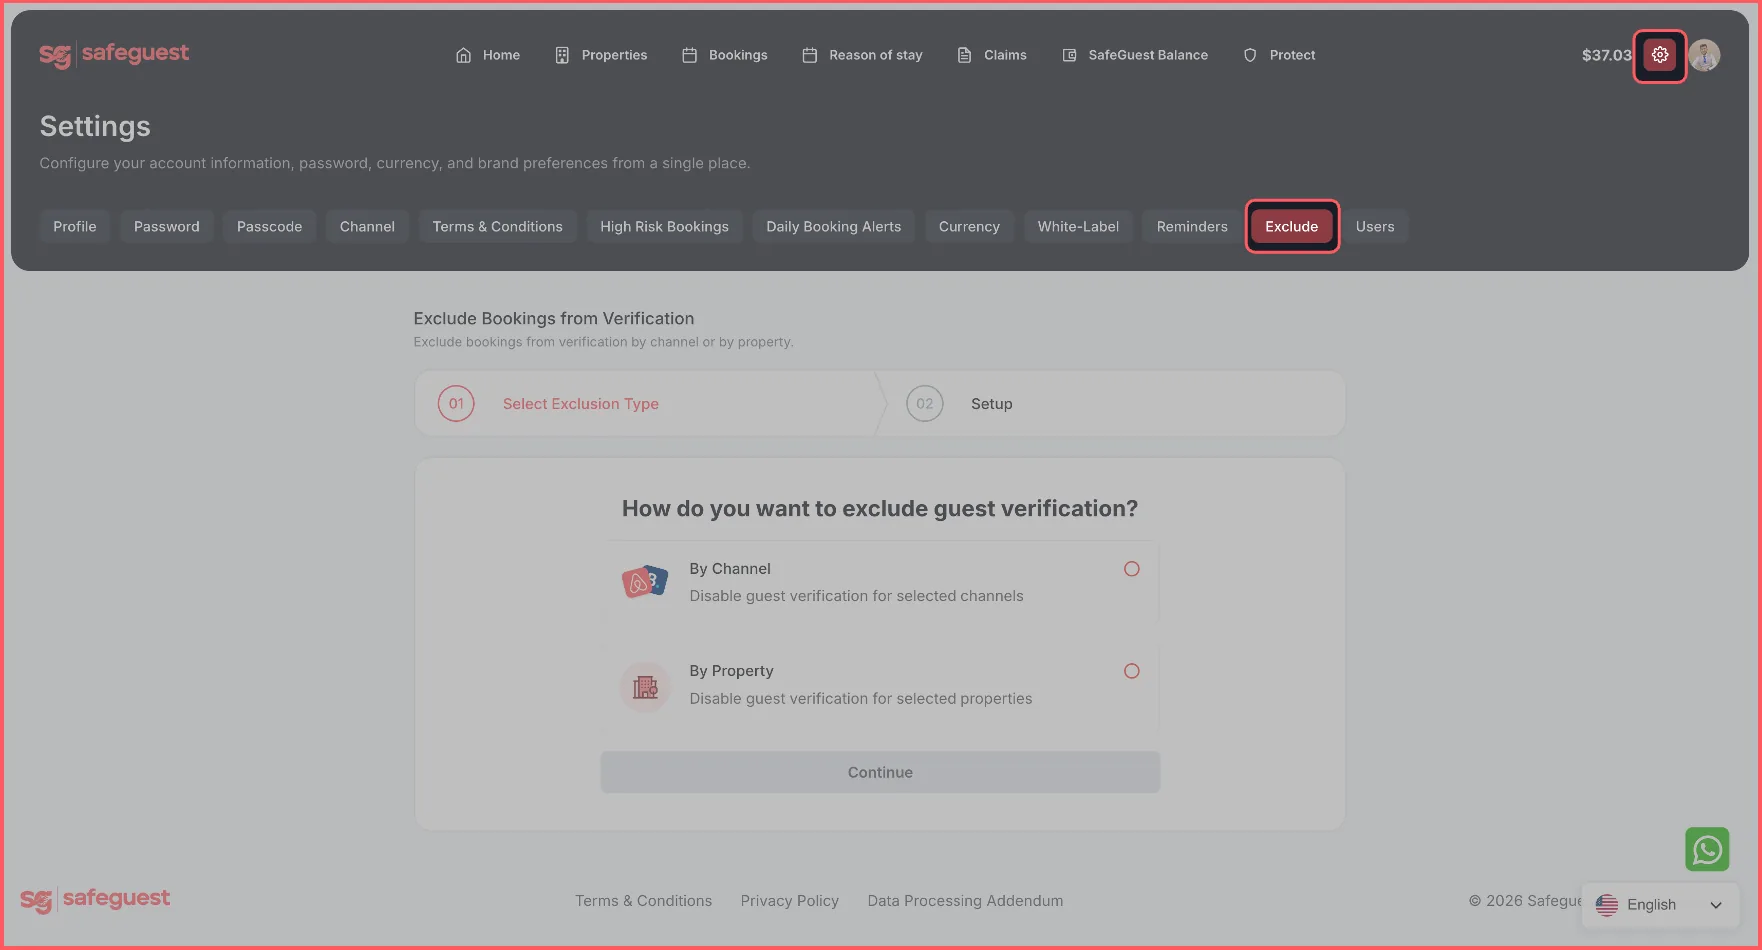
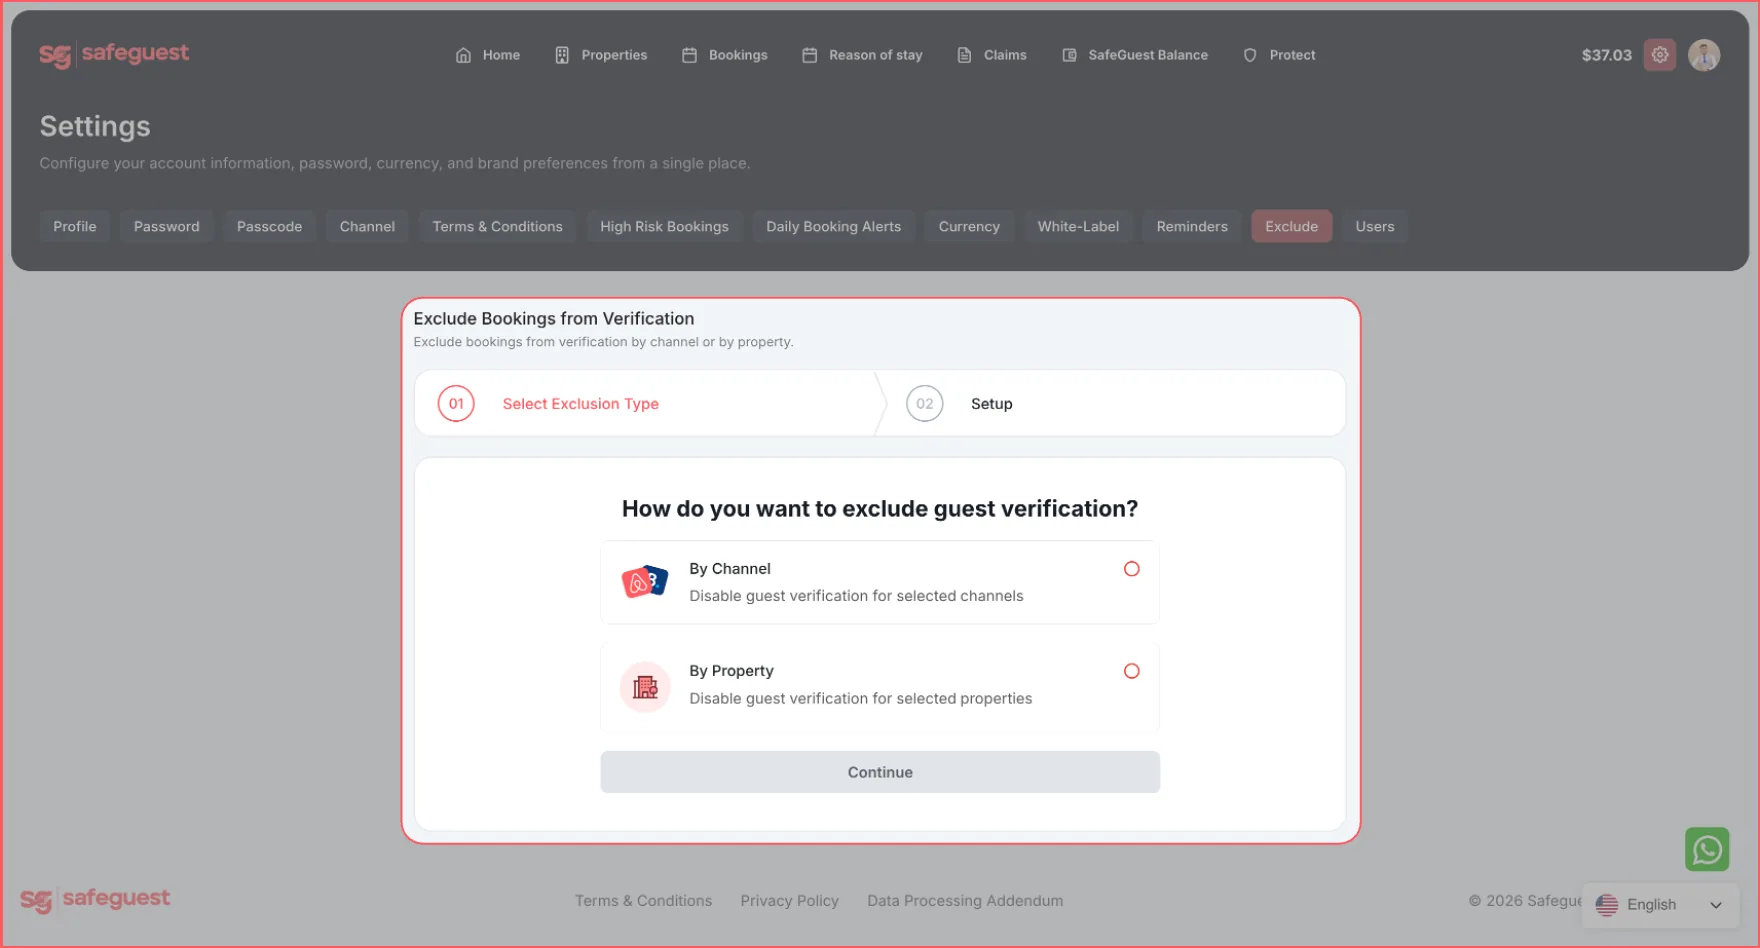
Step 13: Exclude channels or properties when needed
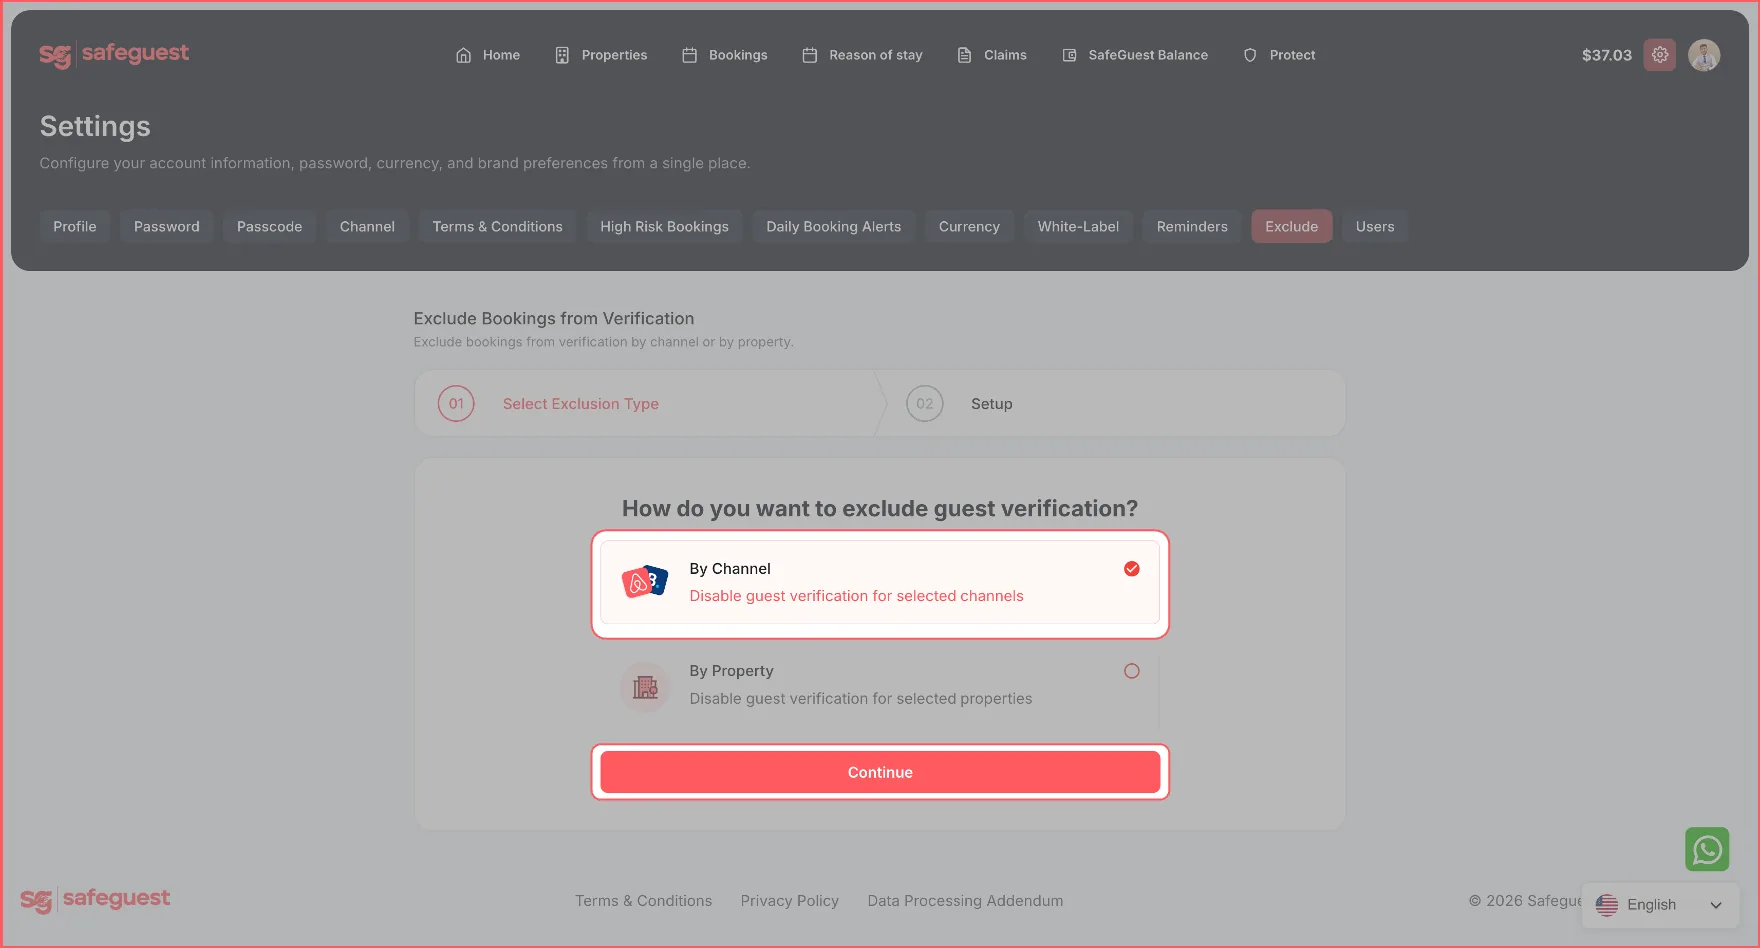
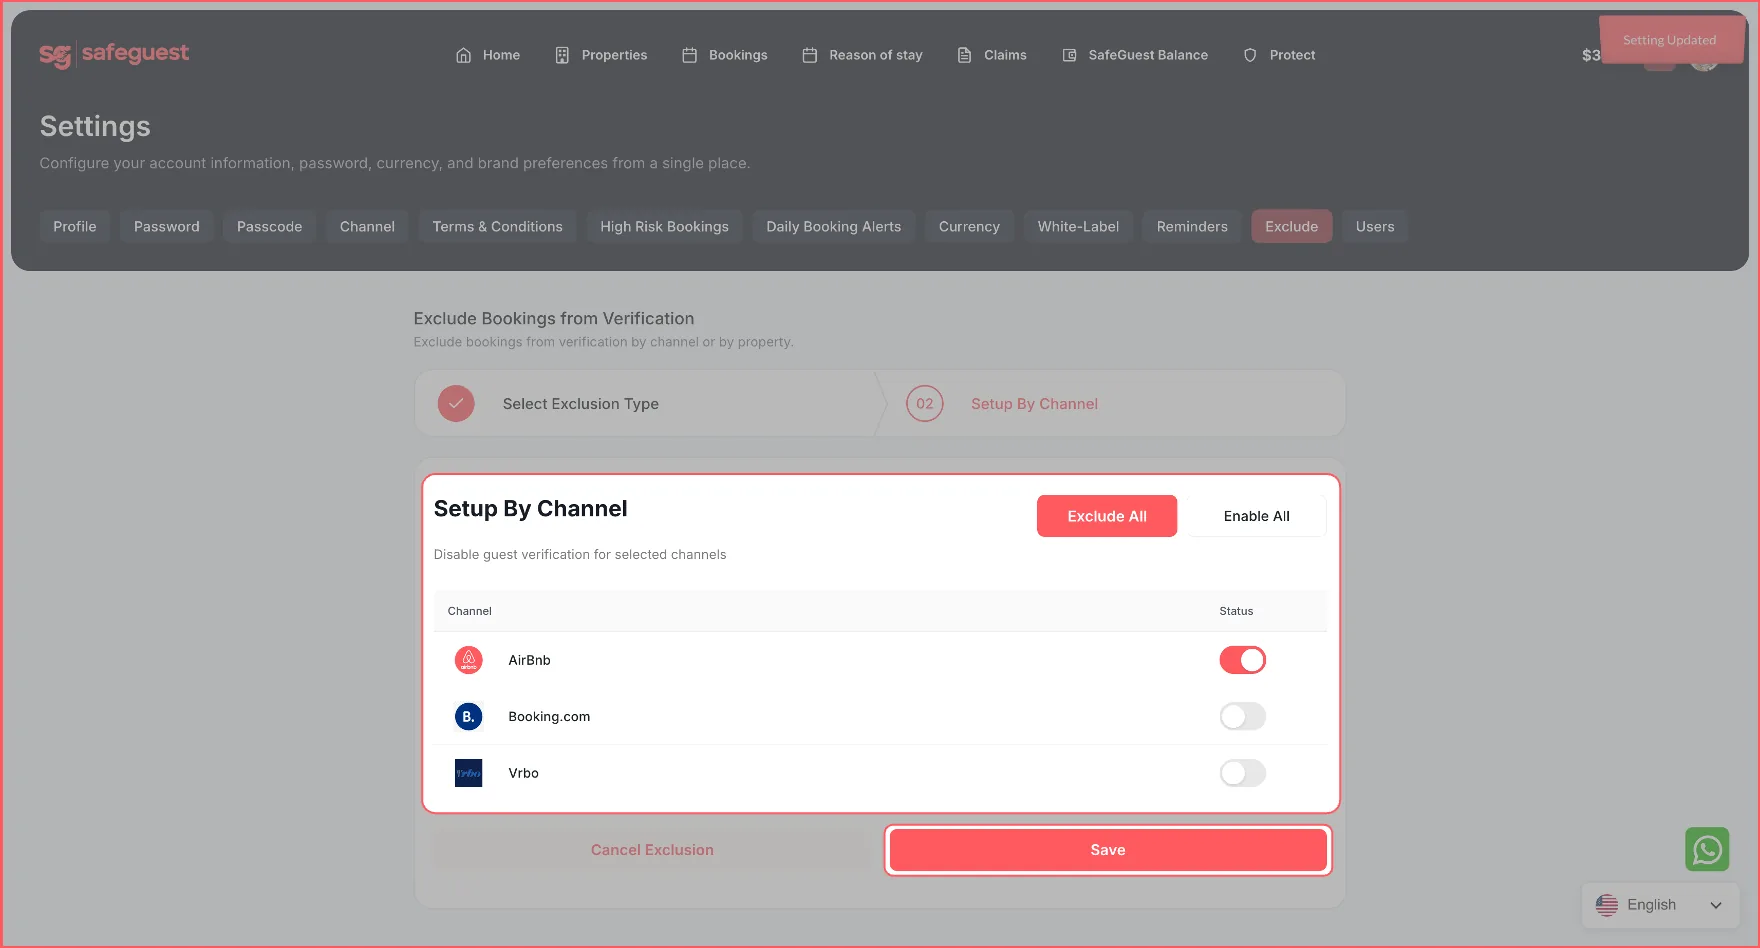
If you do not want SafeGuest verification URLs generated for bookings from a specific channel or property, use the Exclude setting. You can skip this step if every booking should be verified.
- Open Settings, then select Exclude.
- Choose By Channel or By Property.
- Select the channels or properties to exclude, then save the setting.
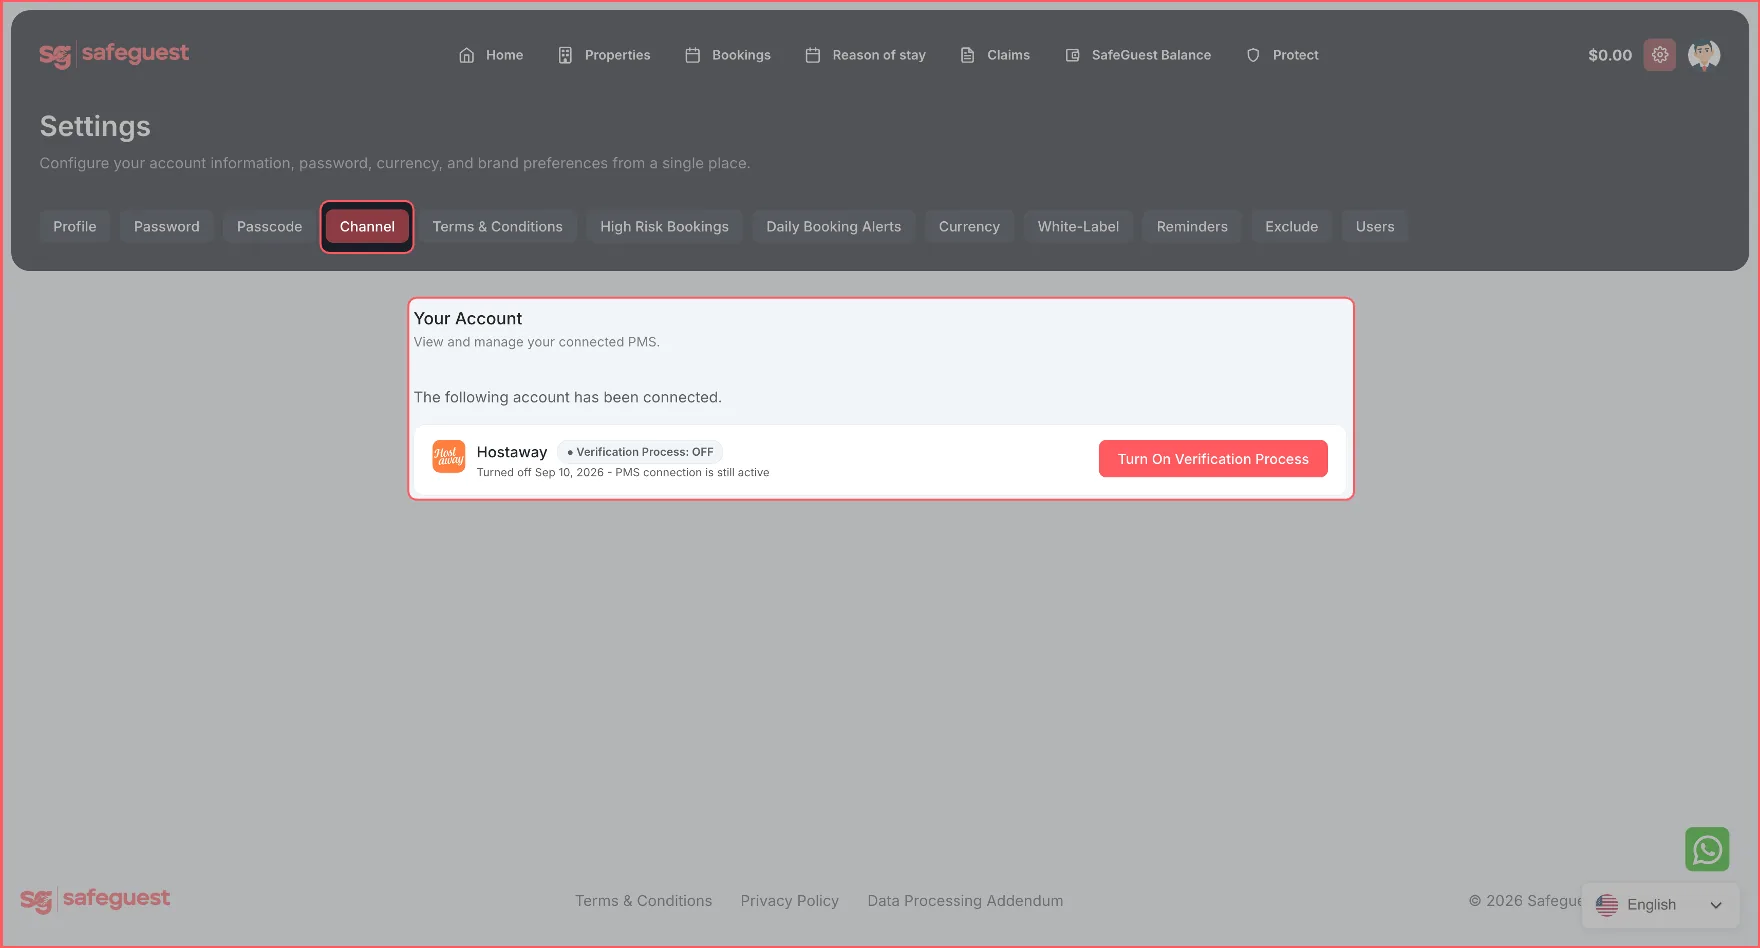
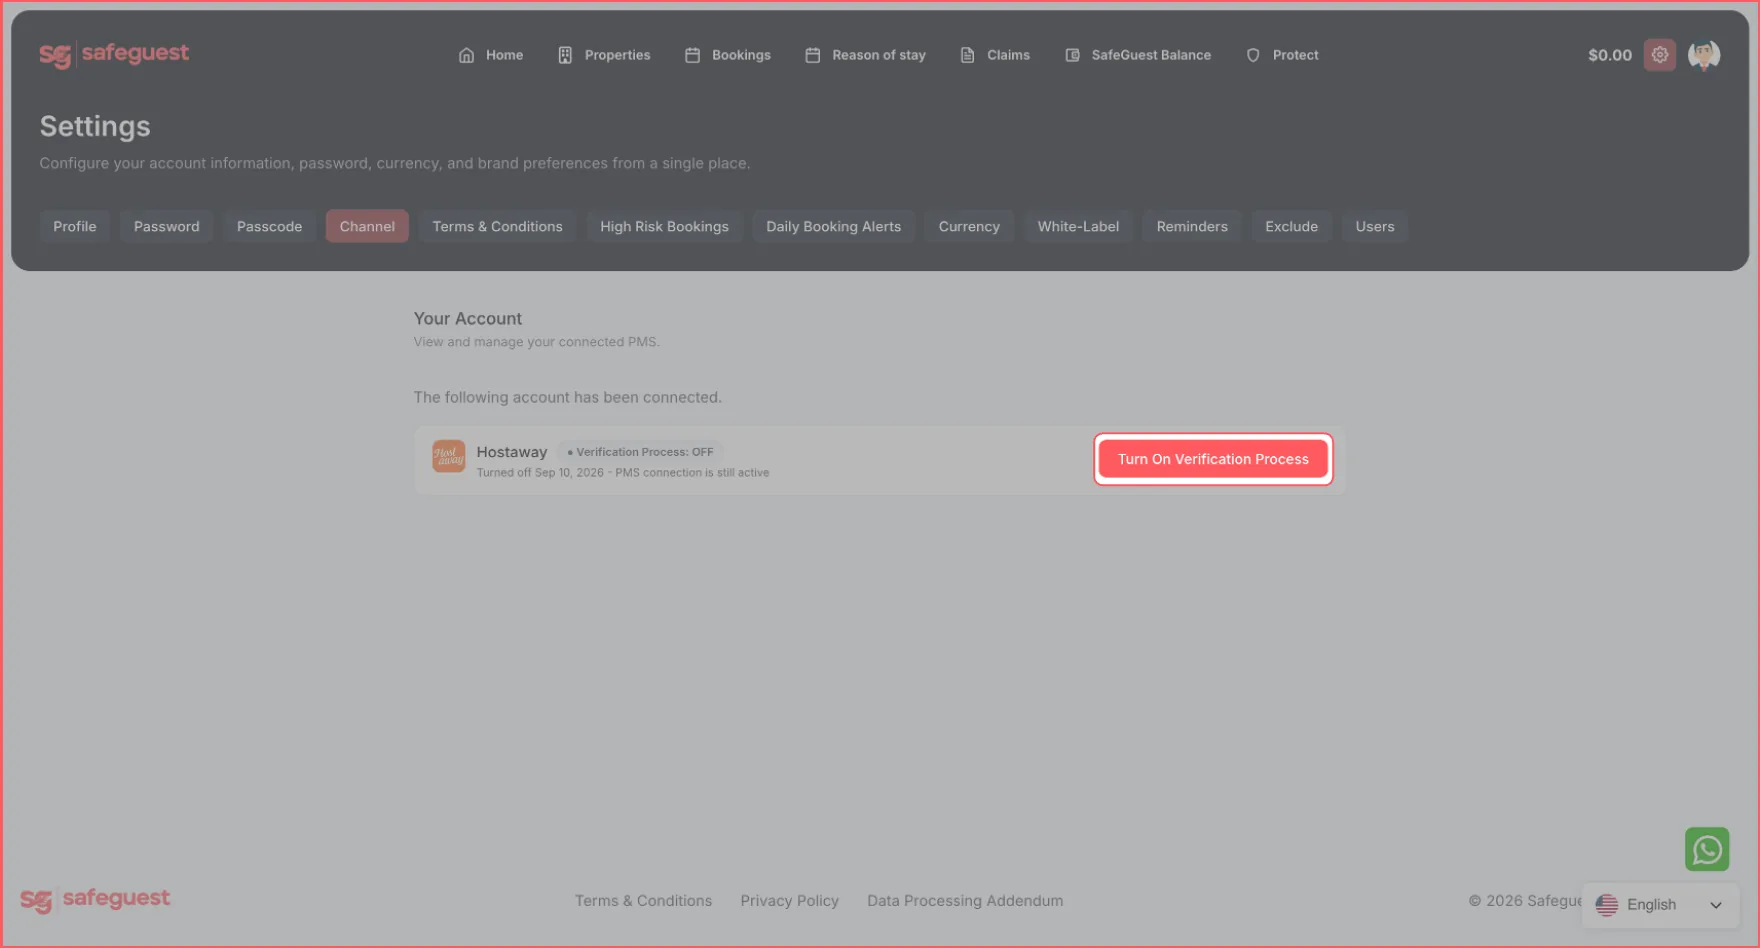
Step 14: Turn on the verification process
- Open the Channel tab and review the connected Hostaway account.
- Select Turn On Verification Process.
- Choose how verification URLs should reach guests.
Recommended: choose Send automatically from SafeGuest so SafeGuest sends the verification URL by OTA message, email, or SMS. If you choose Send via Hostaway automation, complete Step 17.
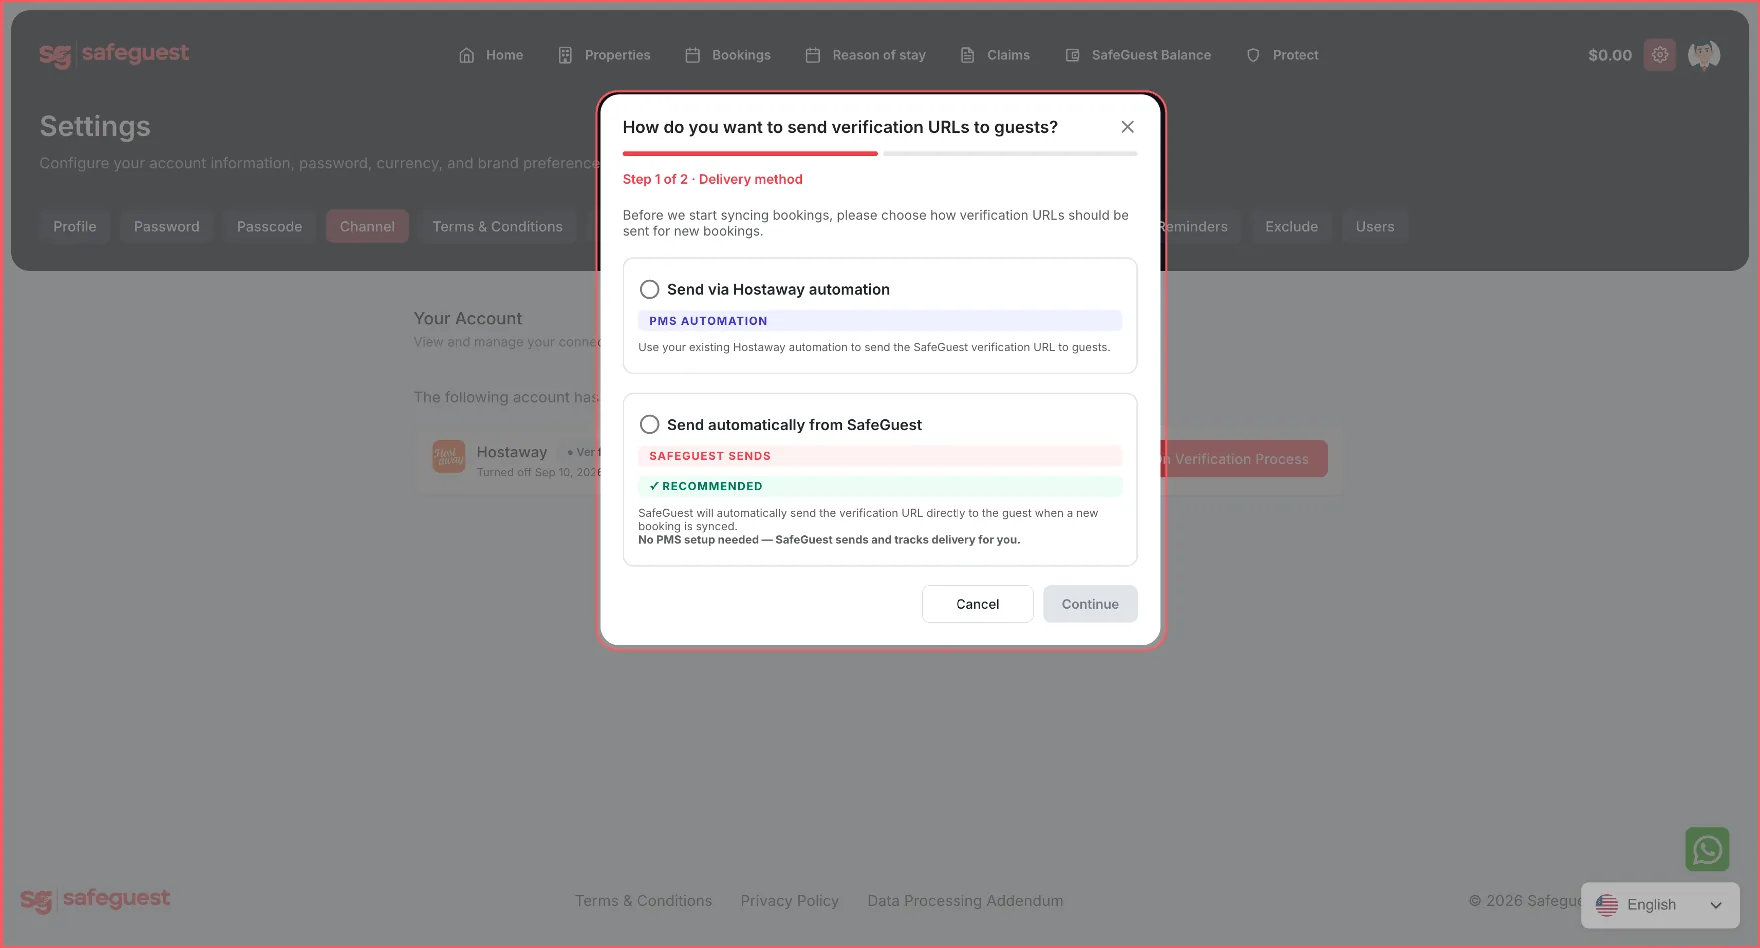
Step 15: Verify your properties in SafeGuest
- Open Properties from the SafeGuest navigation.
- Allow the Hostaway properties to synchronise. This usually takes less than one minute.
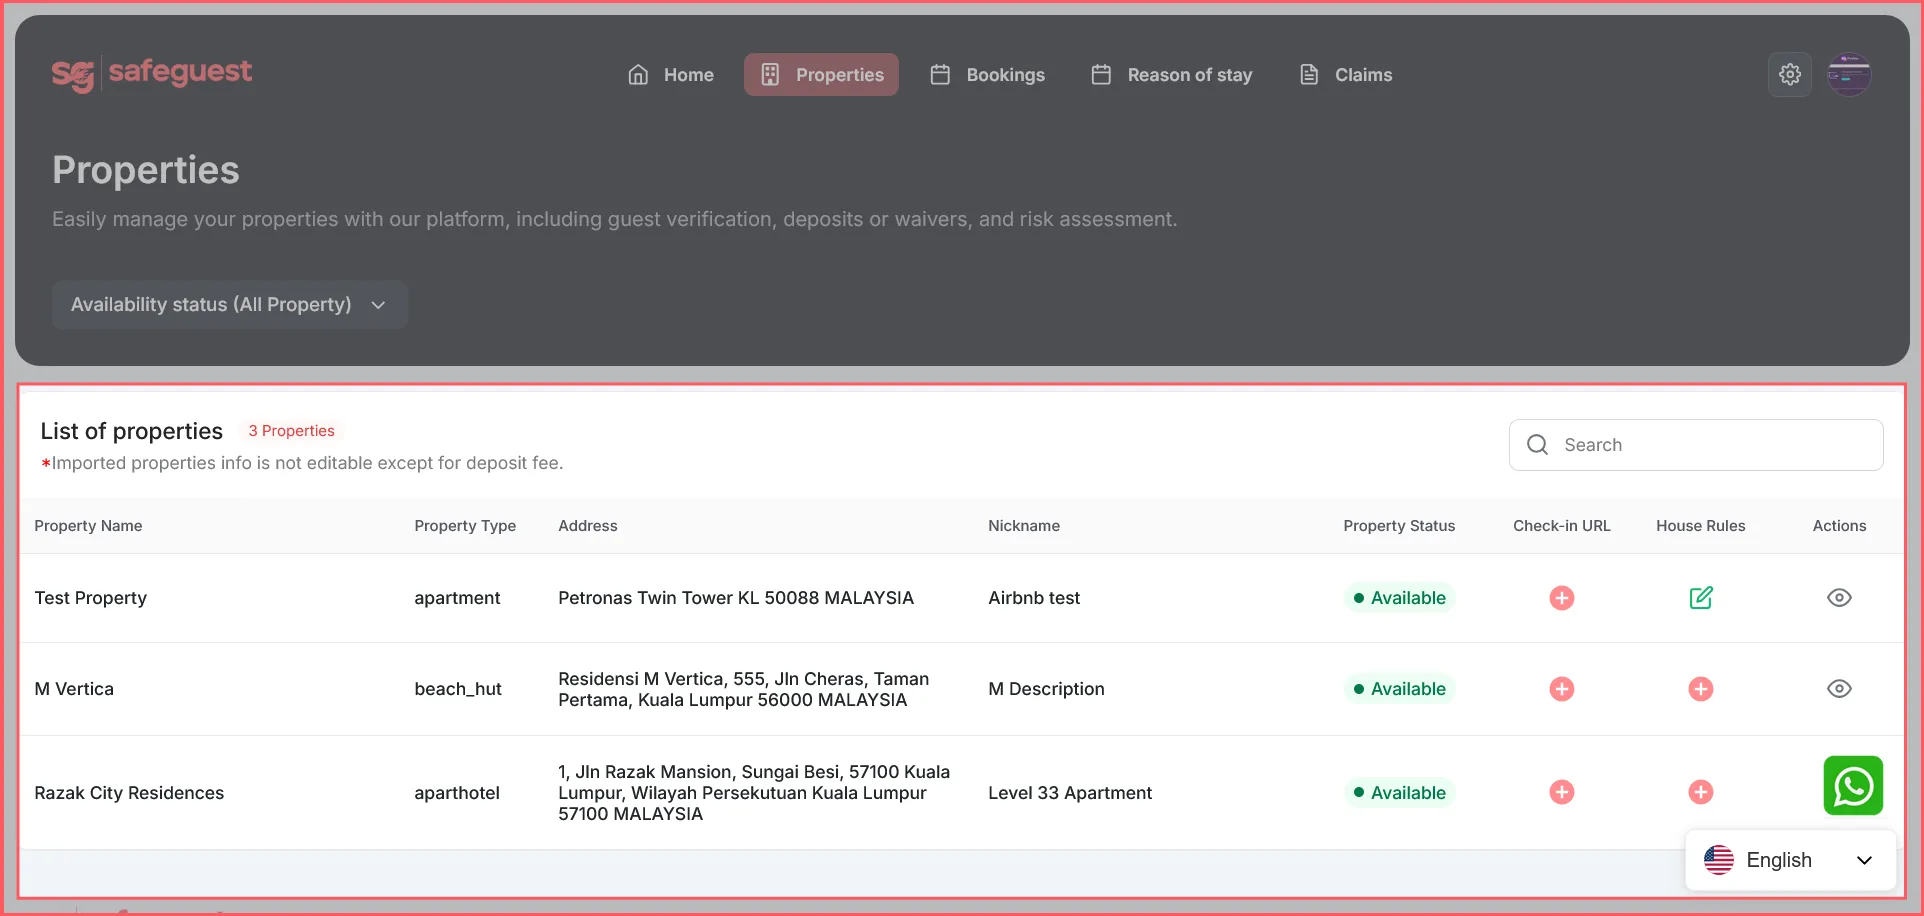
Step 16: Verify your bookings
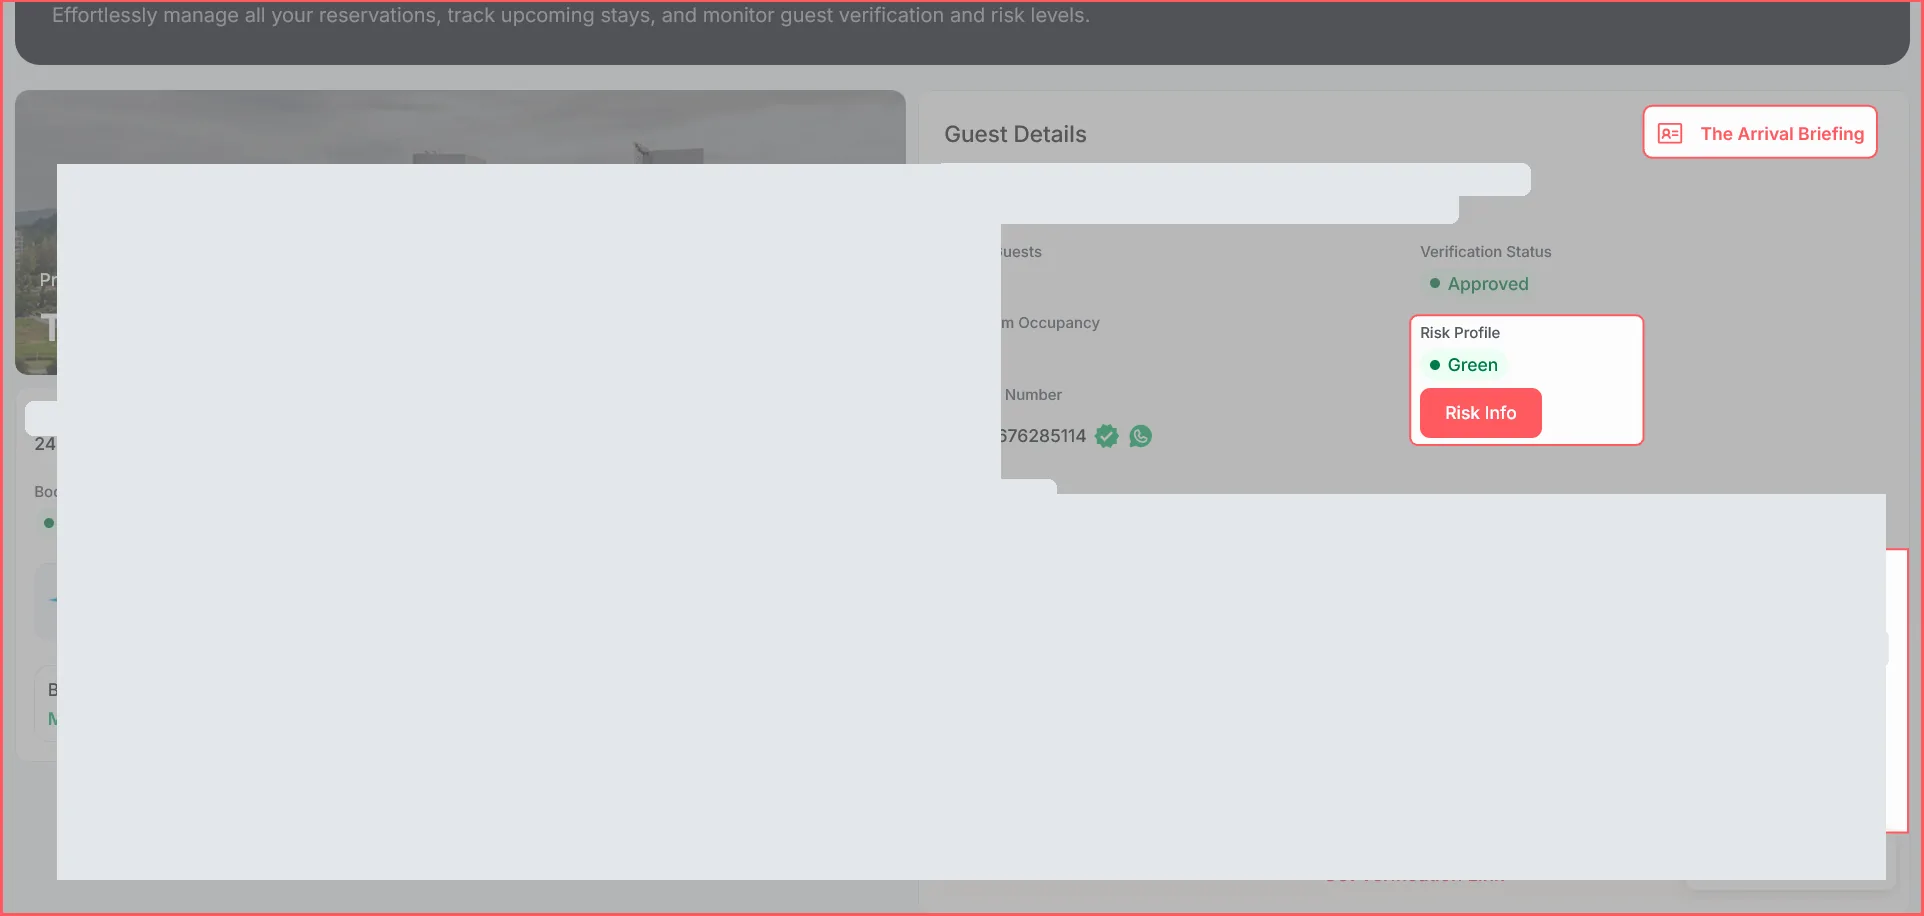
- Open Bookings and review upcoming reservations.
- Select the eye icon beside a booking to open its details.
- After the guest completes SafeGuest verification, review the Arrival Briefing, Risk Status, and AI-generated summary.
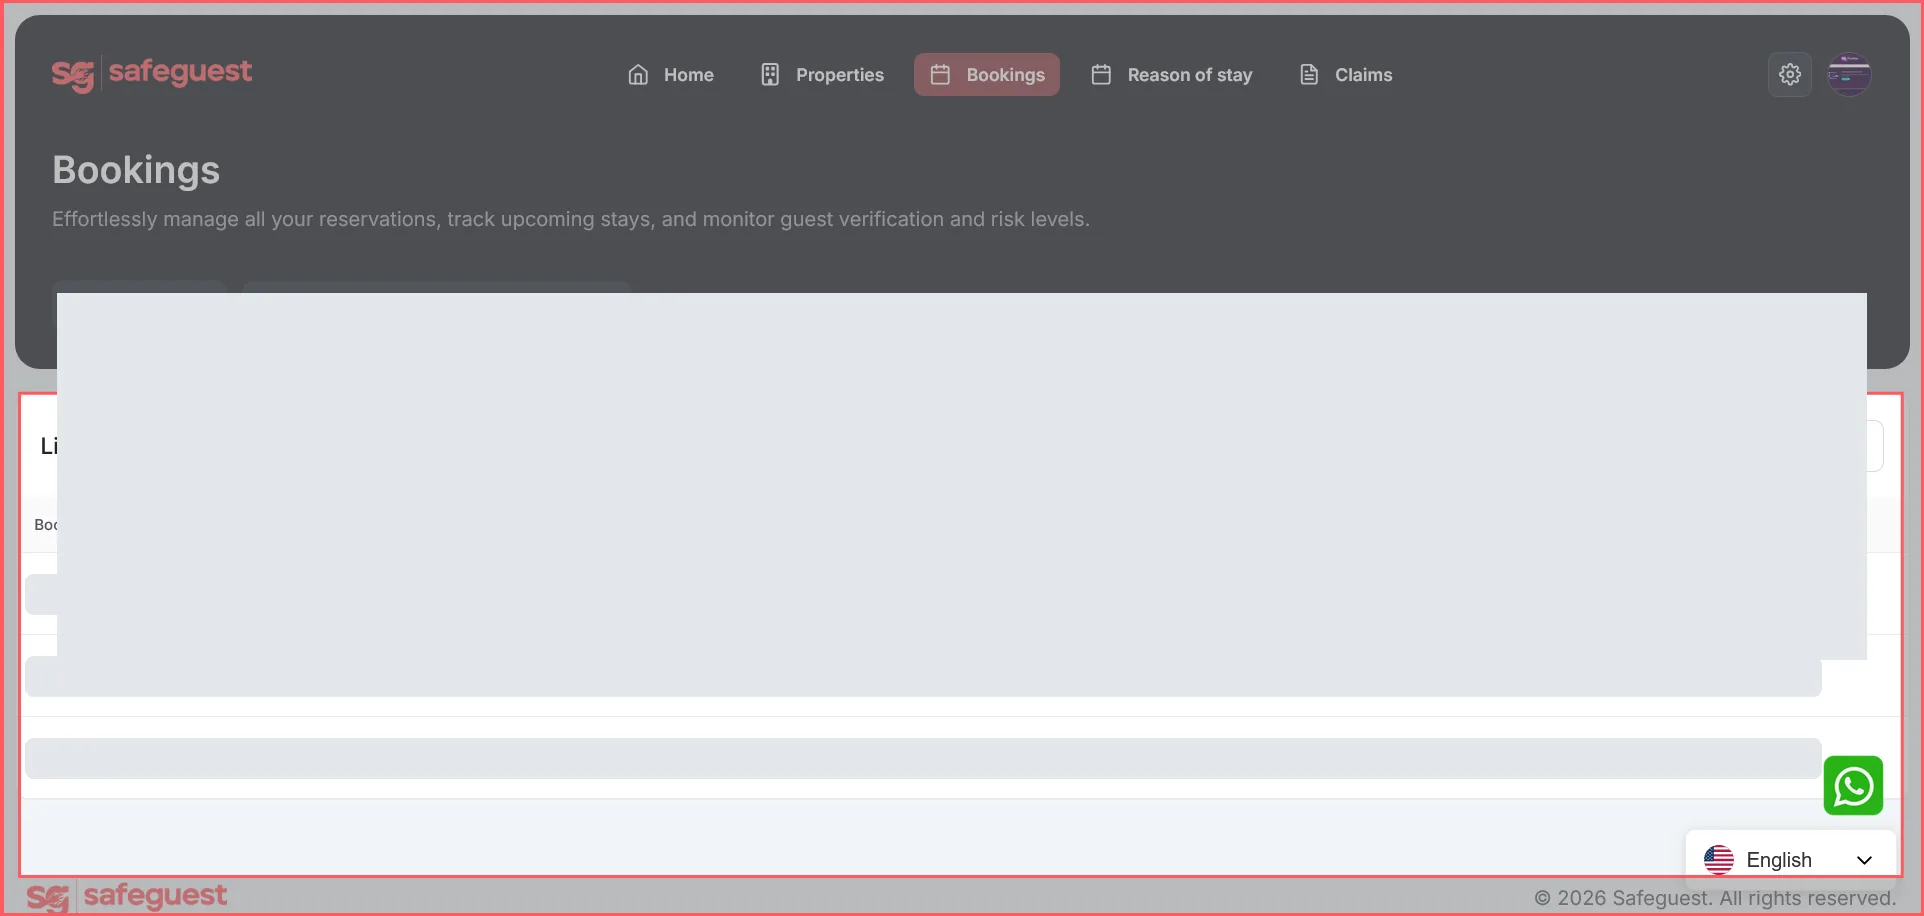
Step 17: Set up automated messages in Hostaway
This step is only needed if you selected Send via Hostaway automation in Step 14.
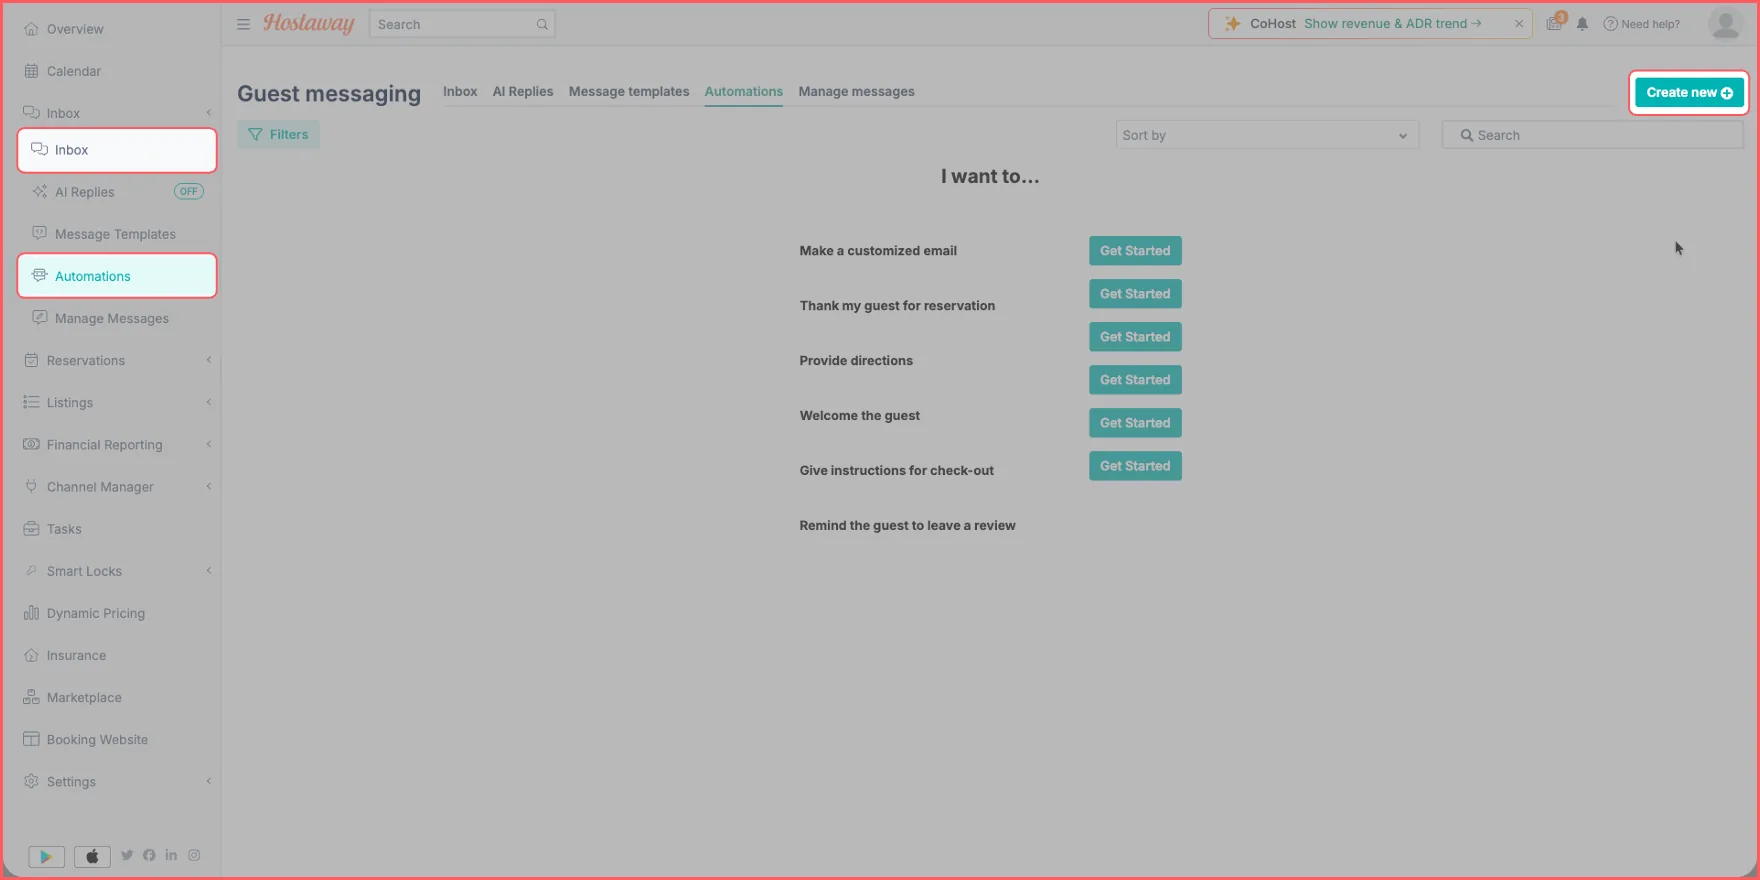
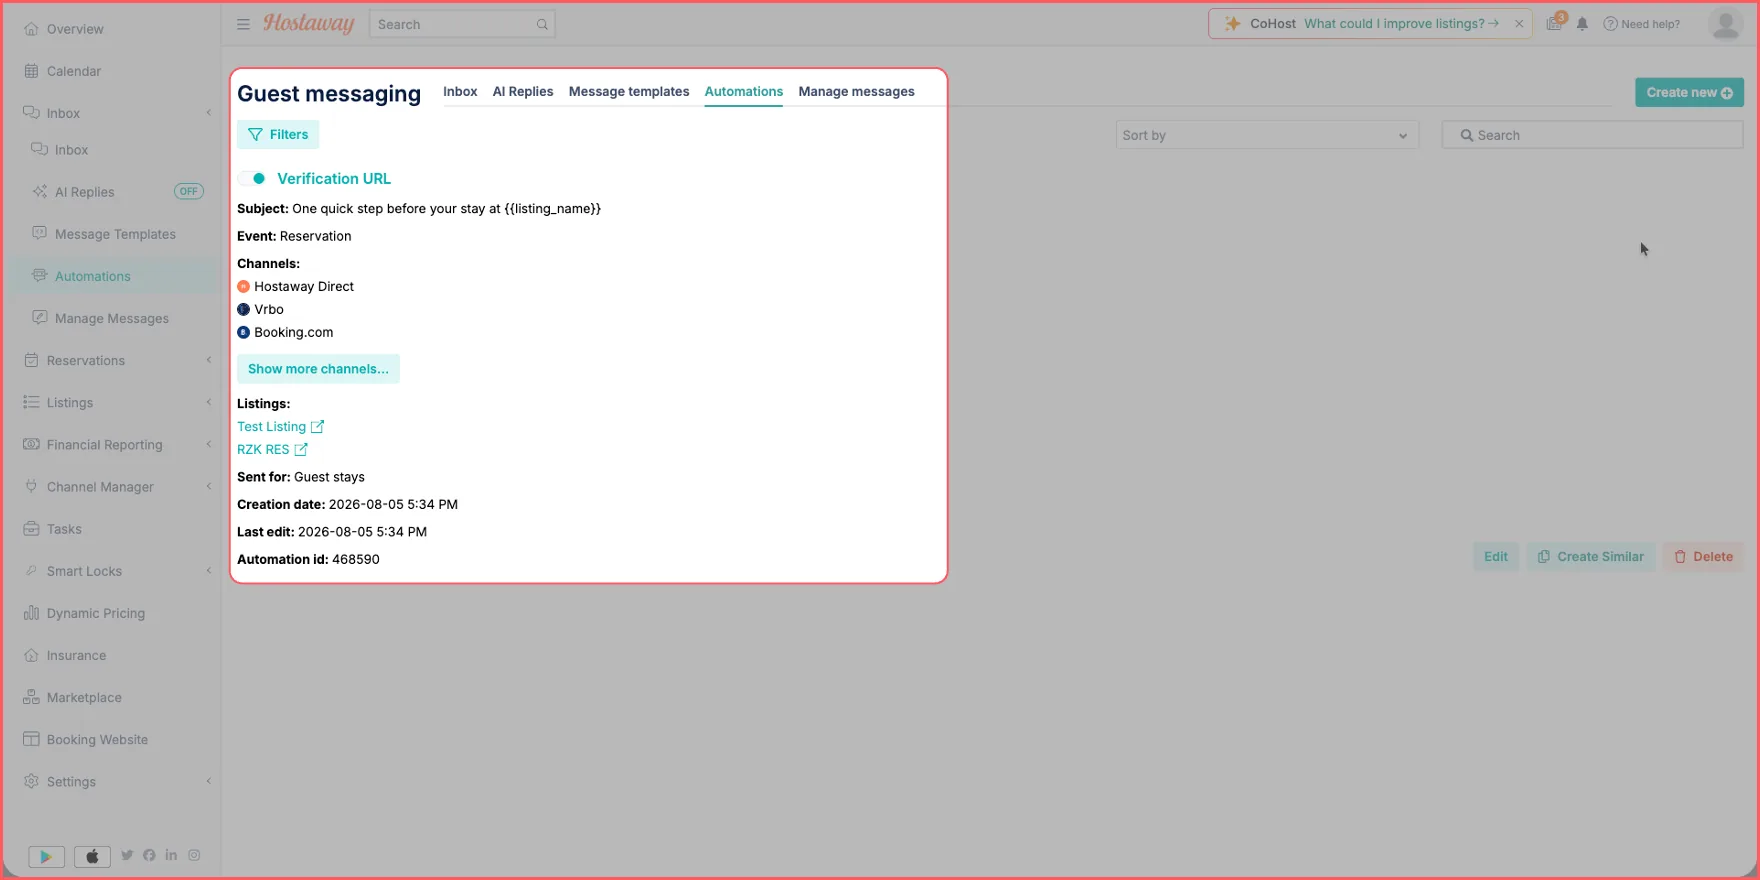
- In Hostaway, select Inbox, then Automations.
- Select Create to start a new template.
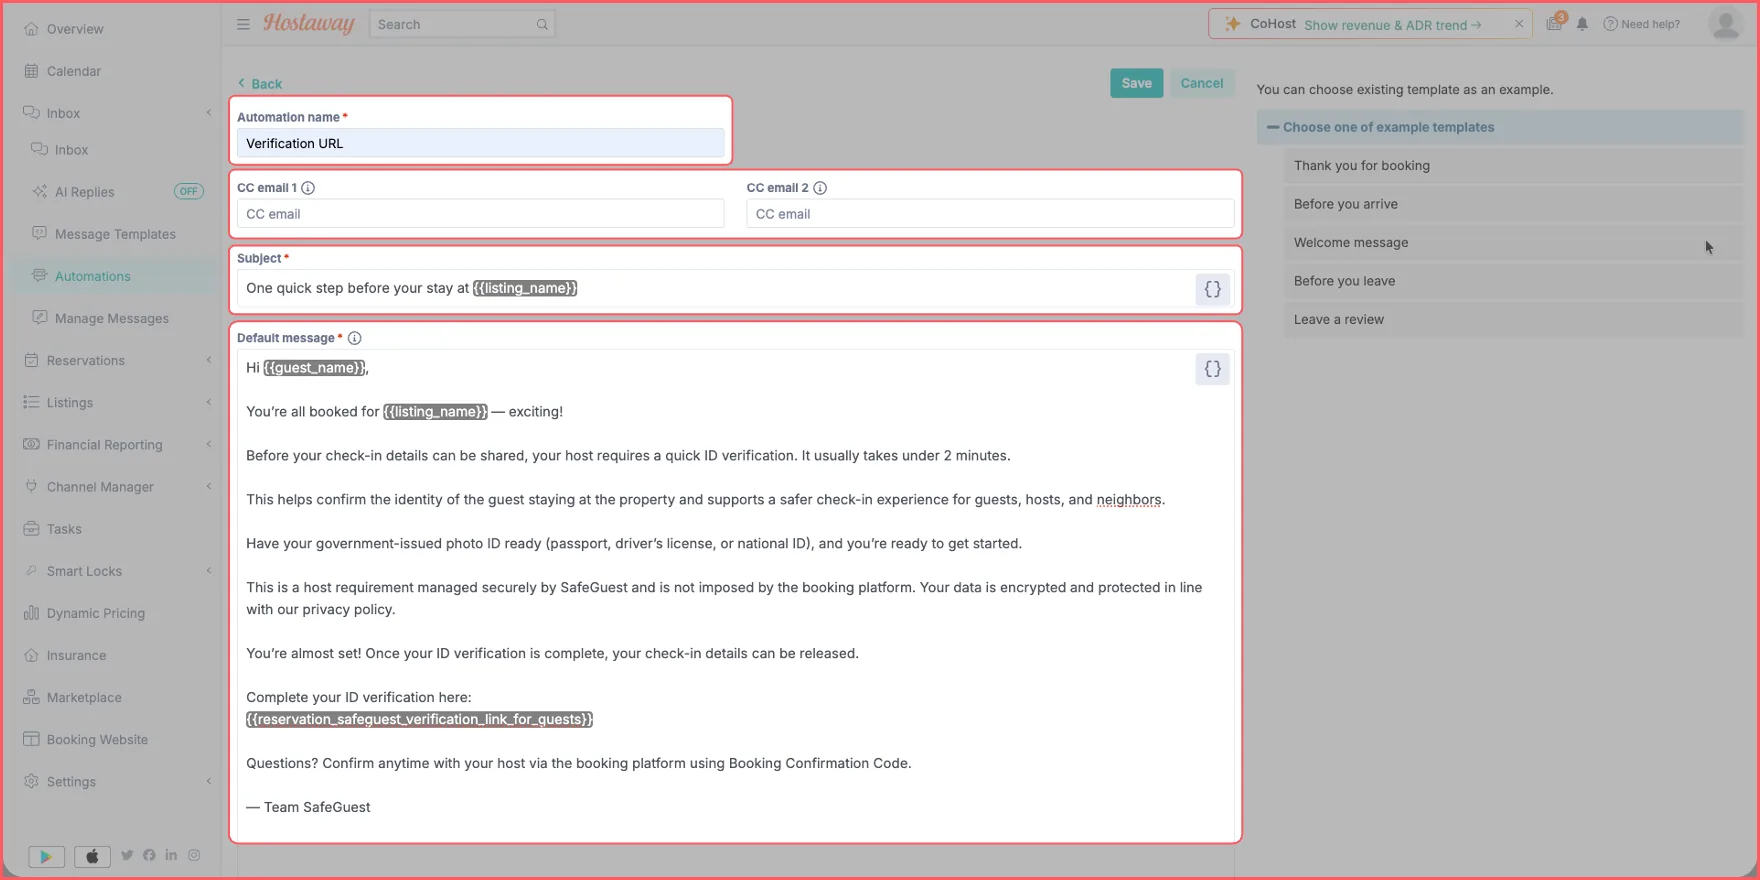
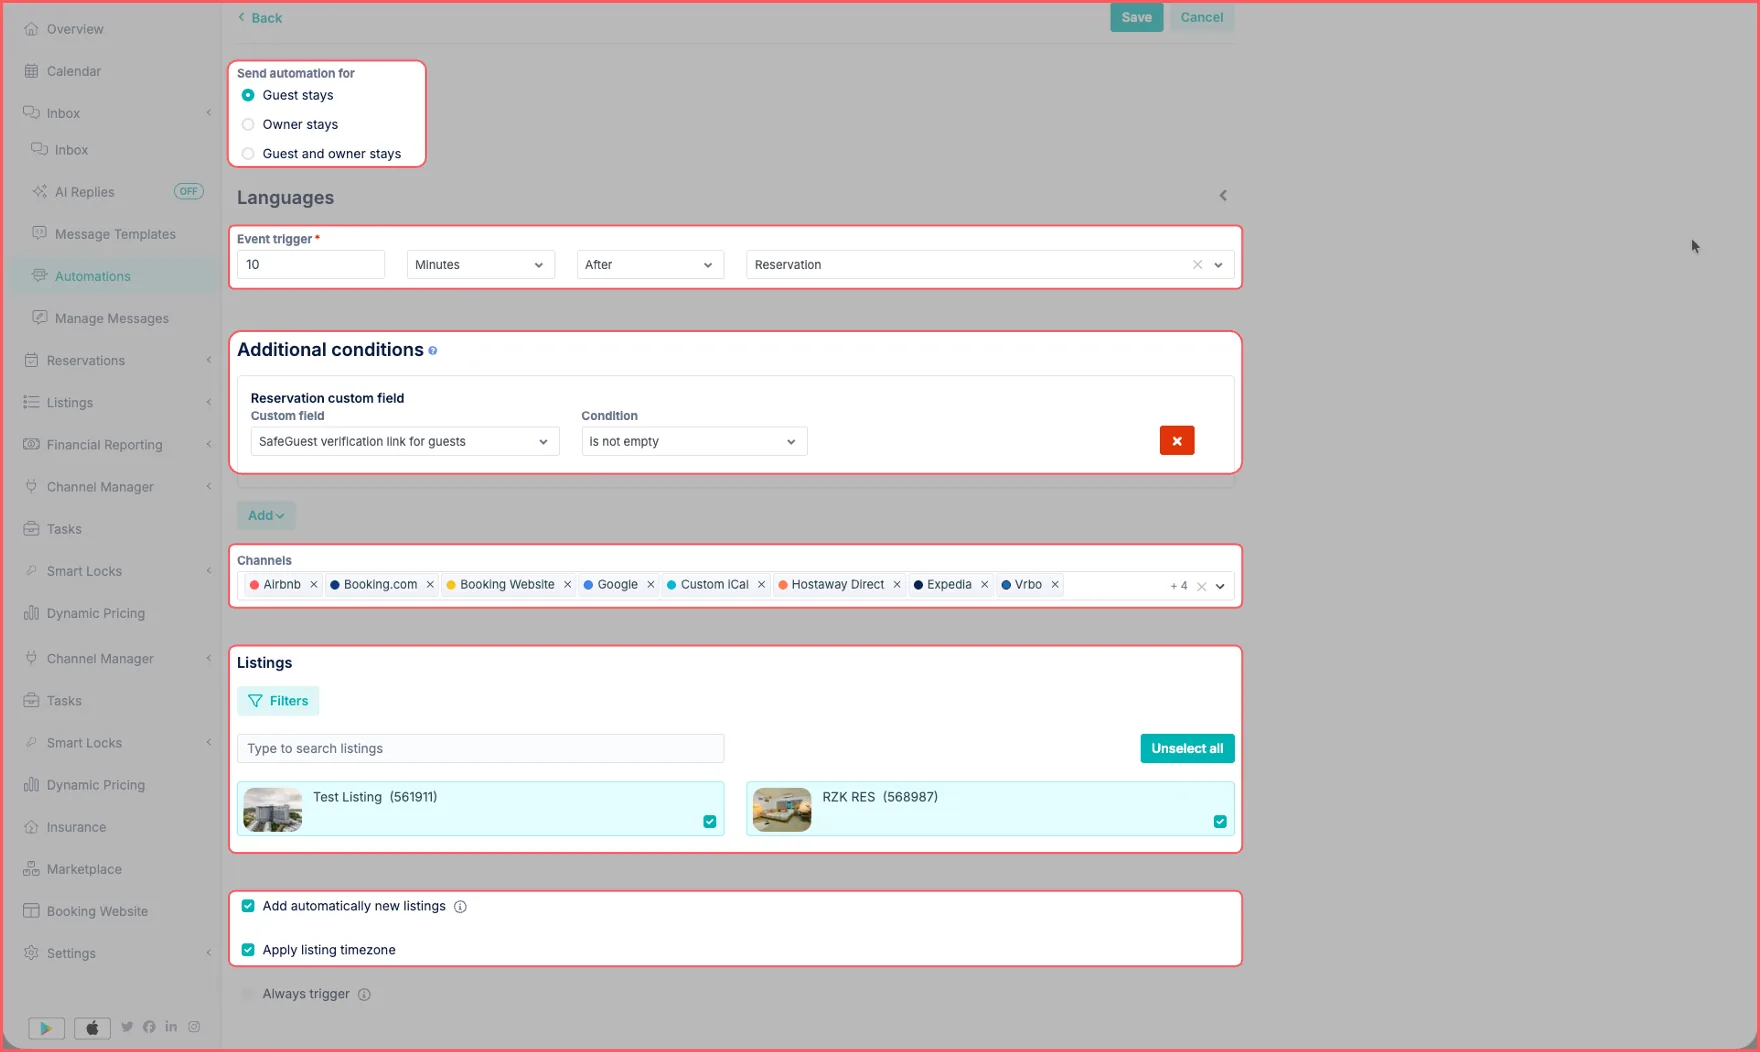
- Name the automation, add the subject and message, and select Guest stays.
- Set the event trigger — for example, 10 minutes after a reservation is created.
- Add a Reservation custom field condition. Choose Safeguest verification link for guests and is not empty.
- Select the relevant channels and listings. Enable Add automatically new listings and Apply listing time.
- Select Save. The template will appear on the Automations page.
Ready to connect Hostaway and SafeGuest?
Follow the steps above or use the interactive walkthrough to connect your account, configure verification, and review your first synchronised bookings.
Know before they knock.
Safeguest Prevent verifica a cada huésped antes de la llegada. Gratis para anfitriones.
Sigue leyendo